27 March 2024
Claire Bowditch
Introduction
xAssets Network Discovery is able to discover Apple Mac, Linux, Unix, AIX and any other UX flavor computers through the SSH protocol.
This is achieved by using SSH to connect to each Apple Mac device and extract asset data.
SSH must be enabled on each Apple Mac device to allow the discovery process to work.
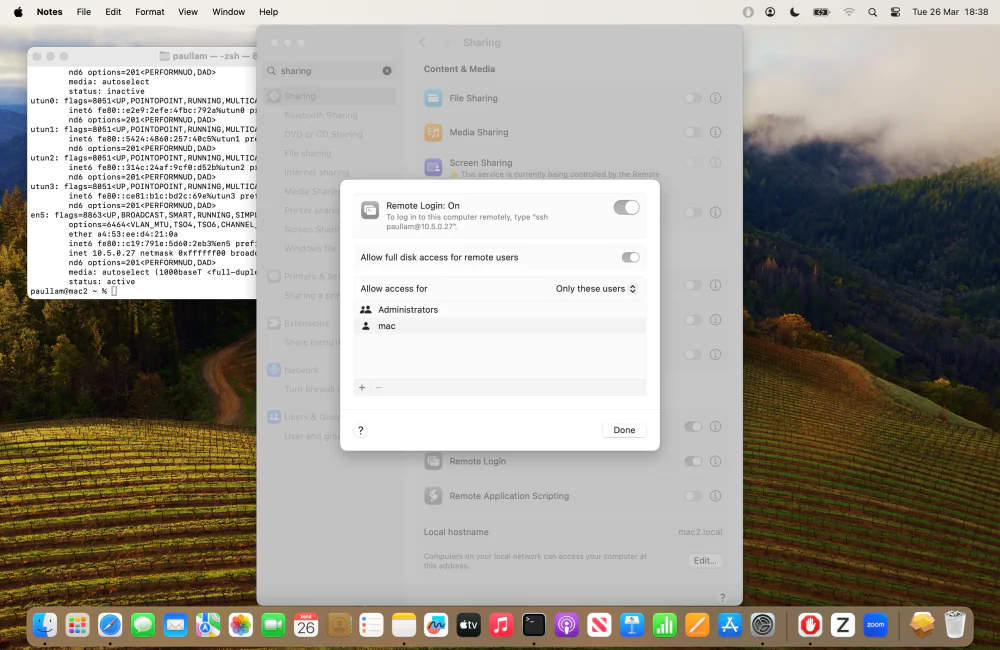
Enable SSH
To enable SSH on an Apple Mac, follow these steps:
- Click the Apple Icon at the top left of the screen
- Click on System Settings
- Click on Sharing (or search for "sharing")
- Tick the Remote Login checkbox so it is "On"
- Tick the Allow full disk access for remote users checkbox
- Add the necessary users to the "Allow access for" list of permitted users
- Click Done
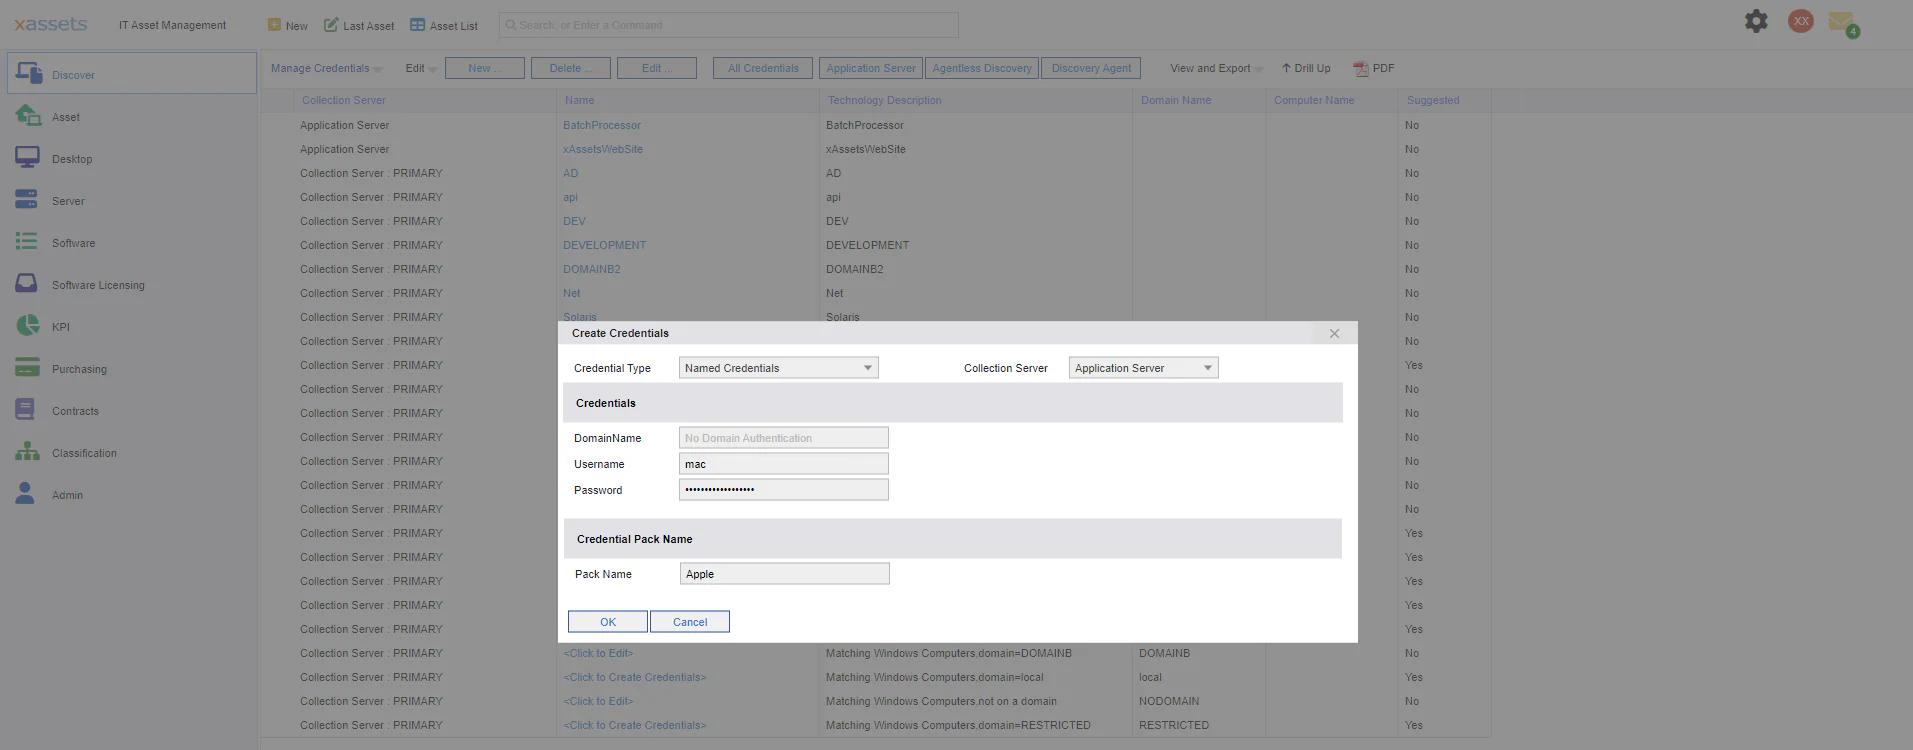
Create a Credential Pack for SSH
Apple Mac discovery requires a Credential Pack for SSH.
Log into xAssets and click Discover > Prepare > Manage Credentials
Click "New" at the top of the screen
Name the pack "Apple", complete the credentials, and then click OK to save.
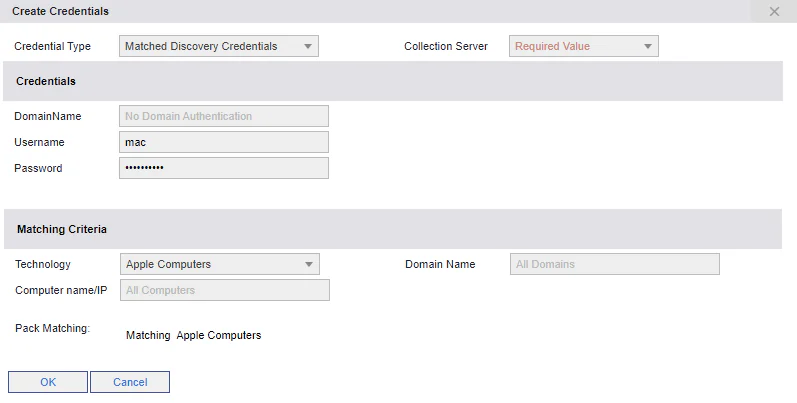
It is also possible to create a "matching" credential pack. When these packs exist, discovery will inspect the ping footprint of the asset being pinged,
and use the appropriate credential pack based on the ping footprint. To save a matching credential pack, use the same instructions as above,
but choose "Matching Pack" from the "Credential Type"" dropdown.
Matching credential packs do not need a "name", you simply specify the technology and if needed the Computer Name or IP range which
the matching pack will match against.
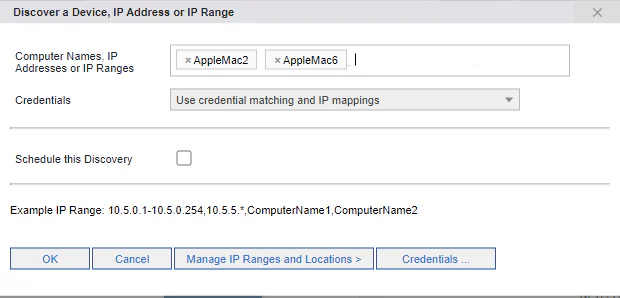
Run Discovery
Click "Discover" > "Discover" > "Discover a Computer or IP Range". Enter the IP address of the Apple Mac computer,
choose the credential pack name just entered, and click "OK".
If a "Matching Credential Pack" was created, the discovery process will use the matching pack without needing to specify the credential pack.
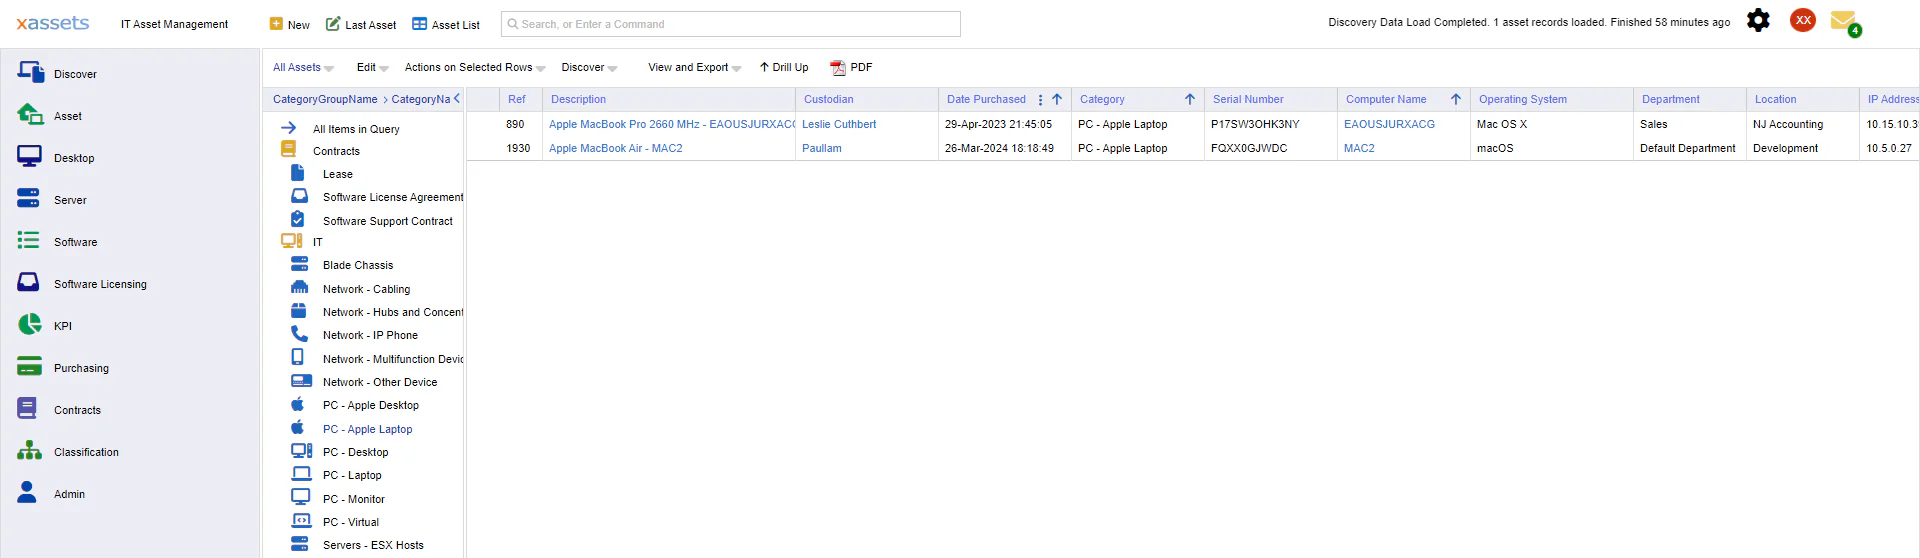
Information Collected by xAssets Network Discovery
Discovery of Apple computers typically takes 10-20 seconds per device, compared to 2-4 seconds for windows.
However, in the default configuration, up to 25 devices can be discovered in parallel per subnet, with up to 3 subnets running in parallel,
so the overall discovery time is not significantly impacted by the number of devices chosen.
There is also a short time window to transfer the
data back to the application server and load it into the Asset Management Database.
When completed, the assets will show under the appropriate category in the Asset Register:
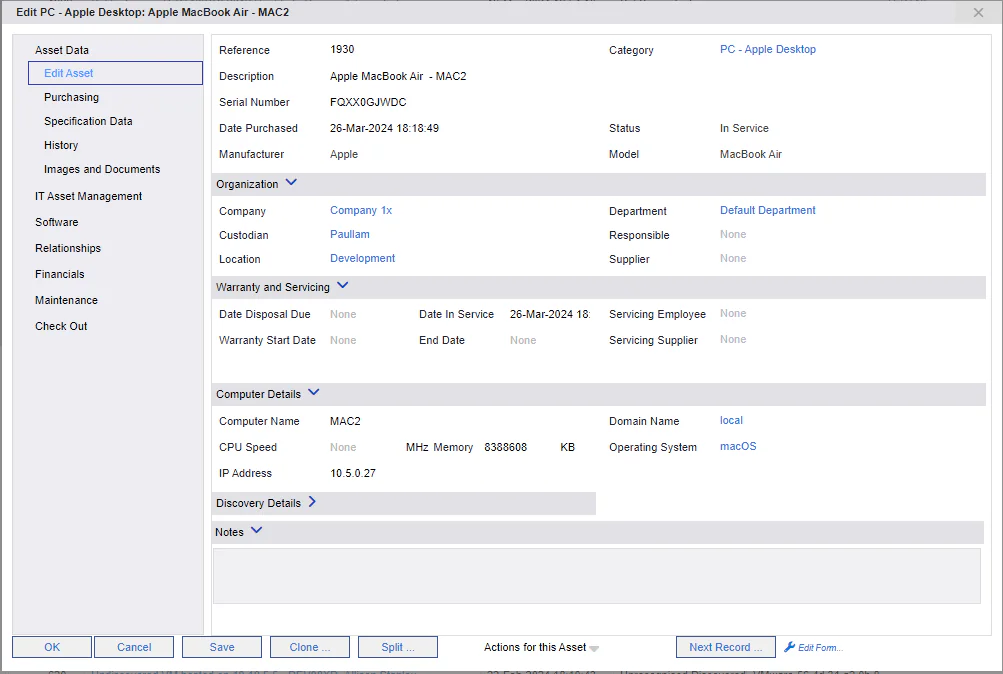
Click the asset description to drill down into the asset
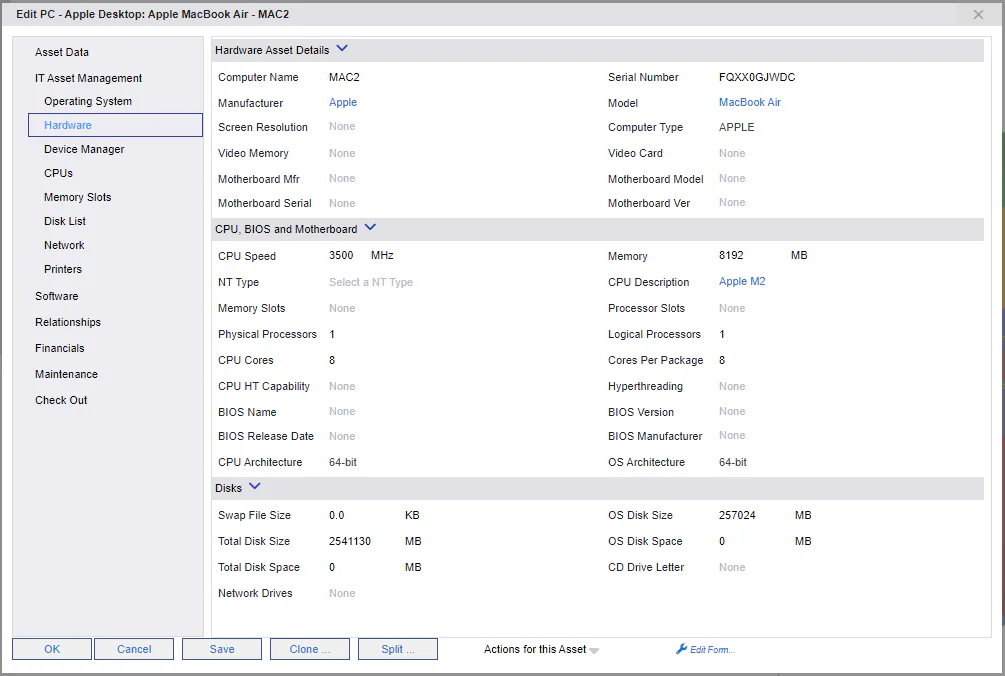
Use the tabs on the left to view more detailed information on hardware and software:
Enable SSH with a terminal command
This is an alternative to the "Enable SSH" section above, and in practical terms it is more effort than using the dialogs above, but discovery was required
on a larger number of Apple Macs, this code could be scripted, although there may be some difficulty around editing the "Allow access for" list of permitted users
which is stored in the "sshd_config" file.
Open a terminal window (Command (⌘) + Space, then type "Terminal" and press Enter)
Enable SSH
-
Open Terminal (using
Cmd + Space
and type "Terminal").
-
To enable SSH, use the following command:
sudo systemsetup -setremotelogin on
- Enter the administrator password when prompted
Grant Full Disk Access
Add Users for SSH Login
-
Add SSH users by modifying the SSH configuration file (
sshd_config
).
-
Open the SSH configuration file using a text editor like nano or vim. For example:
sudo nano /etc/ssh/sshd_config
-
Look for the line
# AllowUsers
(remove the
#
at the beginning of the line if it's commented out) and add the usernames separated by spaces. For example:
- Save the changes and exit the text editor.
Restart SSH
-
After making changes to the SSH configuration file, you need to restart the SSH service for the changes to take effect. Use the following command:
                            sudo launchctl stop com.openssh.sshd
                            sudo launchctl start com.openssh.sshd
This should have enabled SSH on the Mac and users specified in the
AllowUsers
directive will be able to log in via SSH. Full disk access should have been granted to SSH sessions.
If you did want to put all this into a script to run on multiple computers, this is a draft script which you can edit.
Take care to ensure that the sed edits are working as intended
                    # Enable SSH
                    sudo systemsetup -setremotelogin on

                    # Grant Full Disk Access
                    sudo tccutil --insert /usr/sbin/sshd
                    sudo tccutil --insert /usr/sbin/sshd-keygen-wrapper

                    # Add Users for SSH Login
                    sudo cp /etc/ssh/sshd_config /etc/ssh/sshd_config_backup  # Backup the original configuration file
                    sudo sed -i '' '/AllowUsers/s/.*/AllowUsers user1 user2/' /etc/ssh/sshd_config  # Replace user1 and user2 with desired usernames

                    # Restart SSH
                    sudo launchctl stop com.openssh.sshd
                    sudo launchctl start com.openssh.sshd

                    echo "SSH configuration completed"