Editing Rules via Calculate → Configure
The Configure button on the Calculate Software Licensing dialog opens the rules editor. This page walks through the dialog and the workflow for making and saving changes safely.
Opening the Editor
- Navigate to Licensing → Calculate Licensing Position.
- The Calculate Software Licensing dialog opens.
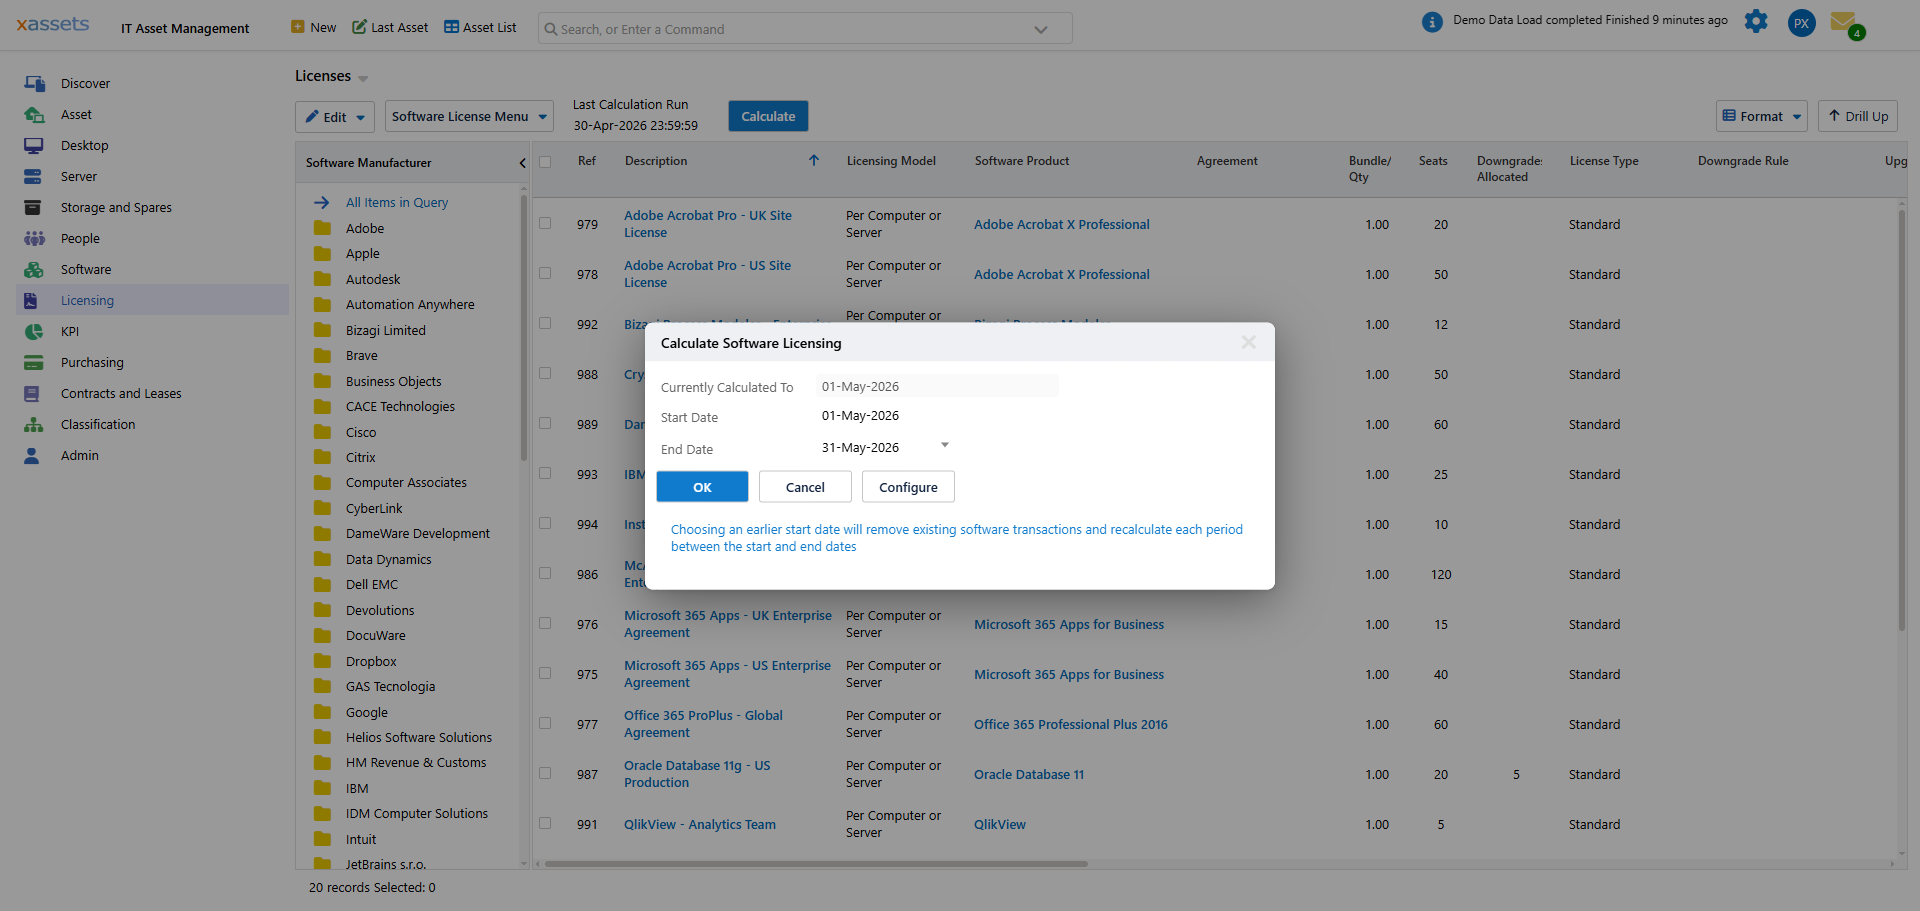
- Click the Configure button.
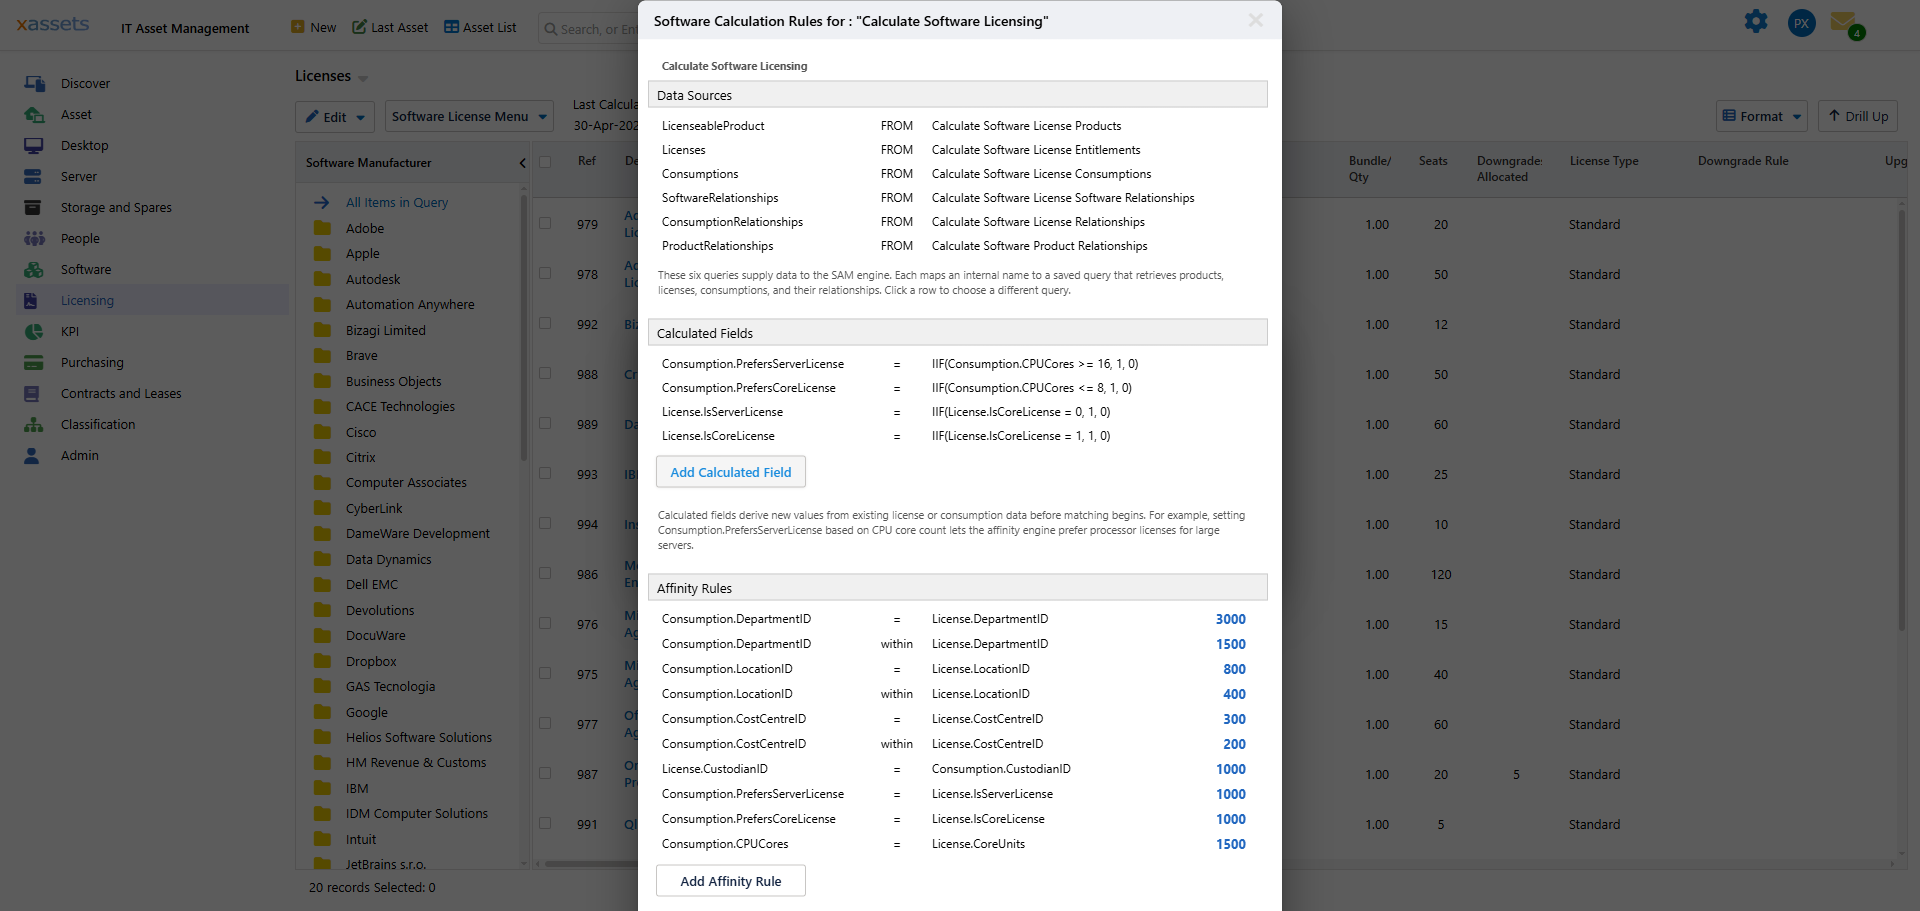
The editor opens showing the four rule blocks — Data Sources, Calculated Fields, Requirements, Affinity Rules.
If you are not an administrator, you will see "Only administrators can configure software calculation rules" — see Customizing the Calculation: Overview for permissions.
What You Can Do in Each Block
| Block | Add | Edit | Delete |
|---|---|---|---|
| Data Sources | Yes (advanced) | Yes (advanced) | Not recommended |
| Calculated Fields | Yes — click Add Calculated Field | Yes — click any row | Yes — clear the row |
| Requirements | Yes — write directly into the block | Yes | Yes |
| Affinity Rules | Yes — write directly into the block | Yes | Yes |
Most customizations involve adding to Calculated Fields and adding to Affinity or Requirements.
Editing a Calculated Field
Click an existing field row to edit it in place. Each row has:
- Subject —
ConsumptionorLicense(which side of the comparison the value lives on) - Field — the name to give the calculated value (e.g.,
PrefersServerLicense) - Expression — the formula
The expression syntax is a small subset of VB-style expressions: IIF(condition, valueIfTrue, valueIfFalse), basic arithmetic, comparison operators, and ISNULL(value, replacement).
Use integer flags. The expression evaluator does not quote string literals reliably, so
IIF(Manufacturer = "Adobe", 1, 0)will misbehave silently. Use the numeric ID —IIF(ManufacturerID = 42, 1, 0)— or, better, set a numeric flag column on the catalog entry and reference that.
Editing an Affinity Rule
Affinity rules are written directly as text:
Affinity Consumption.DepartmentID = License.DepartmentID, 3000
The shape is Affinity {comparison}, {weight}. Comparison operators are = (exact) and within (hierarchy match). Weight is an integer.
To change a weight, edit the number. To add a new affinity, add a new line with the same shape.
Editing a Requirement
Same shape, no weight:
Requirement Consumption.LocationID within License.LocationID
A failing requirement excludes the license entirely. Be conservative — adding requirements is the easiest way to inadvertently make every license ineligible for everything.
Saving
Click OK to save. Click Cancel to discard. Saving updates the underlying transformation; the next calculation will use the new rules.
There is no version history in the editor itself. If you want to be able to roll back, copy the current rules text into a backup file before editing — see Testing Rule Changes Safely.
After Saving
The new rules take effect on the next calculation. Existing transactions are not modified. To apply the new rules to historical periods, you must recalculate from a date that covers those periods (which deletes and reposts the affected transactions — see Concepts: Temporal Accounting).
The recommended pattern:
- Edit the rules.
- Recalculate the current open period only.
- Verify the results on a small, representative product.
- Once confirmed, the rules will continue to apply going forward.
Only recalculate historical periods if you are deliberately rebuilding history for an audit or correction.
Quick Reference: Block Syntax
| Block | Syntax |
|---|---|
| Data Source | <name> FROM "<query name>" |
| Calculated Field | Set Consumption.<Field> = <expression> or Set License.<Field> = <expression> |
| Requirement | Requirement <left> = <right> or Requirement <left> within <right> |
| Affinity | Affinity <left> = <right>, <weight> or Affinity <left> within <right>, <weight> |
Related Reading
- How Rules Are Evaluated
- Default Rules — the full set of shipped rules
- Per-Product Scoping — the most common customization
- Testing Rule Changes Safely