Preparation
This page describes the xAssets settings and authentication scripts that control the SSO login flow. Understanding these components is helpful when troubleshooting SSO issues or configuring advanced scenarios.
Prerequisites
- Configuration-level access to xAssets
- Familiarity with the SSO Introduction and Setup
Key Settings
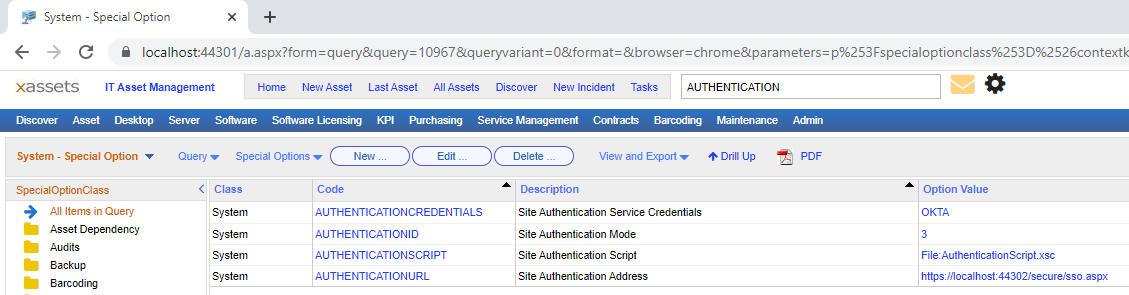
SSO requires two settings to be configured, both accessible from Admin > Settings:
| Setting | Purpose |
|---|---|
| AUTHENTICATIONID | Selects the SSO provider from a dropdown. Values of 3 or higher enable SSO; lower values disable it. Each provider has a corresponding numeric value. |
| AUTHENTICATIONSCRIPT | Points to the authentication script (stored as a transformation). This script is automatically saved to a secure area when the AUTHENTICATIONID is changed. In most cases, you do not need to modify this setting directly. |
Authentication Scripts
The authentication scripts handle the communication protocol with the identity provider. They support:
- OAuth2 -- used by Azure AD and other modern providers
- OIDC (OpenID Connect) -- used by OKTA, OneLogin, and Duo
- SAML 2.0 -- used by legacy SAML providers
- PKCE (Proof Key for Code Exchange) -- used by OKTA and OneLogin for enhanced security without requiring a client secret
The scripts also support advanced scenarios such as:
- User filtering based on attributes received from the identity provider
- IP-based provider selection, routing users to different identity providers based on their network location (see Using Different Providers)
- Custom claim mapping for non-standard identity providers
Important: Authentication scripts are managed by xAssets and cannot be edited by customers. The override model that applies to normal transformations does not apply to authentication scripts. For custom SSO requirements beyond what the standard scripts support, contact xAssets consulting.
How the Login Flow Works
When SSO is enabled, the login flow proceeds as follows:
- The user navigates to the xAssets URL
- xAssets checks for a valid authentication token. If none is found, it records the user's IP address and database, then redirects to the identity provider's login page.
- The user authenticates with the identity provider (entering credentials, completing MFA, etc.)
- The identity provider redirects back to xAssets with an authorisation code or token
- xAssets validates the response (checking IP address, database, and token integrity) and creates or locates the corresponding xAssets user account
- The user is logged in and the main xAssets screen is displayed
If any validation step fails, an error is displayed. See Troubleshooting for a list of error messages and their causes.
Related Articles
- SSO Introduction and Setup — enabling SSO and creating the SSOADMIN account
- Troubleshooting — diagnosing login failures
- Using Different Providers — IP-based provider selection