SSO with Azure
This page provides step-by-step instructions for configuring Azure Active Directory (now Microsoft Entra ID) as the single sign-on provider for xAssets. Azure AD is the most commonly used SSO provider with xAssets.
Prerequisites
- An Azure Active Directory tenant
- Azure Portal administrator access to create application registrations
- Configuration-level access to xAssets
- The SSOADMIN account created and in the Admins group (see SSO Introduction and Setup)
Step 1: Create an Application Registration in Azure
- Sign in to the Azure Portal
- Navigate to Azure Active Directory > App Registrations > New Registration
- Name the application (e.g., "xAssets SSO")
- Set the supported account type as appropriate for your organisation
- Click Register
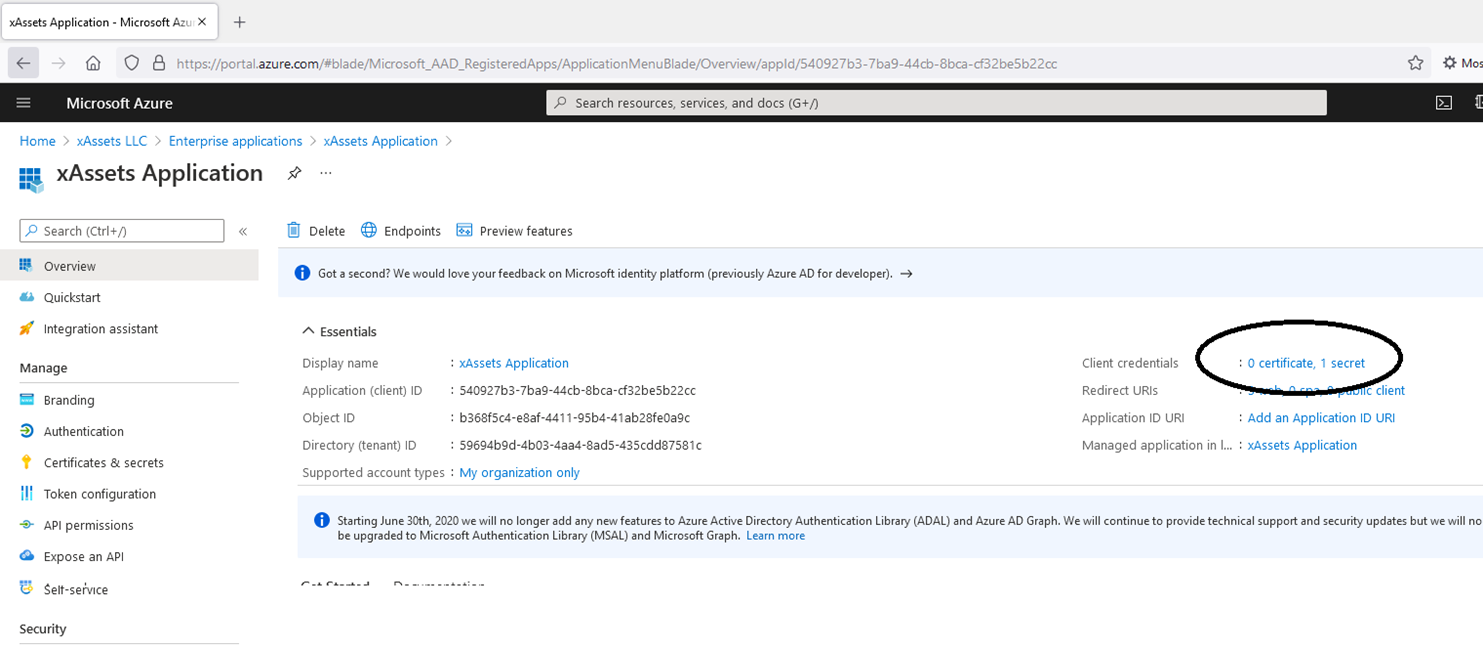
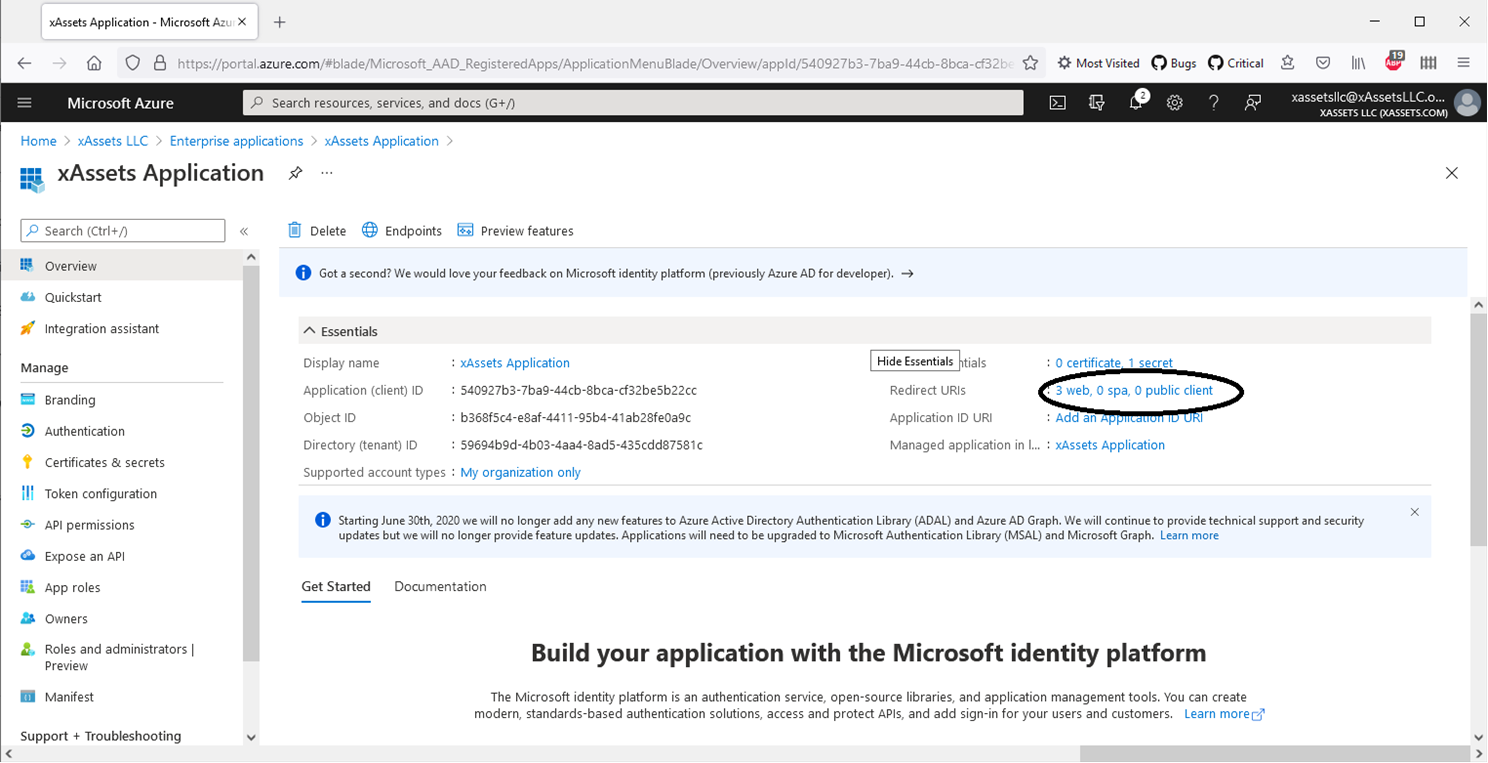
Note the Key Values
From the application overview page, copy the following values -- you will need them for the xAssets credential pack:
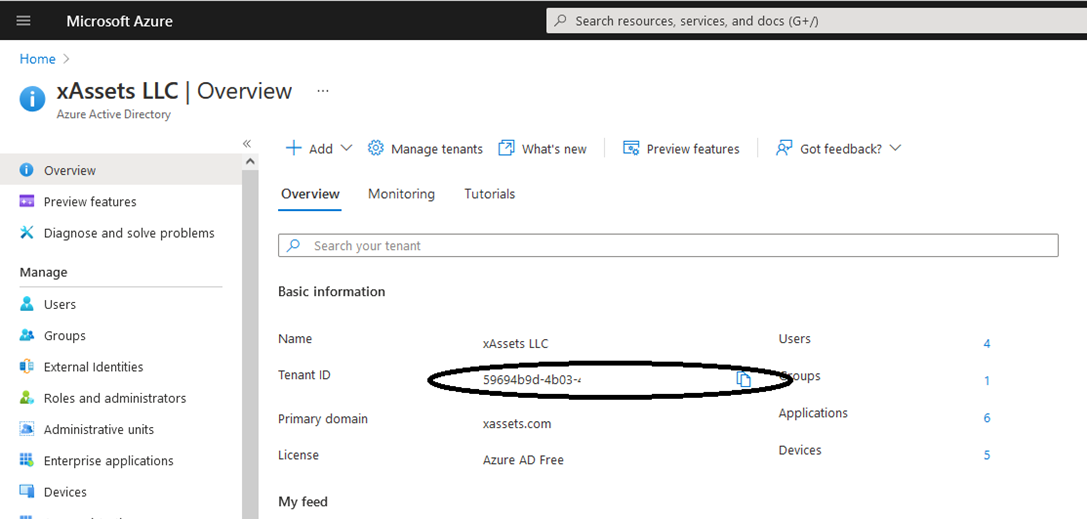
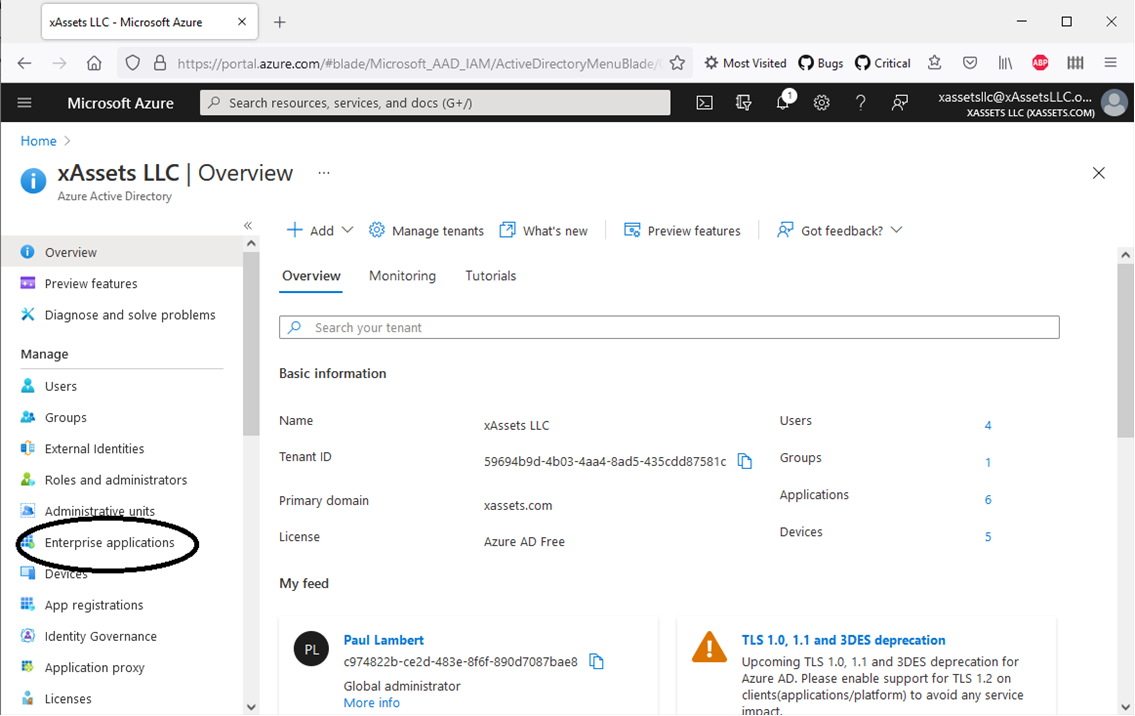
- Directory (Tenant) ID -- found on the Azure AD overview page
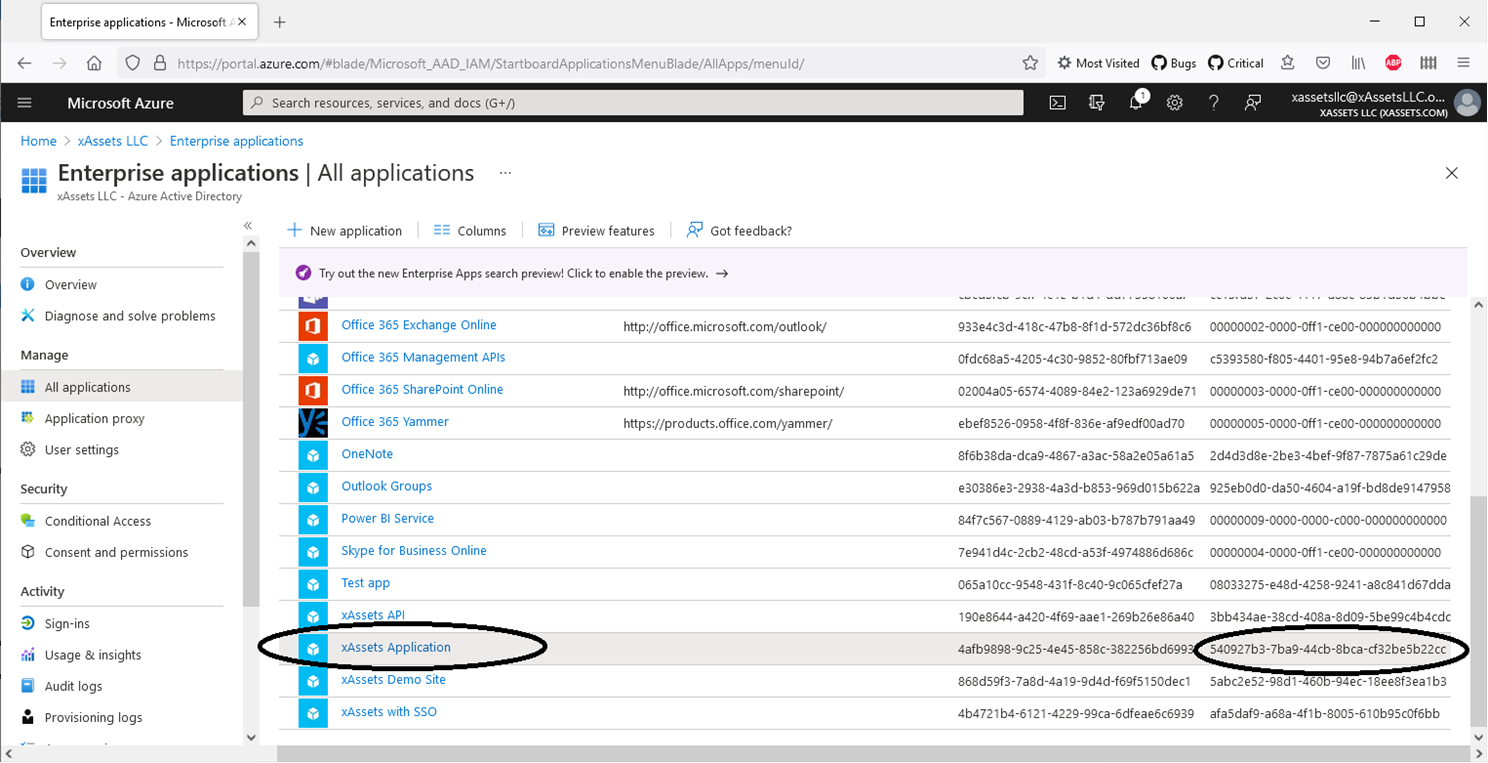
- Application (Client) ID -- found on the application overview page
Step 2: Configure the Application
Open the application registration and configure the following:
Create a Client Secret
- Navigate to Certificates & Secrets > New Client Secret
- Add a description and set an expiration period
- Click Add
- Copy the Value immediately -- it is only displayed once. This is the password for the credential pack.
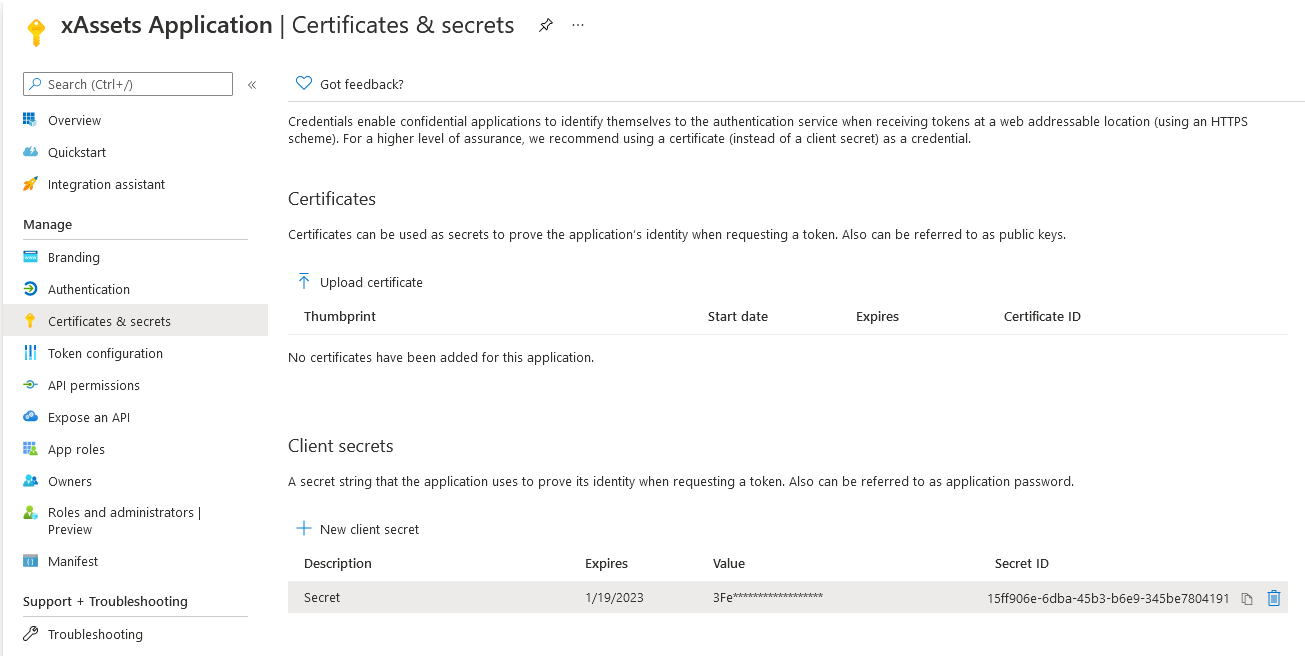
Warning: Client secrets have expiration dates. Set a calendar reminder to renew the secret before it expires, or SSO will stop working. When renewing, create a new secret, update the xAssets credential pack, then delete the old secret.
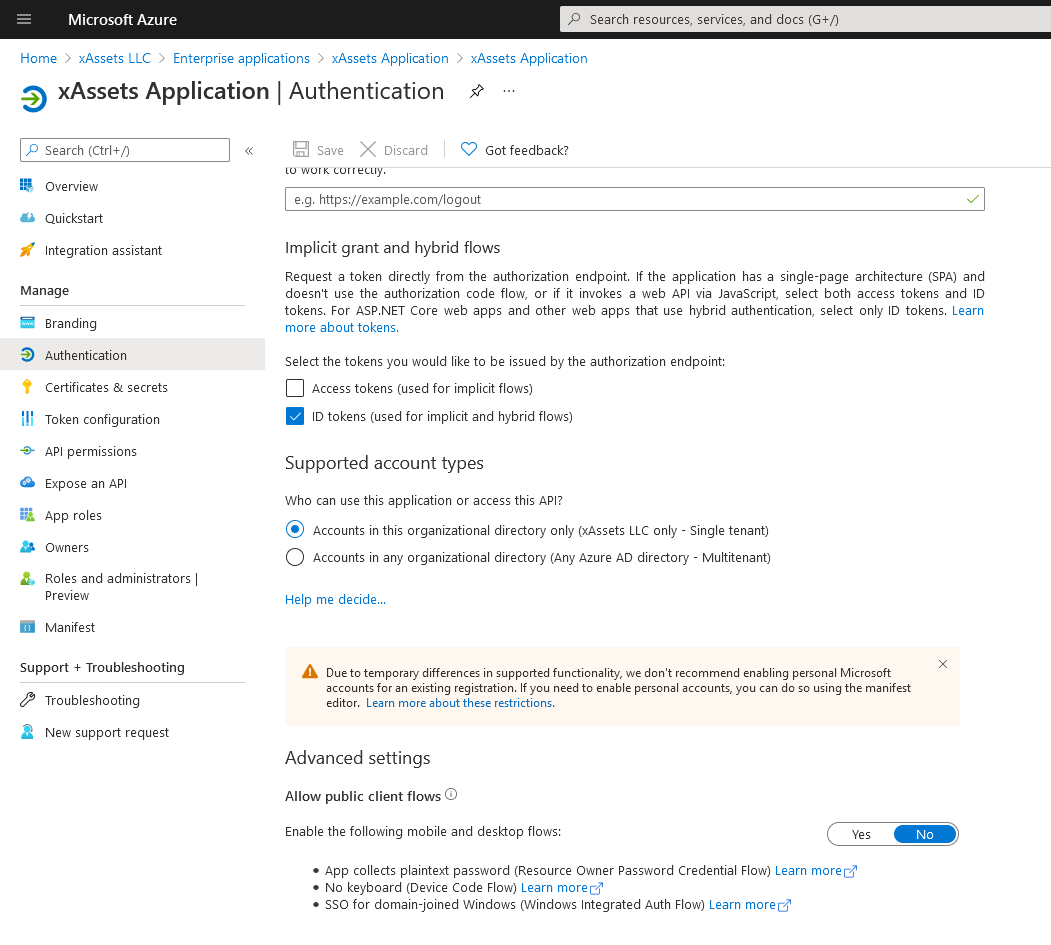
Configure Authentication
- Navigate to the Authentication page
- Tick ID tokens under "Implicit grant and hybrid flows"
Grant API Permissions
- Navigate to the API Permissions page
- Ensure the following permissions are granted: Microsoft Graph > OpenID and User.Read
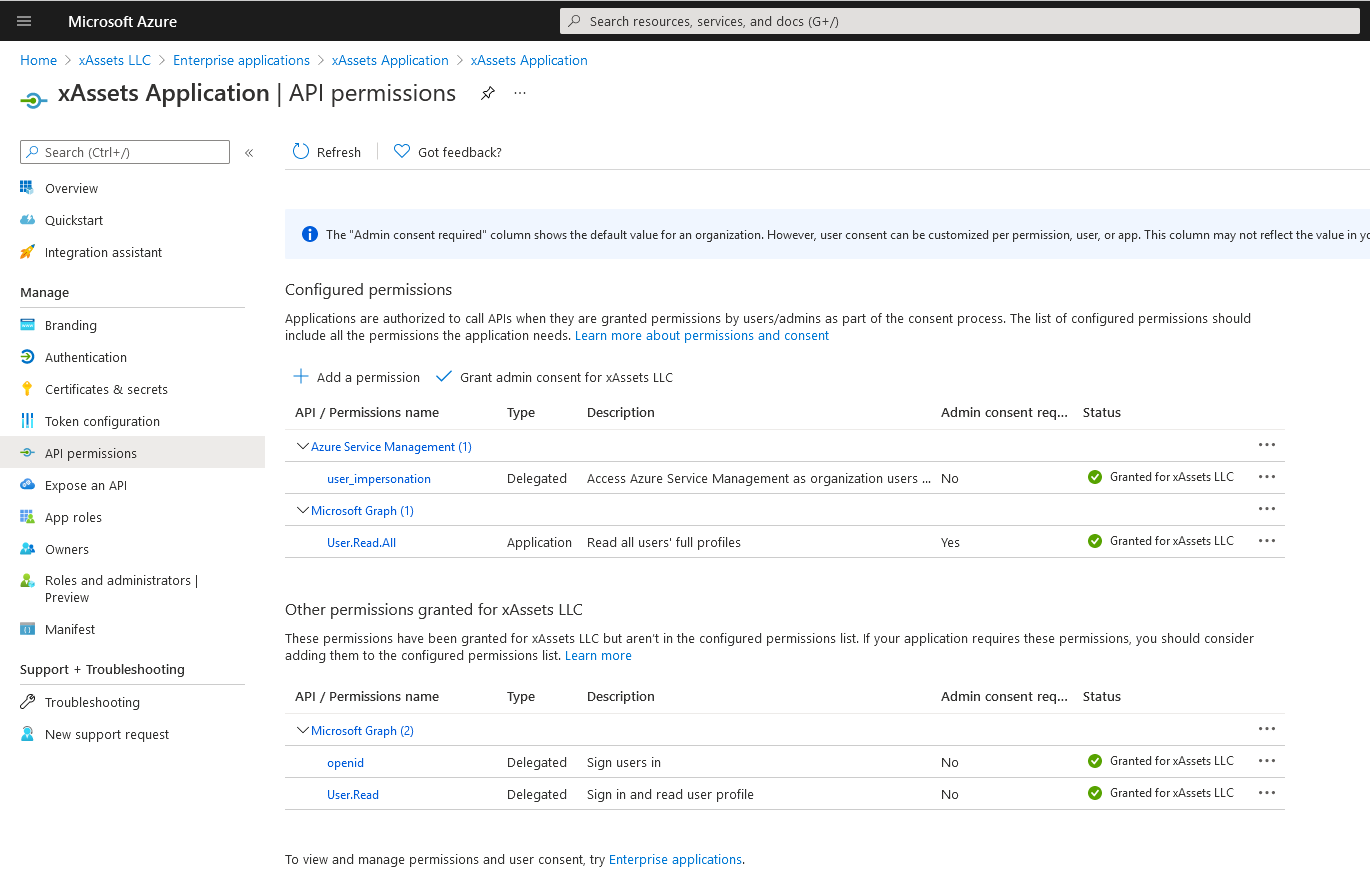
- Click Grant admin consent if prompted
Register Redirect URIs
- Navigate to the Authentication page
- Under Redirect URIs, add your xAssets URL in the form:
https://mycompanyname.hostedprefixname.xassets.net/a.aspx
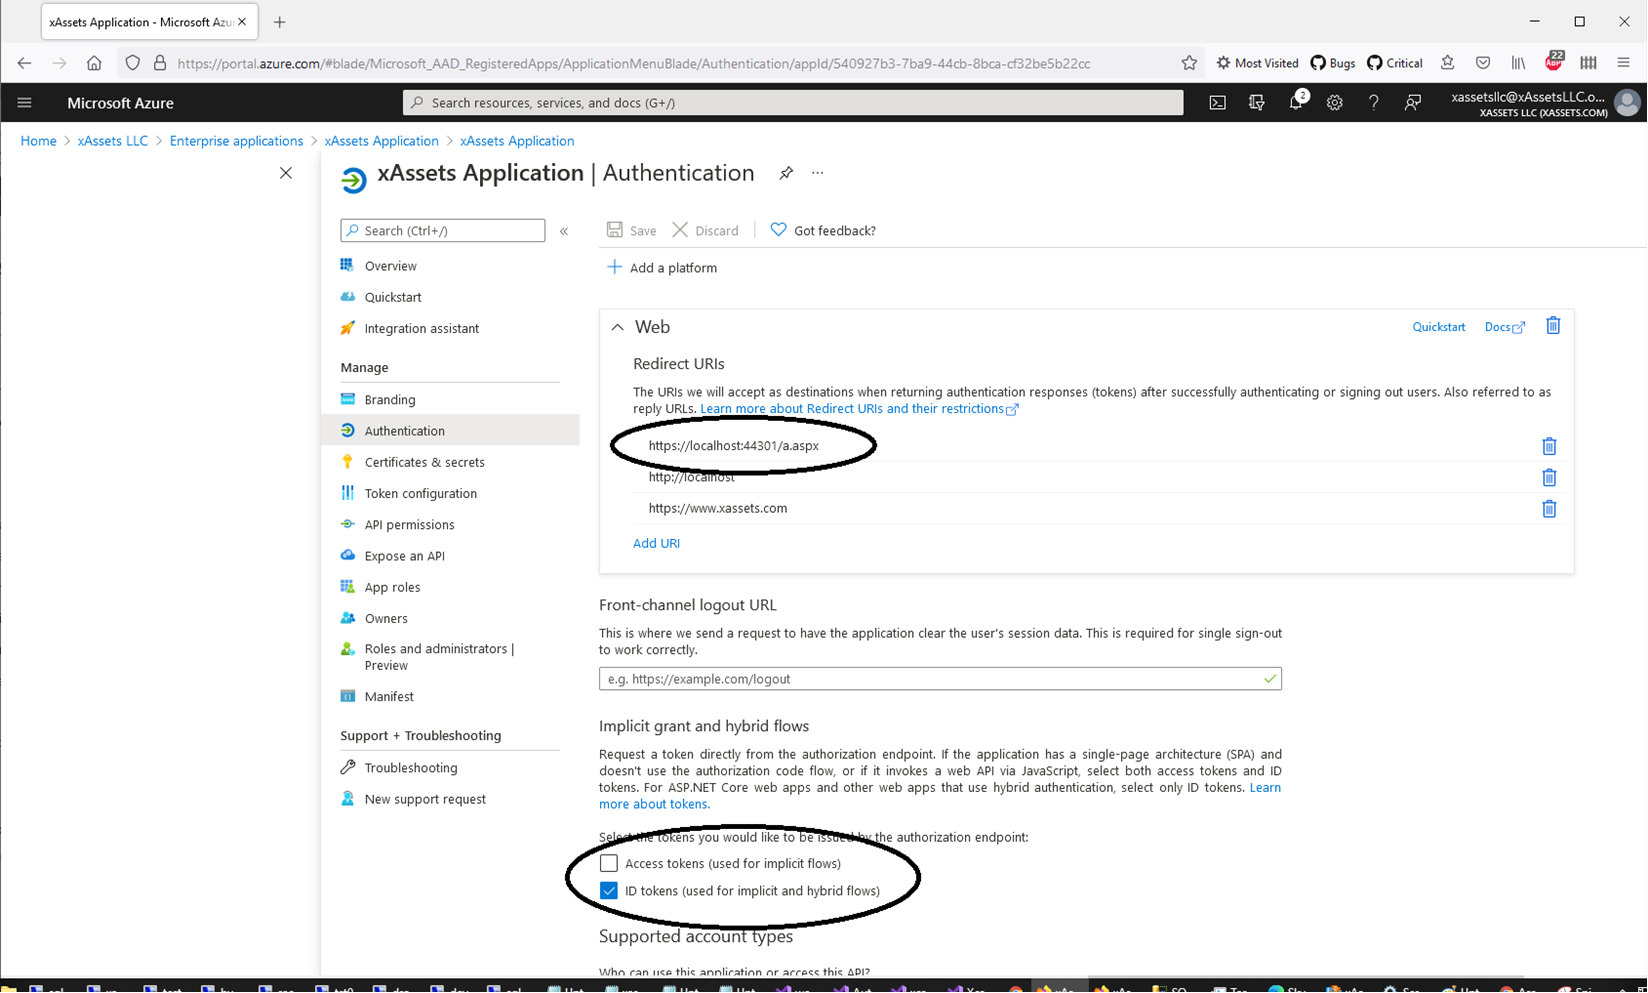
Make sure ID Tokens is also ticked on this screen.
Warning: The redirect URI must match your xAssets URL exactly, including the protocol (
https), domain name, and path (/a.aspx). A mismatch will cause authentication to fail with a redirect error.
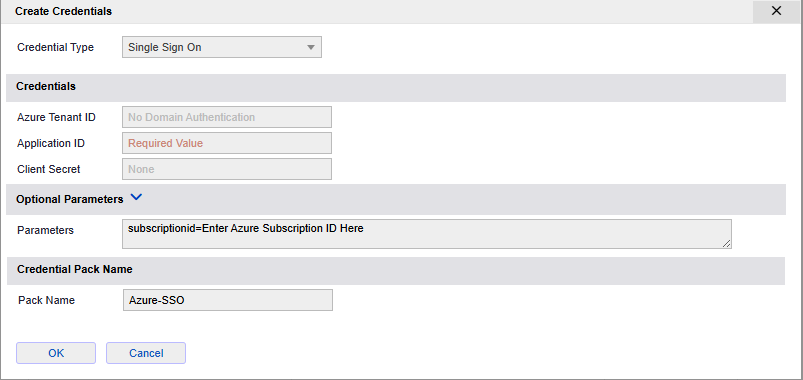
Step 3: Create a Credential Pack in xAssets
- Navigate to the credentials area: click Settings (top right) > Credentials
- Click New to create a new credential pack
- Set the type to Single Sign On
- Name the pack Azure (without quotes)
- Fill in the values:
| Field | Value |
|---|---|
| Domain Name | Your Azure Tenant ID |
| Username | The Application (Client) ID |
| Password | The client secret Value from Step 2 |
Note: Do not worry if you already have a credential pack called "Azure" for Azure VM or Entra ID data integration. The SSO pack is saved with a different internal name and will not conflict. If you need to recreate the SSO pack, it cannot be edited -- simply click "New" and create a new pack with the same name to overwrite the old one.
Step 4: Set the Authentication Type
- Navigate to Admin > Settings
- Set AUTHENTICATIONID to Azure AD
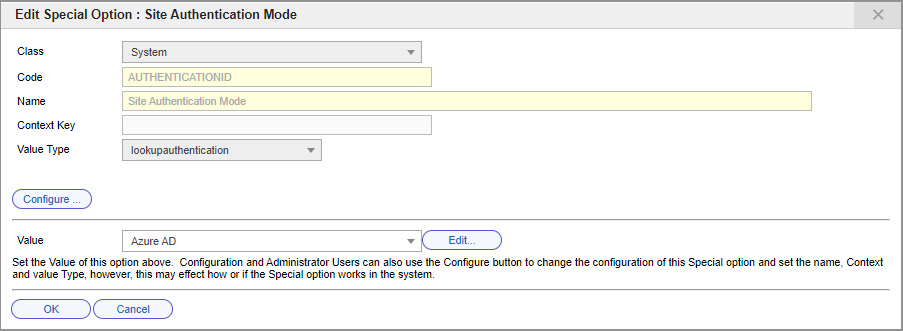
Azure authentication will now be invoked whenever the login page or main screen is visited without an existing valid token.
Step 5: Test the Login
- Open a new private/incognito browser window
- Navigate to your xAssets URL
- You should be redirected to the Microsoft login page
- After successful authentication, you should be returned to xAssets and logged in
If the login fails, see Troubleshooting. To log in without SSO for troubleshooting, use:
https://mycompany.hostedprefixname.xassets.net/a.aspx?logondirect=direct
Related Articles
- Azure User Groups — mapping Azure AD groups to xAssets user groups
- SSO Introduction and Setup — general SSO enablement steps
- Troubleshooting — diagnosing login failures
- Azure Direct Integration — Azure data integration (separate from SSO)