Azure – Direct Integration
xAssets provides two built-in integrations with Microsoft Azure:
- Azure Integration - Servers — imports virtual machines from an Azure subscription into the asset register.
- Azure Active Directory Integration — imports user records from Microsoft Entra ID (formerly Azure AD) into the Custodian table.
Both share the same app registration model and can use a single shared credential pack — see Sharing One Credential Pack below.
Azure Virtual Machines
What the Integration Provides
The Azure VM integration (listed as Azure Integration - Servers in the Integrations list) imports the virtual machines from your Azure subscription into xAssets as asset records. It provides:
- VM master data — computer name, VM ID (serial number), install date, machine type (e.g.
Standard_D2s_v3), availability zone, Azure tags - Operating system — OS type, image offer, SKU, exact version, admin username, license type, patch mode, assessment mode, automatic update settings
- Hardware specifications — vCPU count, memory, OS disk size and resource disk size looked up from the Azure VM size catalogue
- Network addresses — public and private IP addresses retrieved via a second pass against each VM's network interface
The integration covers one subscription per credential pack.
Limitations
The following data is not available from the Azure Resource Manager VM APIs and is not imported:
- Installed software — use the xAssets Discovery Agent or Network Discovery against the instance
- BIOS details, memory slot details, Device Manager entries
- Windows Updates and patches
- Windows internal hostname (lives inside the guest OS, not surfaced by ARM)
- Non-compute Azure resources (storage accounts, databases, Key Vaults, etc.)
If you also have xAssets Network Discovery or the PCAnalyser agent deployed on the instance, these additional fields will be populated from that side.
Prerequisites
- An Azure tenant with an active subscription containing virtual machines
- An app registration in Microsoft Entra ID with Reader access to the subscription
- Access to xAssets with permission to create credential packs
- The xAssets Batch Service must be running (the integration runs as a batch job)
- Outbound HTTPS access from the xAssets server to
login.microsoftonline.comandmanagement.azure.com
Setup
Step 1: Create an App Registration in Azure
- Sign in to the Azure Portal
- Navigate to Microsoft Entra ID > App registrations > New registration (the top-level nav was renamed from "Azure Active Directory" to "Microsoft Entra ID" — both labels still work)
- Name the application, e.g.
xAssets Azure API - Register the application and note the Application (client) ID and Directory (tenant) ID
- Navigate to Certificates & secrets and generate a new Client secret. Copy the secret Value immediately — it is only shown once
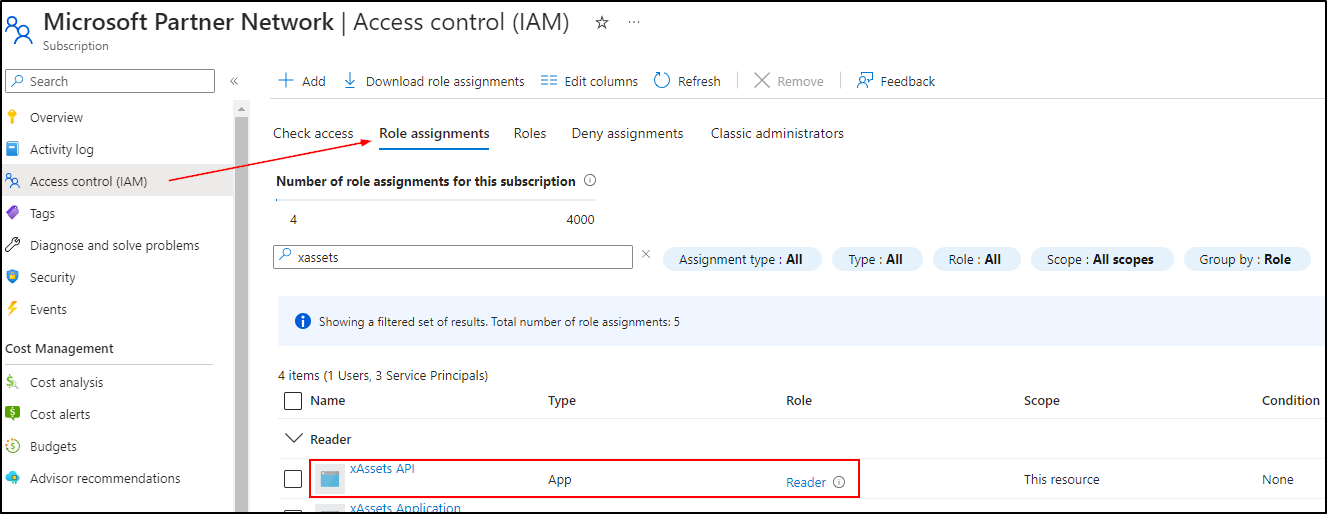
Step 2: Grant Reader Access to the Subscription
- In the Azure Portal, navigate to Subscriptions and select the subscription containing the VMs
- Note the Subscription ID — you will need it in Step 3
- Click Access control (IAM)
- Click + Add > Add role assignment
- Select Reader from the role list (use the search box under "Job function roles" if it is not visible)
- Click Next to go to the Members section
- Click + Select members
- Search for your app registration name (e.g.
xAssets Azure API) and select it - Click Select, then Next, then Review + assign
Step 3: Create a Credential Pack in xAssets
- Navigate to Discover > Prepare > Credentials
- Click New
- Configure the credential pack:
| Field | Value |
|---|---|
| Credential Type | Named Credentials |
| Collection Server | Application Server |
| Pack Name | Azure |
| Domain Name | Your Tenant ID (from Step 1) |
| Username | Your Application (client) ID (from Step 1) |
| Password | The client secret Value (from Step 1) |
| Parameters (under Optional Parameters) | subscriptionid=<your subscription ID> |
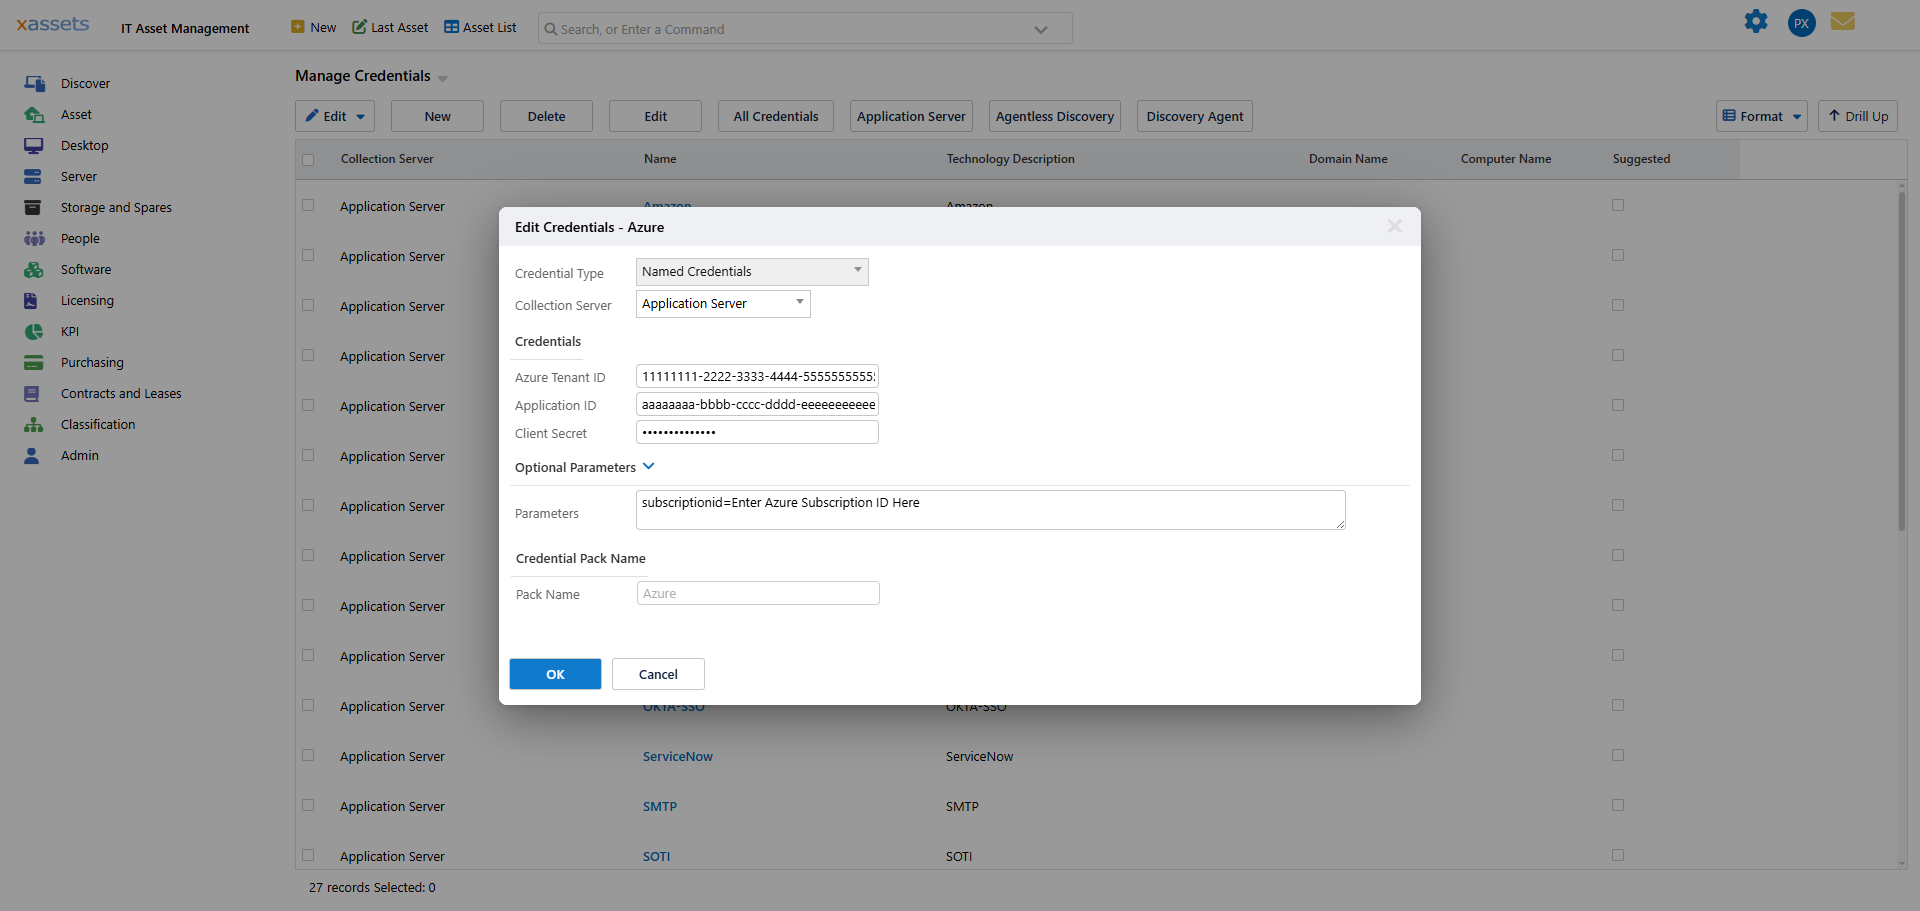
- Click OK to save the credential pack
Note: The
Parametersfield is what separates the Azure VM credential format from Azure AD. The VM integration readssubscriptionidfrom this field to target the right subscription; the AD integration ignores it. Both integrations can therefore share a singleAzurepack — see Sharing One Credential Pack.
Step 4: Run the Integration
- Navigate to Discover > Integrations
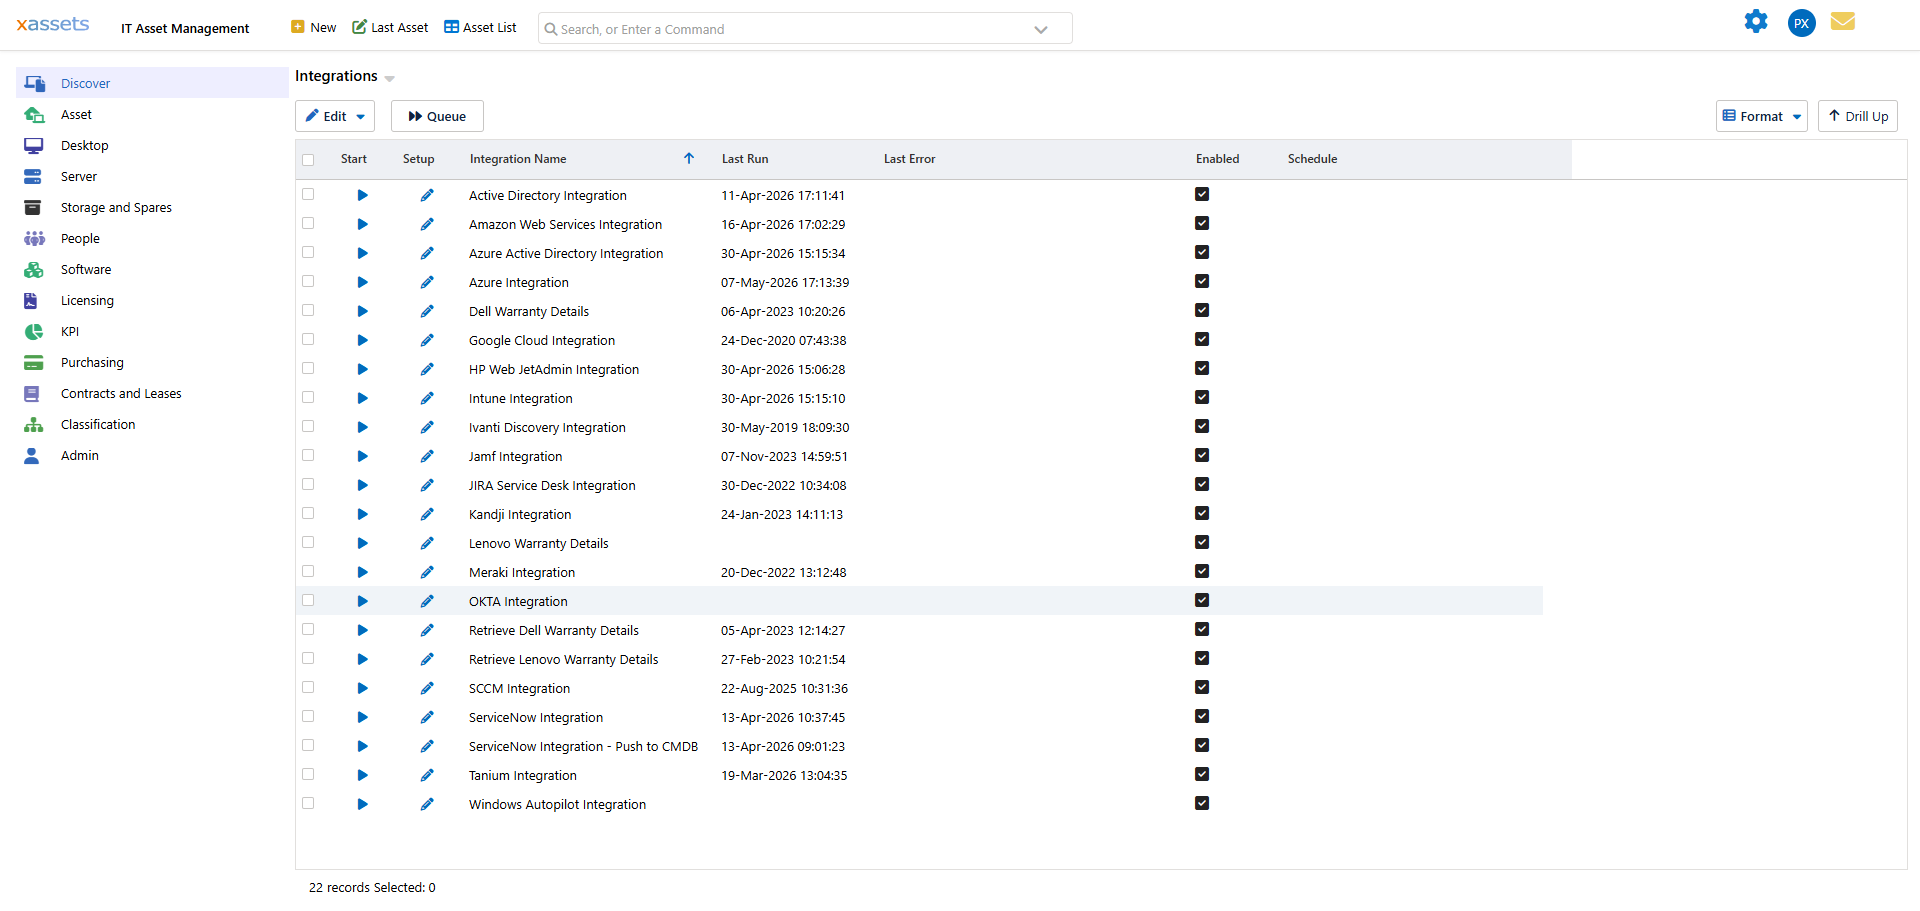
- Select Azure Integration - Servers by clicking its row
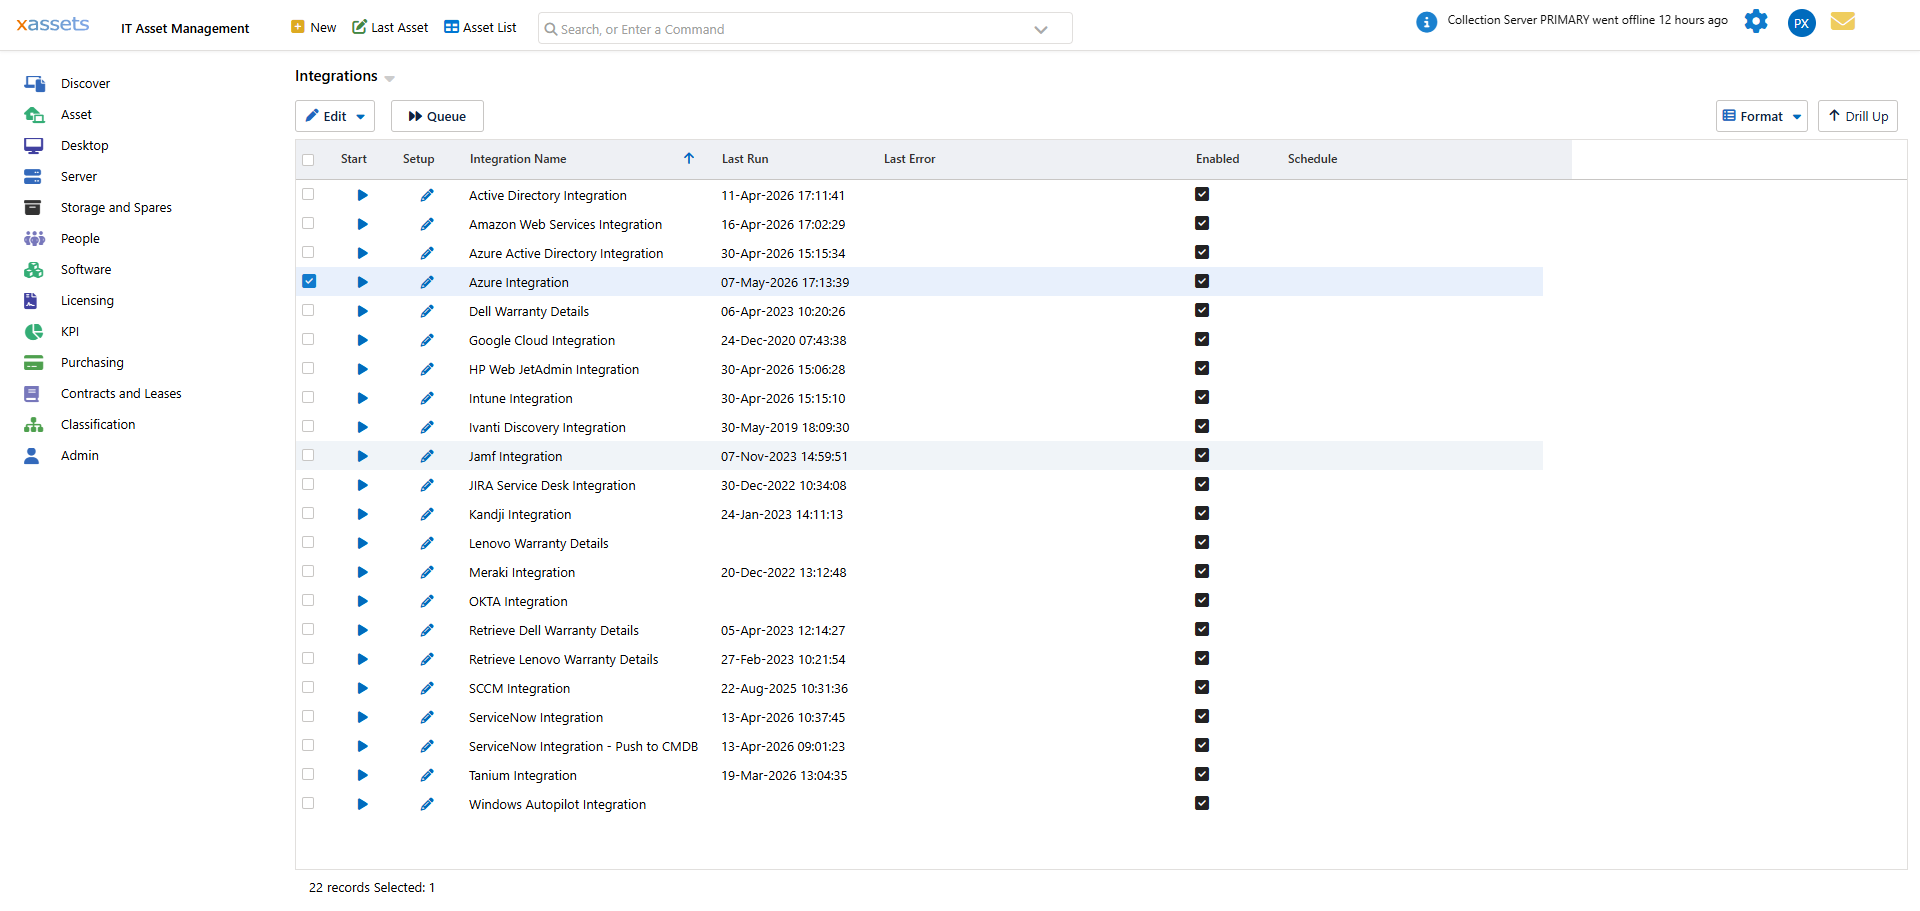
- Click Queue at the top of the screen to add the integration to the batch job queue. Alternatively, click the Start icon in the row to run the integration immediately.
- The integration runs as a batch job. Monitor progress in the batch job status area at the top right of the screen. Status messages will show:
- "Importing server data from Azure" — authenticating and fetching the VM list
- "Moving server data from Azure to holding area" — staging into the Discovery Load tables
- "Azure Server Integration Completed. X asset records loaded." — finished
Tip: You can also open the integration's Setup dialog (the pencil icon in the row) to confirm which credential pack the integration will use, enable or disable it, edit its schedule, or configure per-integration settings.
Step 5: Verify the Results
After the integration completes:
- Open the Asset List and filter by Source =
Azureto see imported assets. Each asset will have:- Manufacturer set to Microsoft, Model set to
Azure <machine-type>(e.g.Azure Standard_D2s_v3) - Location set to
Azure <region>(e.g.Azure Uksouth) - Serial Number set to the VM ID GUID, Computer Name set to the Azure resource name
- Manufacturer set to Microsoft, Model set to
- Open an individual asset to verify:
- Install Date, operating system, OS version, SKU
- CPU cores, memory, and OS disk size filled in from the VM size catalogue
- Admin username, patch mode, license type
- Network tab — both public and private IP addresses
Azure Active Directory (Entra ID)
What the Integration Provides
The Azure AD integration (listed as Azure Active Directory Integration in the Integrations list) imports user records from Microsoft Entra ID into the xAssets Custodian table. New joiners, role changes, and leavers flow through automatically, so your custodian list stays in step with the directory without manual upkeep.
The integration also populates supporting location records — countries, states, cities, and office locations — from the user objects it imports.
Prerequisites
- An Azure tenant with Microsoft Entra ID
- An app registration with the Microsoft Graph User.Read.All application permission granted at tenant level (plus admin consent)
- Access to xAssets with permission to create credential packs
- The xAssets Batch Service must be running
- Outbound HTTPS access from the xAssets server to
login.microsoftonline.comandgraph.microsoft.com
Setup
Step 1: Create an App Registration
If you already created one for the Azure VM integration in Step 1 above, you can reuse it — just add the Microsoft Graph permissions below, then skip to Step 2.
Otherwise:
- In the Azure Portal, create a new app registration (e.g.
xAssets Azure AD) following Step 1 of the VM instructions above - Generate a client secret and copy the Value
- Navigate to the API permissions tab and add Microsoft Graph > Application permissions — at minimum
User.Read.All:

- Click Grant admin consent to activate the permissions
Step 2: Create a Credential Pack in xAssets
- Navigate to Discover > Prepare > Credentials
- Click New
- Configure the credential pack:
| Field | Value |
|---|---|
| Credential Type | Named Credentials |
| Collection Server | Application Server |
| Pack Name | Azure |
| Domain Name | Your Tenant ID |
| Username | Your Application (client) ID |
| Password | The client secret Value |
- Click OK to save the credential pack
Note: The Azure AD integration recommends the pack name
Azure— the same name the VM integration recommends. If you run both integrations, you only need one pack. See Sharing One Credential Pack.
Step 3: Run the Integration
- Navigate to Discover > Integrations
- Select Azure Active Directory Integration by clicking its row
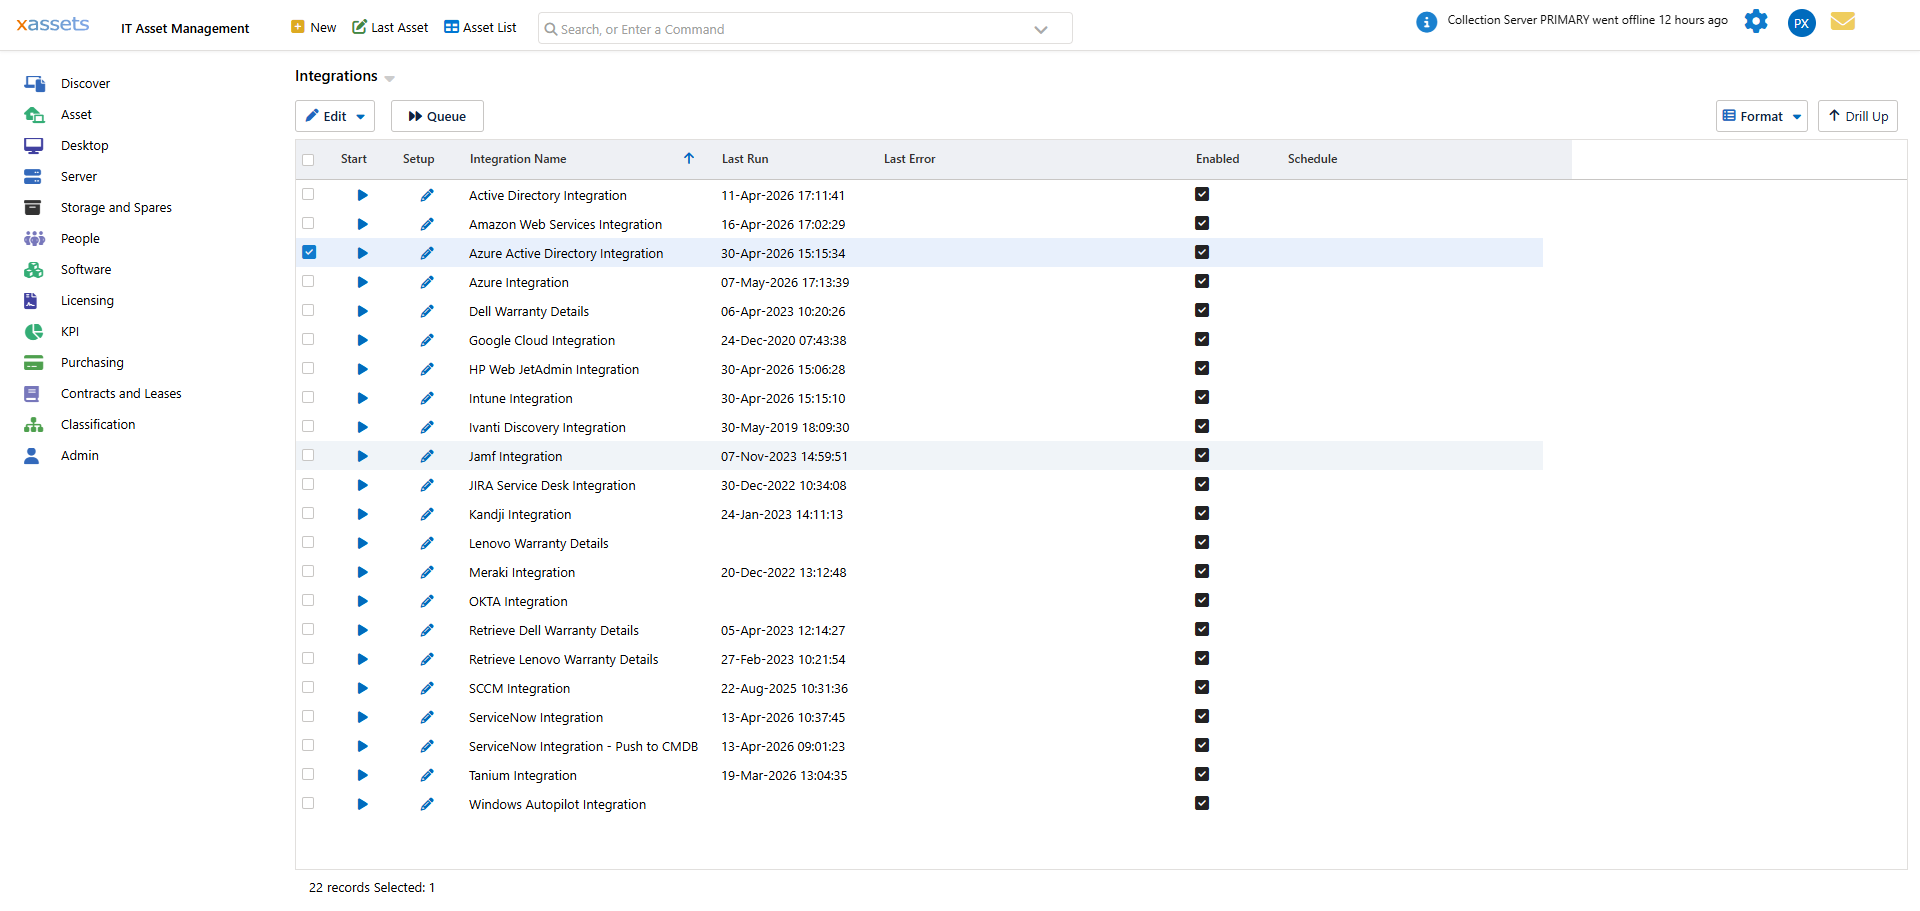
- Click Queue at the top of the screen. Alternatively, click the Start icon in the row to run the integration immediately.
- The integration runs as a batch job and imports user records into the Custodian table. Supporting Country, State, City, and Location records are created as needed.
Sharing One Credential Pack Between Both Integrations
Both the Azure VM and Azure AD integrations recommend the same pack name, Azure. If your organisation runs both:
- Create a single app registration in Microsoft Entra ID
- Give it Reader on the subscription (for the VM integration) and Microsoft Graph User.Read.All (for the AD integration), with admin consent granted for both
- Create one credential pack named
Azure, populated with the tenant ID, client ID, client secret, andsubscriptionid=<guid>in the Parameters field - The VM integration reads all four slots; the AD integration reads the first three and ignores the Parameters field
This avoids maintaining two sets of credentials and two client secrets on separate rotation schedules.
Troubleshooting Azure and Intune Permissions
If you experience permission errors with any Microsoft integration (Azure VMs, Azure AD, or Intune), follow this diagnostic approach:
- Open the transformation behind the integration (via Admin > Transformations) and note the API URL being called
- Open Microsoft Graph Explorer
- Paste the API URL into the query box (e.g.
https://graph.microsoft.com/v1.0/usersfor Azure AD) - Run the query with the Run Query button
- If permissions fail, review the "Modify permissions" section to identify which permissions are needed. Read each permission description carefully before clicking "Consent" to avoid granting excessive privileges
- Once the query works in Graph Explorer, verify the same permissions are granted to your app registration in the Azure Portal
Warning: Microsoft Graph Explorer can grant more elevated permissions than are required. Always review the description of each permission before consenting, and only grant the minimum permissions needed for the integration.
Permissions for Azure SSO are covered separately — see SSO with Azure.
Related Articles
- Microsoft Intune — importing Intune-managed devices
- Amazon Web Services — importing AWS EC2 instances
- Google Cloud — importing GCP Compute Engine instances
- SSO with Azure — Azure SSO configuration (different from data integration)