JIRA Asset Panel Integration
xAssets provides an integration with JIRA Service Management that automatically associates assets with JIRA issues. Assets are identified using AI matching on the text of incidents and displayed within the JIRA user interface, so there is no need to log into xAssets separately.
This page covers the full setup process and the configuration options for fine-tuning the matching behaviour.
What the Integration Provides
When a JIRA issue is created or viewed, xAssets scans the issue summary and description using natural language processing to identify assets. The system matches against:
- Computer names
- IP addresses
- Usernames
- The name of the issue reporter
Matched assets are displayed in a custom field on the JIRA issue. Users can accept the automatic matches, modify them, or manually search for assets -- all within the JIRA interface.
Note: This integration uses a JIRA Forge custom field developed by xAssets. It replaces the older "JIRA Asset Panel" which was deprecated in 2024. The content of the field dialog is built within xAssets and can be configured to show any asset data, provided it fits in the screen space allowed by JIRA.
Prerequisites
- A JIRA Service Management instance with administrator access
- An xAssets instance accessible from the internet (or from JIRA's network)
- A JIRA administrator to perform Steps 1-3
- An xAssets administrator to perform Steps 4-5
Setup
Step 1: Create the Assets Field in JIRA
These steps should be performed by a JIRA administrator:
- Obtain a JIRA custom field installation link from xAssets Support
- Before using the link, ensure you are logged into only the JIRA instance you want to deploy to (JIRA has a "sign out of all" option if needed)
- Paste the installation link into a browser window that is already logged into your JIRA instance
Step 2: Make the Field Visible on JIRA Screens
- In JIRA Service Management, navigate to Settings (top right) > Issues > Fields > Custom Fields (in the left panel)
- Find the Assets custom field and click it
- Click the Screens tab
- Click Add or remove associated screens
- Tick the screens where you want the Assets field to appear (e.g., the issue view screen)
The field should now be visible in the right-side Details panel of JIRA issues.
Step 3: Optional -- Pin the Field
- Find the Assets field in the Details panel of any issue
- Hover over the field name -- a pin icon appears
- Click the pin to move the field to the top panel above "Details" for greater visibility
Step 4: Enter Credentials
- Create an API key in JIRA -- this is a JIRA API token, not an xAssets API key
- Create a credential pack in xAssets called JIRA on the Application Server:
| Field | Value |
|---|---|
| Domain Name | Your JIRA instance domain (e.g., myco.atlassian.net) |
| Username | The username associated with the JIRA API token |
| Password | The JIRA API token |
- In xAssets, navigate to Discover > Integrations > Integrate with JIRA
- The system generates a credentials code starting with
ey-- save this code to a text file - In JIRA, click the custom field in any issue
- The field prompts for credentials as a single text box. If it does not prompt, click the Disconnect button first.
- Paste the credentials code from step 4 into the field
- The system should sync up and display any matching assets
- Refresh the main JIRA screen to verify the field displays assets correctly
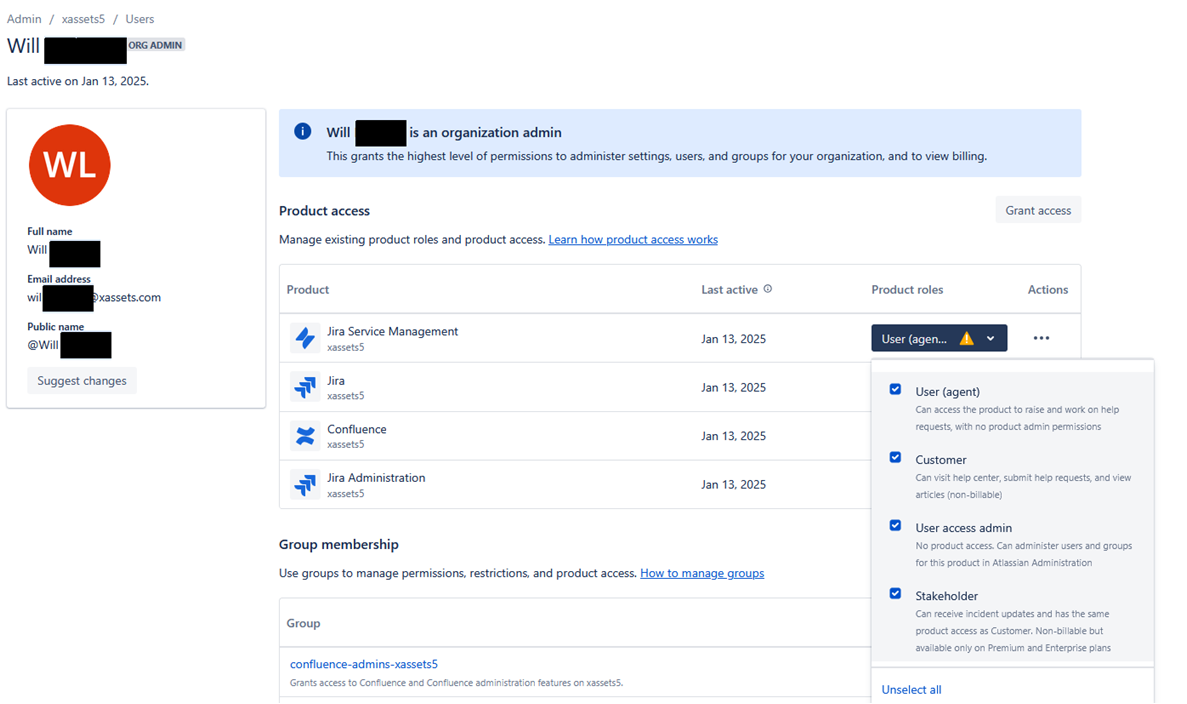
Step 5: Set Permissions
If nothing happens when a user clicks the asset panel, the issue is likely permissions-related:
- Navigate to https://admin.atlassian.com
- Select your instance, then click Users
- Find the user and check their Product access section
- Ensure they have Customer, Agent, and Stakeholder permissions as appropriate
How the AI Matching Works
When a new issue is created, xAssets performs an AI match to find assets linked to the incident. At this initial stage, the match list is dynamically created each time the issue is displayed -- it may change if the summary or description text changes.
When a user clicks the issue's Assets field, the system performs the AI match again, and the user can then save the match or modify it to choose specific assets. Once the match is saved, the AI matching stops and the saved list is preserved.
Fine-Tuning the Matching
Several xAssets settings (SpecialOptions) control the matching behaviour. Set these through Admin > Settings:
MATCHINCIDENTCATEGORIES
Lists the CategoryIDs that carry a high priority in the matching algorithm. The system prioritises matches from these categories over others.
MATCHINCIDENTSWITHAI
Enabled by default. Set this to false or 0 to disable AI text scanning and only use the reporter name for matching.
AssetMatchingQuery
Sets the query used for matching. By default, the system uses the "All Assets" query. The prioritisation algorithm is applied on top of whatever query is specified. If the selected query includes a self-generated "priority" column, the system will not generate its own priority logic.
AssetMatchingPriorityCap
Determines the priority threshold below which records are not considered a good enough match to offer to the user. The default value is 100. Records with a priority score below this value are excluded from the match results.
AssetMatchingQuerySelection
Enables context-specific matching by routing different types of issues to different queries or settings. This setting takes the form:
field1_field2_field3
Where each field is one of:
| Field Name | Matches On |
|---|---|
issuetype |
The type of issue (e.g., "Task") |
issuetypeid |
The ID of the issue type (e.g., "10009") |
projectid |
The ID of the project (e.g., "10001") |
projectkey |
The key of the project (e.g., "PT") |
projecttype |
The type of project (e.g., "service_desk") |
rendercontext |
The render context (e.g., "issue-view") |
entrypoint |
The entry point (e.g., "edit", "create") |
How it works: When AssetMatchingQuerySelection = "issuetype" and an issue of type "task" is processed:
- The system looks for a setting named
AssetMatchingQuery_issuetype_task - If that setting exists, it uses the query specified there
- If that setting does not exist, it falls back to the default
AssetMatchingQuerysetting
This same postfix logic applies to MatchIncidentsWithAI and AssetMatchingPriorityCap, allowing you to enable or disable AI matching and set priority thresholds per issue type, project, or context.
Tip: Start with the default settings and only add context-specific overrides after you have observed the matching behaviour on real issues. Over-configuring the matching rules before understanding your data can make troubleshooting difficult.
Related Articles
- Integration with JAMF — another application-specific integration
- Transformations Overview — the transformation framework used by integrations