Integration with JAMF
xAssets includes a built-in integration with JAMF Pro to import managed Apple devices (Macs, iPhones, iPads) into xAssets as asset records. This page explains how to create the required JAMF API account and configure the xAssets credential pack.
What the Integration Provides
The JAMF integration pulls device information from your JAMF Pro instance into xAssets. Once imported, these devices appear alongside your other assets and can be included in queries, reports, and software licence reconciliations.
Prerequisites
- A JAMF Pro cloud instance (e.g.,
https://yourdomain.jamfcloud.com) - JAMF Pro administrator access to create API accounts
- Access to xAssets with permission to create credential packs
- The xAssets Batch Service must be running (the integration runs as a batch job)
Setup
Step 1: Create an API Account in JAMF
- Browse to your JAMF Pro instance (e.g.,
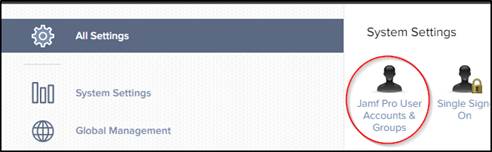
https://yourdomain.jamfcloud.com) - Navigate to All Settings (gear icon, top right)
- Click Jamf Pro User Accounts and Groups
- Click New to create a new account with the following settings:
| Field | Value |
|---|---|
| Username | xAssetsAPI (or another descriptive name) |
| Privilege Set | Custom |
| Access Status | Enabled |
| Full Name | xAssets API |
| Email Address | An appropriate email address for the account |
| Password | A strong password |

- On the privileges screen, grant the minimum read permissions needed for device data:

- Save the account
Step 2: Create a Credential Pack in xAssets
- Navigate to Discover > Prepare > Credentials
- Click Create Credentials
- Configure the credential pack as follows:
| Field | Value |
|---|---|
| Credential Type | Named Credentials |
| Collection Server | Application Server (not on a collection server) |
| Pack Name | JamfAPI |
| Domain Name | Your JAMF domain FQDN (e.g., yourdomain.jamfcloud.com) -- do not include https:// |
| Username | The JAMF API username from Step 1 |
| Password | The JAMF API password from Step 1 |
- Save the credential pack
Step 3: Run the Integration
- Navigate to Discover > Integrations > Get data from JAMF
- Select the JamfAPI credential pack
- The integration runs as a batch job, importing device records into xAssets
Scheduling
To keep your JAMF device inventory current, schedule the integration to run automatically:
- Navigate to Admin > Transformations
- Find the JAMF integration transformation
- Open the Schedule tab and configure the desired frequency (e.g., daily)
Tip: If the integration does not return expected devices, verify that the JAMF API account has sufficient read permissions. The minimum required is read access to Computer, Mobile Device, and/or User objects depending on what you want to import.
Related Articles
- Microsoft Intune — similar integration for Intune-managed devices
- Azure Direct Integration — importing Azure VMs and Azure AD users
- Transformations Overview — understanding transformations