Tanium
xAssets includes a built-in integration with Tanium to import endpoint inventory from the Tanium Asset API. This page explains what the integration provides, its limitations, and how to set it up.
What the Integration Provides
The Tanium integration imports endpoint data from your Tanium environment into xAssets as asset records. It provides:
- Asset master data -- computer name, serial number, manufacturer, model, operating system, IP address, domain, logged-in user, memory, CPU details, and disk sizes
- Software inventory -- Add/Remove Programs titles, versions, and publishers, fully integrated with the xAssets software recognition engine
- Network addresses -- IP addresses and MAC addresses per device
- Disk inventory -- logical drive details including size, free space, and file system type
- Device classification -- automatic mapping of Tanium chassis types (Desktop, Notebook, Virtual, etc.) to xAssets asset categories
The integration pulls data from all endpoints visible in Tanium (online and offline) and supports both Tanium Cloud and on-premise deployments.
Limitations
The following data is not available from the Tanium Asset API and is not imported:
- BIOS details (name, version, release date, manufacturer)
- Memory slot details (individual slot capacity, speed, location)
- CPU hyper-threading and logical processor counts
- OS architecture (32/64-bit)
- Windows Updates and patches
- Device Manager entries
- File-based software discovery
- Windows Services, firewall rules, and exposed shares
If you also have xAssets Network Discovery enabled, these fields will be populated from the Discovery Agent instead.
Prerequisites
- A Tanium environment (Cloud or on-premise) with the Asset module enabled
- A Tanium API token with appropriate permissions
- Access to xAssets with permission to create credential packs
- The xAssets Batch Service must be running (the integration runs as a batch job)
- The xAssets server IP must be whitelisted in Tanium's API token trusted addresses
Setup
Step 1: Create an API Token in Tanium
- Sign in to Tanium Console
- Navigate to Administration > Permissions > API Tokens
- Create a new API token for a user account with the Asset Report Reader and Gateway User roles
- Configure the token's trusted IP addresses to include the xAssets server IP
- Set the token expiration to 365 days (the default 7-day expiration is too short for integrations)
- Copy the API token -- it will look like
token-XXXXXXXXXXXXXXXXXXXXXXXXXXXXXXXXXXXXXXXXXXXXXXXX
Important: Do not share a single API token across multiple integration processes. When a token rotates for any process, it stops working for all other processes using that token.
Step 2: Determine Your Tanium URL
| Deployment | URL Pattern |
|---|---|
| On-premise | https://your-tanium-server.com |
| Tanium Cloud | https://<instance>-api.cloud.tanium.com (note the -api suffix) |
Step 3: Create a Credential Pack in xAssets
- Navigate to Discover > Prepare > Credentials
- Click New
- Configure the credential pack as follows:
| Field | Value |
|---|---|
| Credential Type | Named Credentials |
| Collection Server | Application Server |
| Domain Name | Your Tanium URL domain (e.g., ccbcu-api.cloud.tanium.com) -- without https:// |
| Username | Your API token (e.g., token-abc123...) |
| Password | Any value (this field is not used but is required) |
| Pack Name | Tanium |
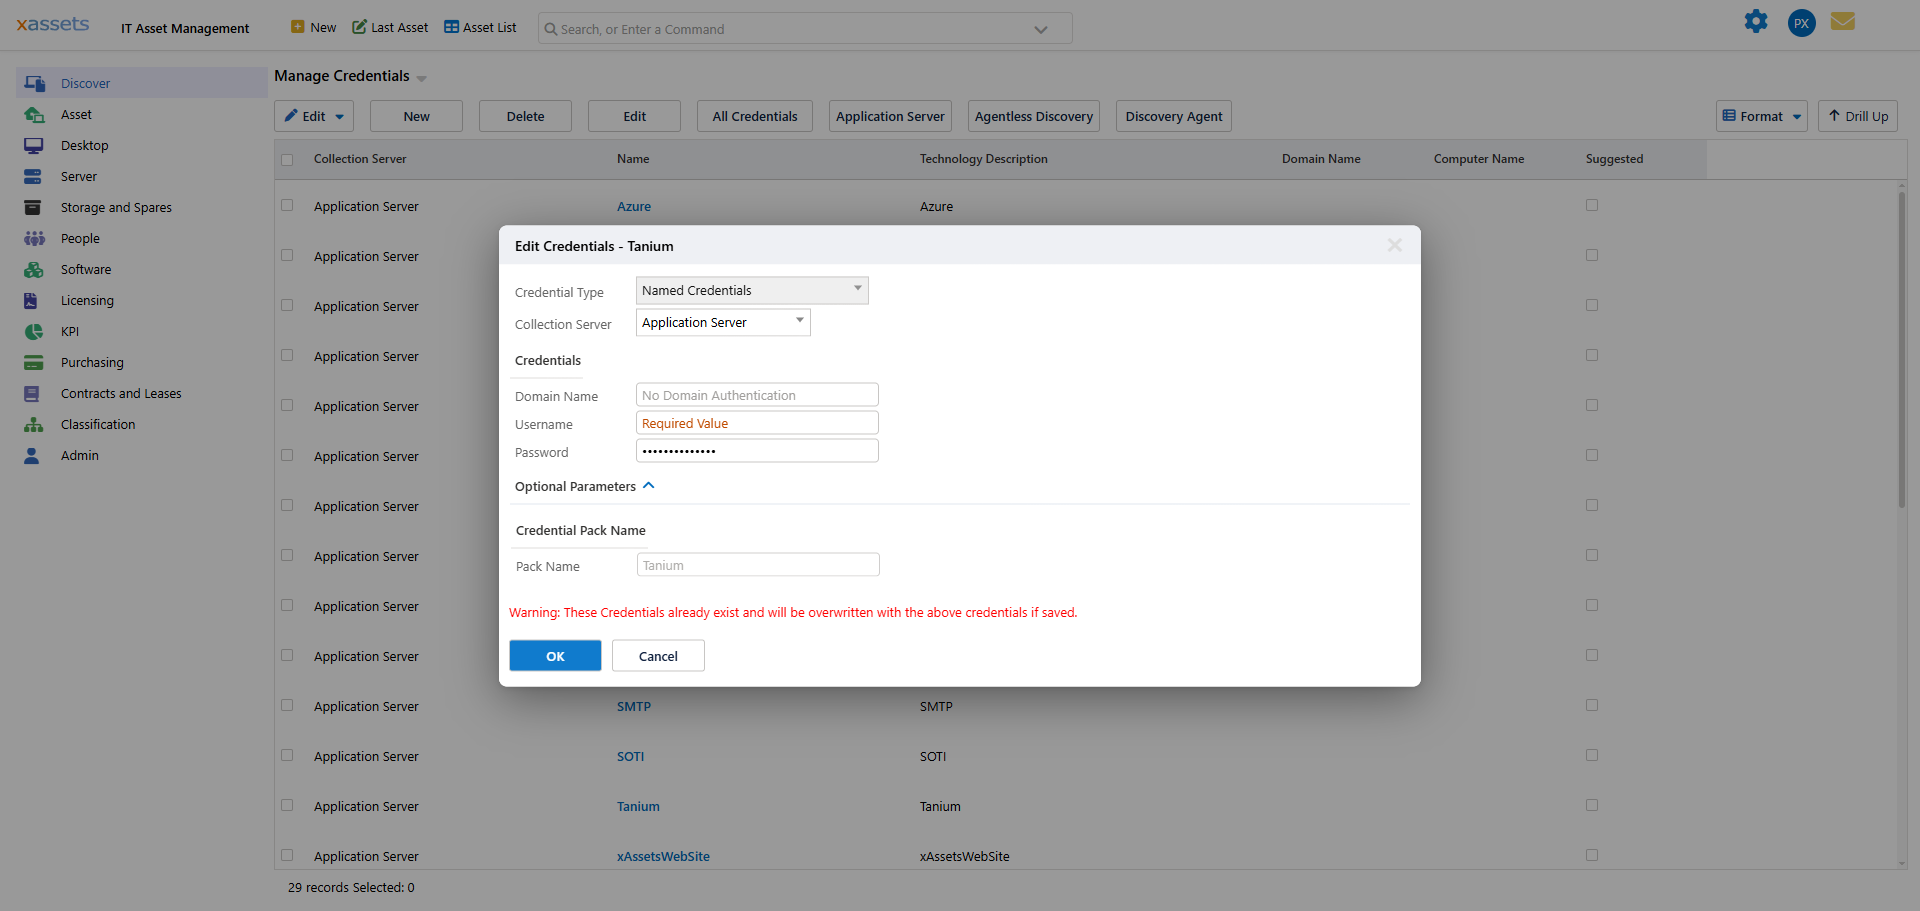
- Click OK to save the credential pack
Note: The Domain Name field stores the Tanium server URL, and the Username field stores the API token. The Password field is required by the credential pack form but is not used by the Tanium integration.
Step 4: Run the Integration
- Navigate to Discover > Integrations
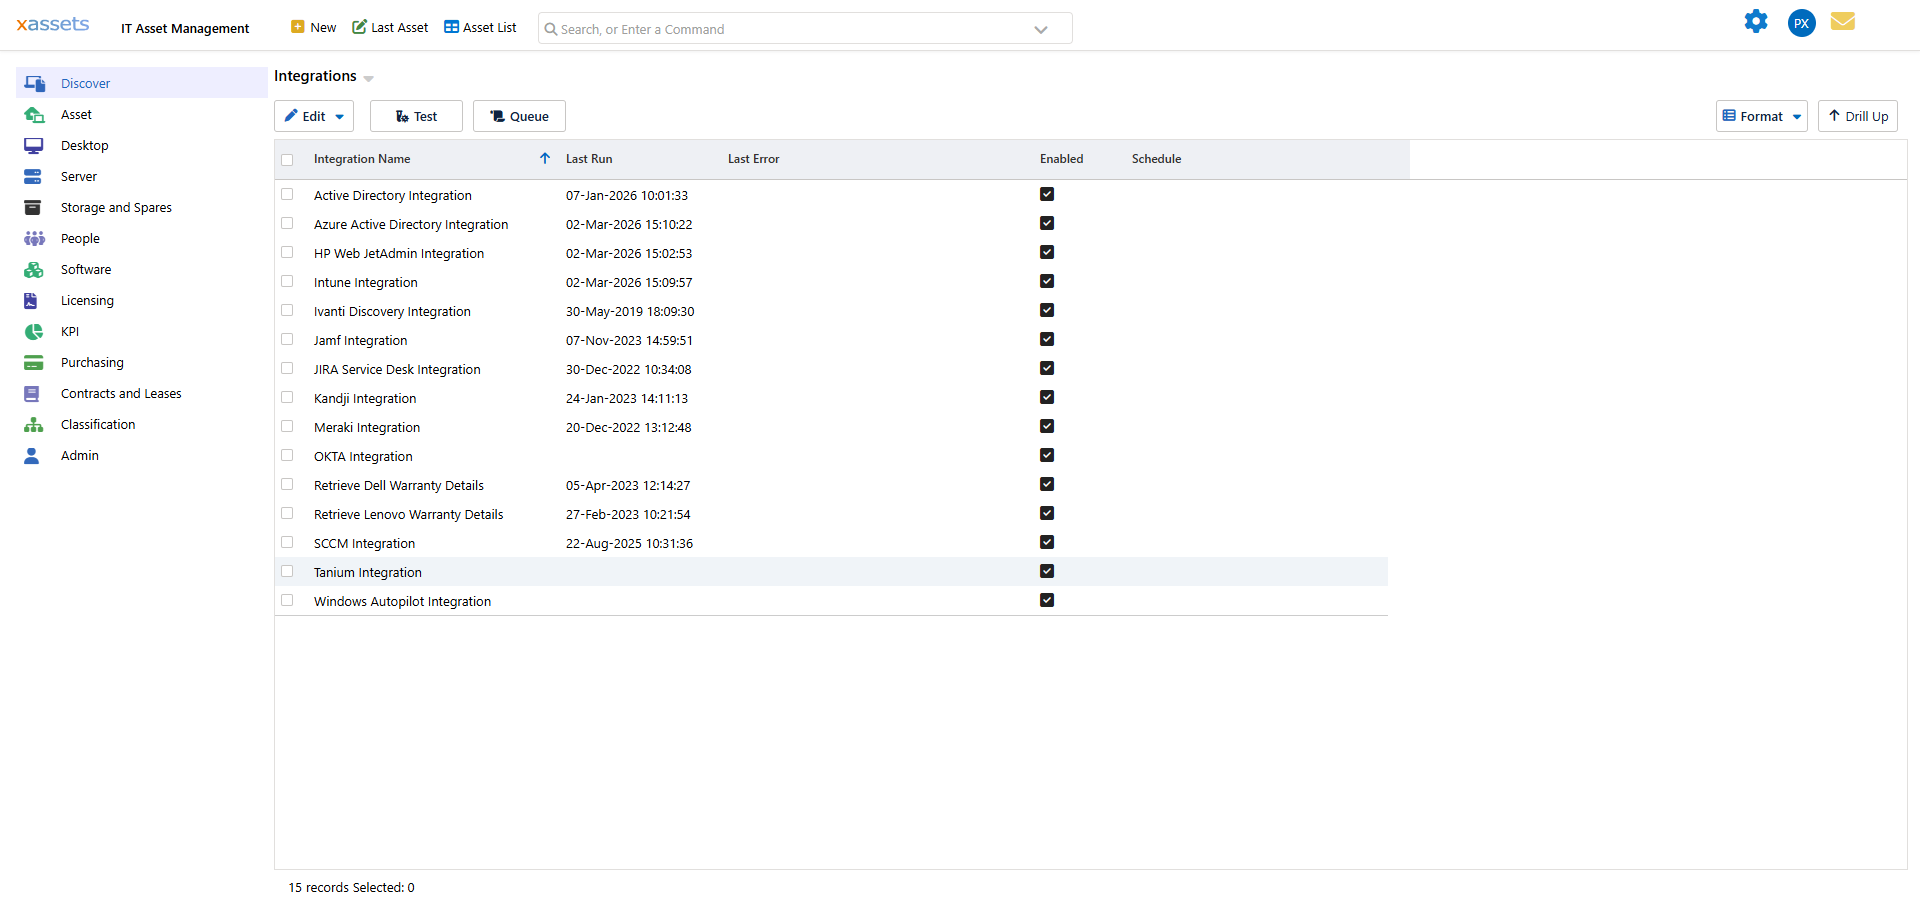
- Select Tanium Integration by clicking its row
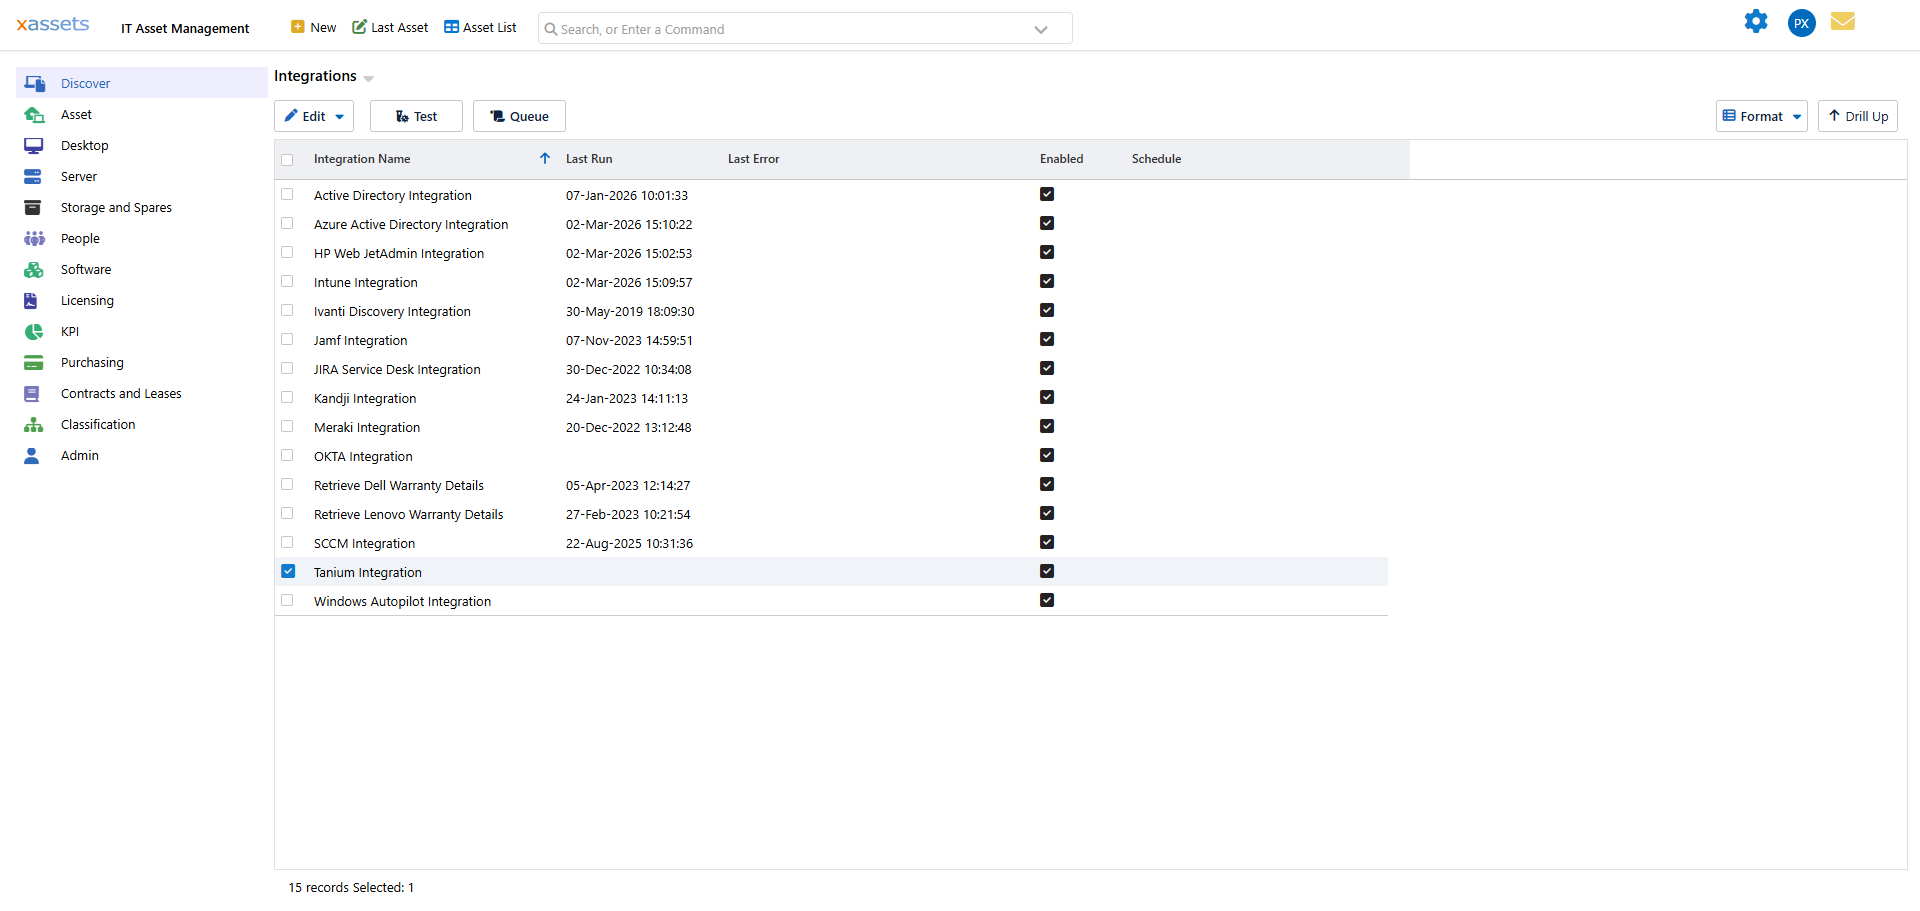
- Click Queue at the top of the screen to add the integration to the batch job queue
- The integration runs as a batch job. Monitor progress in the batch job status area at the top right of the screen. Status messages will show:
- "Getting data from Tanium" -- fetching data from the API
- "Transferring Tanium data to holding area" -- mapping data to the staging tables
- "Loading Tanium holding area into assets" -- creating and updating asset records
- "Tanium Synchronise Completed. X asset records loaded." -- finished
Step 5: Verify the Results
After the integration completes:
- Open the Asset List and filter by Source = TANIUM to see imported assets
- Open an individual asset to verify:
- Hardware details (manufacturer, model, serial number, memory, disk sizes)
- Software titles appear on the Software tab and are recognized by the software catalog
- Network addresses and MAC addresses appear on the Network tab
- Disk details appear with correct sizes in MB
Troubleshooting
Integration hangs on first run
The most common cause is an SSL/TLS issue where the xAssets server cannot validate the Tanium server's certificate. This has been resolved in xAssets 7.3.55 and later, which automatically accepts all server certificates for integration API calls.
500 Internal Server Error
Tanium may return 500 errors when the response is very large. The integration automatically retries up to 3 times with a 5-second delay. If errors persist, consider creating a Tanium View that includes only the columns you need, and configure the integration to use that view.
Authentication failure
Verify that:
- The API token has not expired (check the expiration date in Tanium Console)
- The xAssets server IP is in the token's trusted IP address list
- The Domain Name in the credential pack does not include
https:// - For Tanium Cloud, the URL includes the
-apisuffix (e.g.,ccbcu-api.cloud.tanium.com)
Special Options
The following Special Options can be configured in Admin > Special Options to customize the integration behavior:
| Option Code | Type | Default | Purpose |
|---|---|---|---|
TANIUMDEBUG |
Checkbox | Off | Save raw JSON responses to a file for troubleshooting |
TANIUMCANDISPOSE |
Checkbox | Off | Automatically dispose assets that disappear from Tanium |
TaniumDisposal |
Integer | 8 | The Status ID to assign to disposed assets |
Scheduling
To run the Tanium integration on a schedule, configure a batch job schedule for the Tanium Integration transform. A daily sync is recommended to keep your Tanium device inventory current.
Related Articles
- Microsoft Intune -- importing Intune-managed devices
- Integration with JAMF -- importing Apple devices from JAMF