Creating a License Record
This page covers the manual workflow for entering a single license. For bulk loading, see Importing Licenses — manual entry is for one-off purchases or licenses that do not fit a bulk pattern.
Workflow
1. Open the Create Form
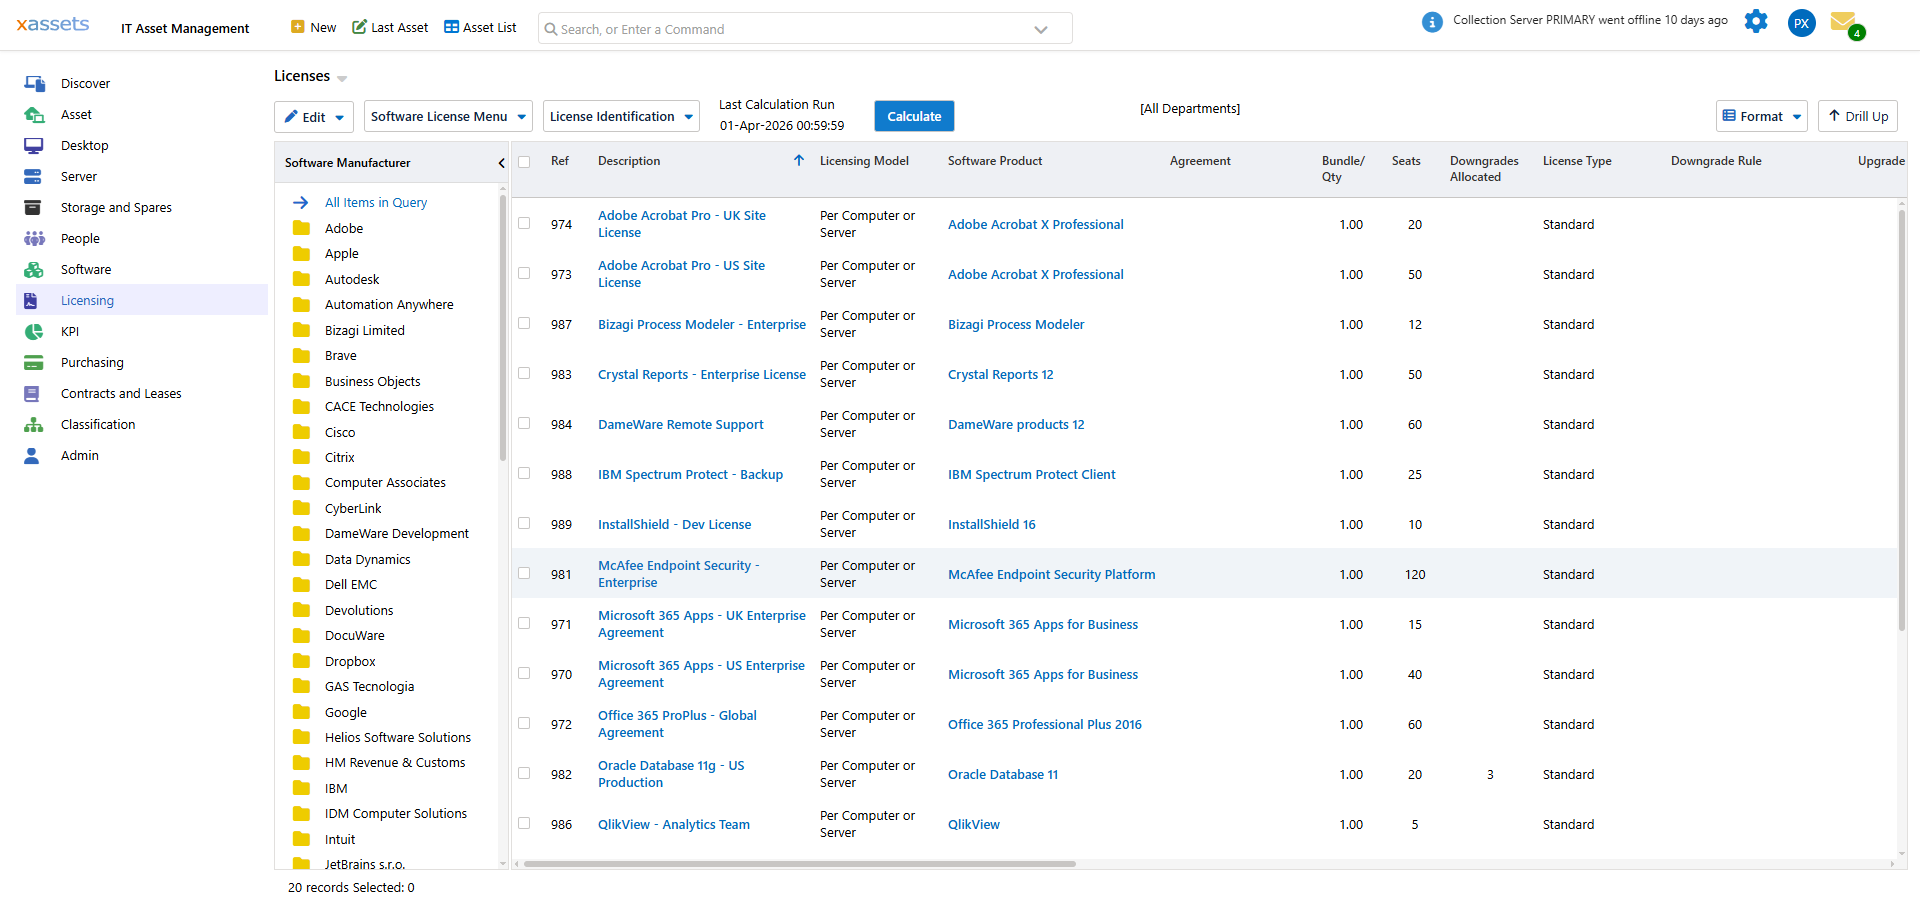
From the Licenses query, choose Create New Software License Asset from the Software License Menu:
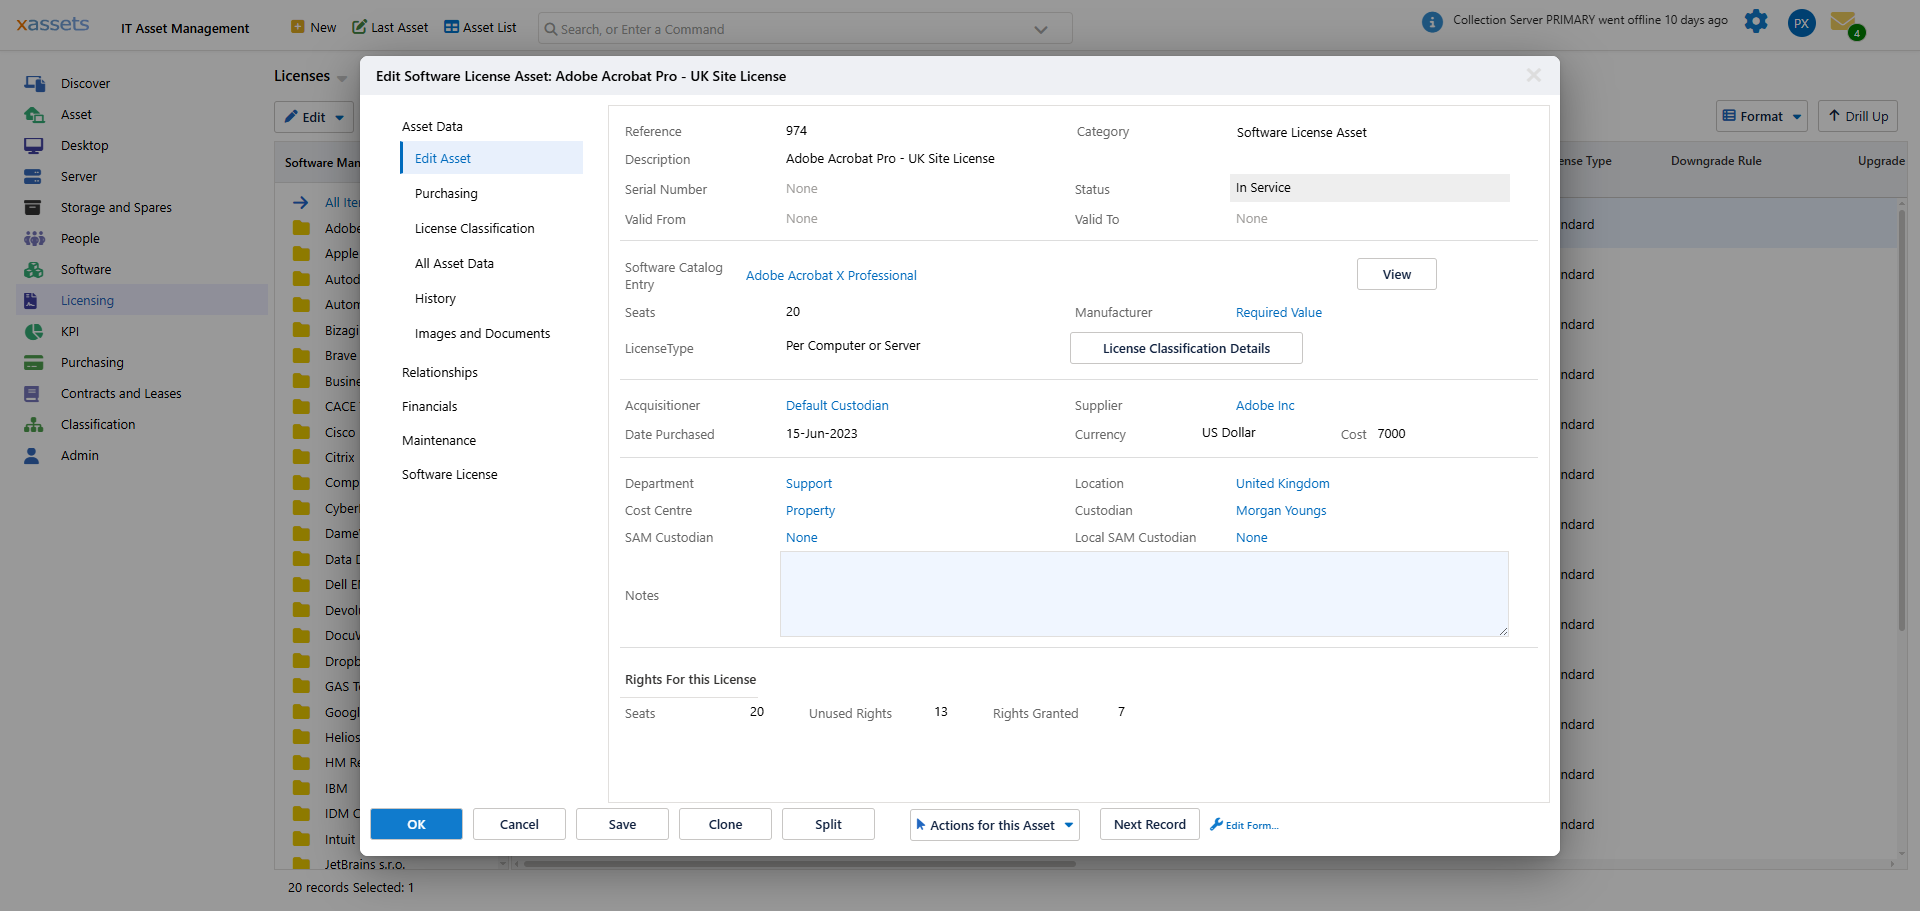
An asset entry screen opens for the new license:

2. Fill in the Required Fields
| Field | What to Enter |
|---|---|
| Description | A clear name (e.g., "Microsoft 365 Apps for Business — 50 Seats") |
| Software Product | The catalog entry this license covers. Must exist in the Software Catalog — start typing and pick from the dropdown. |
| License Type | How the license is metered. Inherits the catalog entry's default if blank. See Concepts: License Metrics. |
| Seats | The capacity in metric units (50 users, 16 cores, etc.) |
| Date Purchased | When the license was acquired. Determines when the engine starts allocating from it. |
| Cost | The purchase cost. Used in expenditure reports. |
| Supplier | Who you bought from. |
| Status | Typically In Service for active licenses. See License Status Codes. |
3. Optional Fields
| Field | Why Use It |
|---|---|
| Reference / Barcode | Internal asset reference and scan code |
| Registration Code / Serial Number | Vendor's product key, for audit lookup |
| Quantity | Number of license items purchased (5 packs of 10 = Quantity 5, Seats 50) |
| Software Agreement | Parent agreement this license is part of (e.g., an Enterprise Agreement) — see Agreements |
| Downgrade Rule | Override the catalog default if this specific license has different downgrade rights |
| Location | Restricts the license to consumptions in this location (or its children) — see Concepts: Affinity vs Requirements |
| Custodian | The person the license is allocated to (for named-user licenses) |
| Department / Cost Centre | Used for affinity scoring during allocation |
| Allocation Rule | Promotes Department, Location, or Cost Centre (or any combination) to a hard requirement for this license. Default is "Inherit from catalog" — the license follows whatever the catalog entry's Default Allocation Rule says. See Per-Product Scoping. |
4. Save
Click OK to save. The license appears immediately in the Licenses query but does not contribute to the licensing position until you recalculate (see step 5).
5. Recalculate
Run Licensing → Calculate Licensing Position to fold the new license into compliance. The new seats appear in the Seats column for the product, and the Allocated/Outstanding columns update based on what the engine grants from the new license.
Tips
- Keep descriptions consistent. Include the seat count (e.g., "Microsoft 365 — 50 Seats") so the licenses query is scannable.
- Set the License Type at creation. If the catalog entry's default is wrong for this specific license, override at creation rather than fixing later.
- Use Location and Department deliberately. A blank location means "no scoping requirement, eligible everywhere." A specific location means the license only covers consumptions within that location (or its children).
- Allocation Rule predetermines scope. Department, Location, and Cost Centre are soft preferences by default. Use the Allocation Rule dropdown when a license must be exclusive to a specific dimension — for example, a Marketing-funded Adobe license that should only cover Marketing users. Set it on the catalog entry as a default; override on individual licenses only where they need to differ.
- Status drives engine inclusion. Only
In Servicelicenses are counted by the engine. Expired or upgraded licenses keep their record but are excluded from the position. See License Status Codes.
When Manual Entry Is Wrong
Three scenarios where you should not use manual entry:
- Loading 20+ licenses — use Standard License Import. Manual entry at that scale is error-prone.
- A Microsoft volume statement — use the Microsoft License Statement Import so the agreement and lineage are captured.
- Adobe VIP / ETLA — use the Adobe License Import.
For everything else — one-off purchases, retail boxed software, perpetual licenses bought outside a volume agreement — manual entry is the right path.
Related Reading
- Importing Licenses — bulk alternative
- License Status Codes
- Agreements — linking to parent EA / ELA / VIP records
- Software Catalog: Per-Product Configuration