Attaching Images and Documents to Assets
Images, documents, and files of most types can be attached to asset records. Use this feature to store photographs of physical assets, specification sheets, user manuals, contracts, invoices, licence certificates, or any other supporting documentation alongside the asset record.
How Attachments Work
Files are uploaded to the xAssets application server rather than stored in the database. Once a file has been uploaded, it can be attached to one or more assets - the same file does not need to be uploaded again for a second asset.
Attachments are visible to all users who have access to the Images and Documents tab, regardless of which profile they are using.
Opening the Images and Documents Tab
- Open an asset for editing - click its description link in the Asset List (or any other grid), or use New/Last Asset on the toolbar.
- In the left-hand tab list of the asset editing dialog, click Images and Documents.
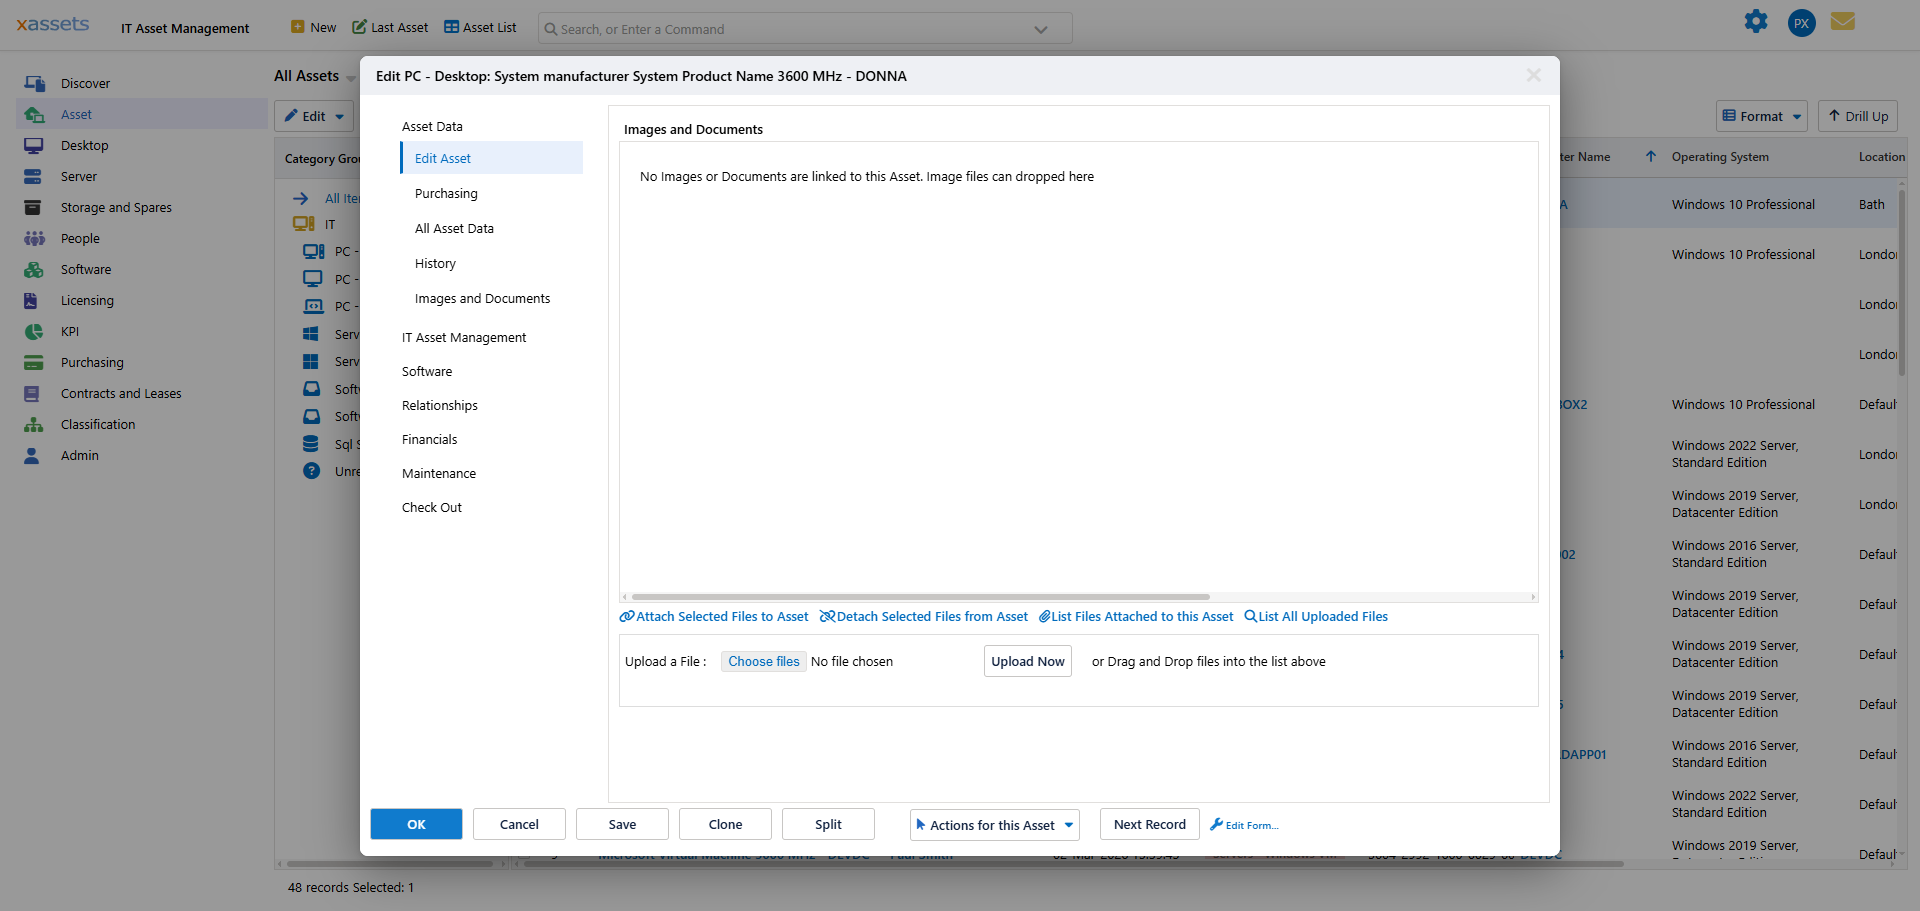
By default the tab shows Files attached to this Asset. If none are attached yet you will see "No Images or Documents are linked to this Asset" - this is the normal, correct state for an asset that has nothing attached.
Uploading and Attaching a File
Three links run along the bottom of the file list:
- List Files Attached to this Asset - shows only the files already linked to this asset (the default view).
- List All Uploaded Files - shows every file previously uploaded to the server, whether or not it is attached to this asset. Use this to re-use a file that was uploaded against a different asset.
- Attach Selected Files to Asset / Detach Selected Files from Asset - the label switches depending on which list is showing; use it to link or unlink whichever files are currently selected in the list.
To attach a new file:
- Click Choose files next to Upload a File, pick the file, then click Upload Now. You can also drag and drop files directly into the list area.
- The uploaded file appears in the list and is attached to the current asset automatically.
To attach a file that was uploaded previously (for a different asset, for example):
- Click List All Uploaded Files.
- Select the file(s) you want by ticking them in the list.
- Click Attach Selected Files to Asset.
Managing Attached Documents
| Action | How |
|---|---|
| View which files are attached | The Images and Documents tab defaults to List Files Attached to this Asset |
| Remove an attachment | Select the file in the attached-files list and click Detach Selected Files from Asset. This removes the link between the file and the asset; the file itself stays on the server and can be re-attached later or attached to another asset. |
| Share a document across assets | Upload the file once from any asset, then use List All Uploaded Files on each other asset to select and attach the same file |
Supported File Types
Most common file types are supported, including:
- Images: PNG, JPG, GIF, BMP
- Documents: PDF, DOCX, XLSX, PPTX, TXT
- Archives: ZIP, 7Z
The maximum upload file size is determined by the server configuration. Contact your administrator if you need to upload large files and encounter size limits.
Tip: Attaching a photograph of each physical asset makes it much easier to identify equipment during audits, especially for assets that look similar (e.g., identical monitors or network switches).
Warning: Documents stored on the application server are accessible to all users with Images and Documents permissions, even across different profiles. Do not attach confidential documents unless you are confident that all users with access to this tab are authorised to view them.
Related Articles
- Editing Assets - the main editing screen and its tabs
- Creating Asset Records - creating new assets to attach documents to