Performing an Audit
This page describes the scanning process for a Keywedge handheld scanner audit, from starting the scan through to completing it. It follows on from Creating a New Audit -- an audit record must already exist before it can be started.
Open the audit record (from Barcoding > Audits > Incomplete Audits, or the equivalent list for the audit's category) and click the 
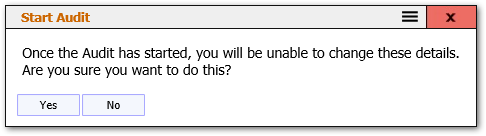
Click 
Scanning Assets
The following is an example of the scanning dialog when using a Keywedge scanner:
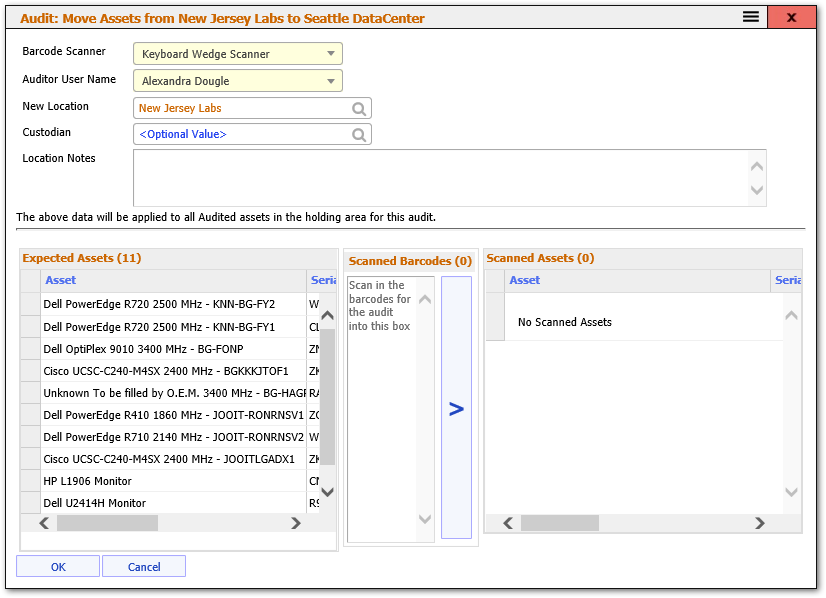
In this example, the audit type is "Asset Move" with expected assets selected by a query. The query returns all 11 assets in the "New Jersey Labs" location. The dialog title names the source and destination ("Move Assets from New Jersey Labs to Seattle DataCenter"), and the form above the asset lists includes the fields Barcode Scanner, Auditor User Name, New Location, Custodian, and Location Notes -- these come from the Asset Move audit type's form, shown here in the form editor:
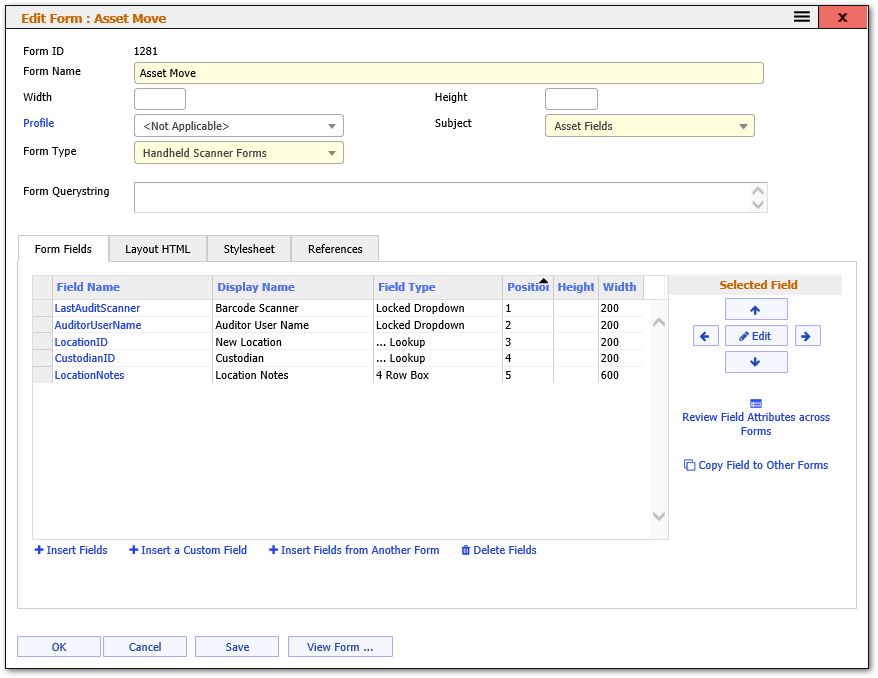
Each field's Field Type on the form controls its scanning behaviour:
- Locked Dropdown / read-only fields (such as Barcode Scanner and Auditor User Name above) show a fixed default and are applied to every scanned asset without further input.
- Lookup fields (such as New Location and Custodian) can be changed before scanning starts, using the dot lookup or by scanning a barcode for the value (for example, a location barcode).
- Optional fields left blank preserve the existing value on the asset record; mandatory fields must be filled before scanning can proceed.
When the audit uses Batched Assets grouping, this form is displayed once at the start and the values entered apply to every asset scanned in the session; once the first asset is scanned, the values are locked and cannot be edited for the rest of the audit. (Audits using Individual Assets grouping instead prompt for these values separately for each asset scanned.)
To scan assets, place the cursor in the Scanned Barcodes box and scan with the Keywedge scanner -- each barcode it reads is typed into the box automatically. As each asset barcode is recognised, that asset moves from the Expected Assets list to the Scanned Assets list. (In a blind audit, both lists are hidden so the auditor cannot see what is expected or already scanned.)
After scanning a location barcode and one asset barcode, the dialog looks like this:
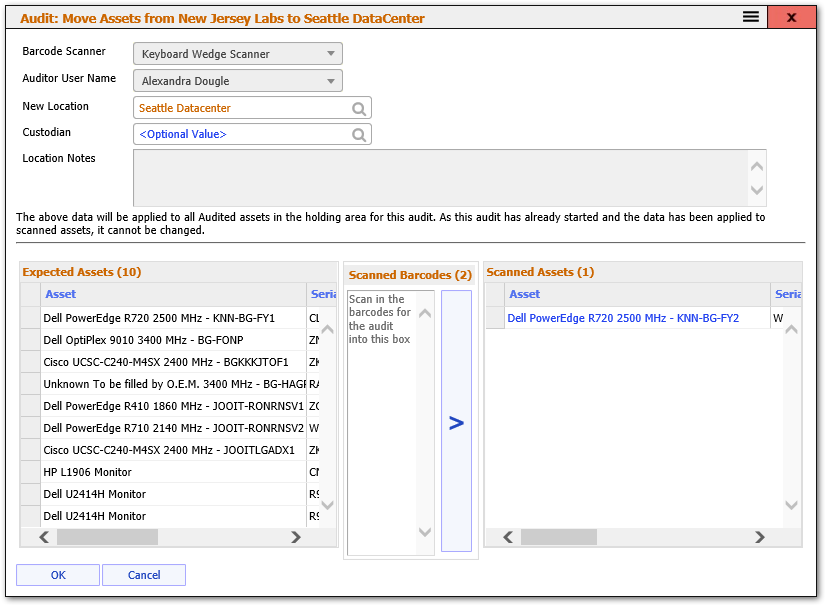
Here the New Location field has been updated to "Seattle Datacenter" by scanning a location barcode, one asset has moved into Scanned Assets, and the note above the grids confirms the form values are now locked because scanning has started.
Pausing and Resuming
You can pause scanning at any time by clicking OK to exit the dialog -- progress already scanned is kept. Resume later by opening the audit and clicking the 
Completing the Scan
When all expected assets have been scanned, click 
Related Articles
- Creating a New Audit - How to create and configure a new asset audit
- Reviewing the Results of an Audit - Analysing audit results and handling discrepancies
- Asset Audits Overview - Introduction to the asset audit process
- Barcode Scanner Types - Types of barcode scanners supported
- Using a Barcode Scanner to Search - Searching for assets using a barcode scanner