Reviewing the Results of an Audit
After scanning is complete and the audit is set to In Acceptance, the next step is to review each scanned asset and accept or reject the proposed changes. This page explains the Holding Area and the accept/reject workflow.
Scanned assets are placed in a Holding Area where you can review proposed changes before they are applied to asset records. To open the Holding Area:
- Click
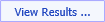
- Click on the asset count against an Incomplete Audit, or
- Navigate to Barcoding > Review Holding Area for Audits.
The screenshot above shows the Holding Area for an Asset Move audit. In this example:
- 10 assets were expected (determined by a query listing all assets in the source location).
- 9 assets were scanned and show a status of SCANNED with the exception "Location Does not Match" -- expected, since the audit is moving them to a new location.
- 1 expected asset was not scanned and shows the exception "Asset Missing or Not Scanned".
- 1 additional asset was scanned but its barcode does not match any asset record, showing "Barcode does not exist in the asset register".
- 1 asset also had a custodian change, flagged as "Custodian does not match".
Reviewing Individual Assets
- Click the Asset Description to view the original, unchanged asset record.
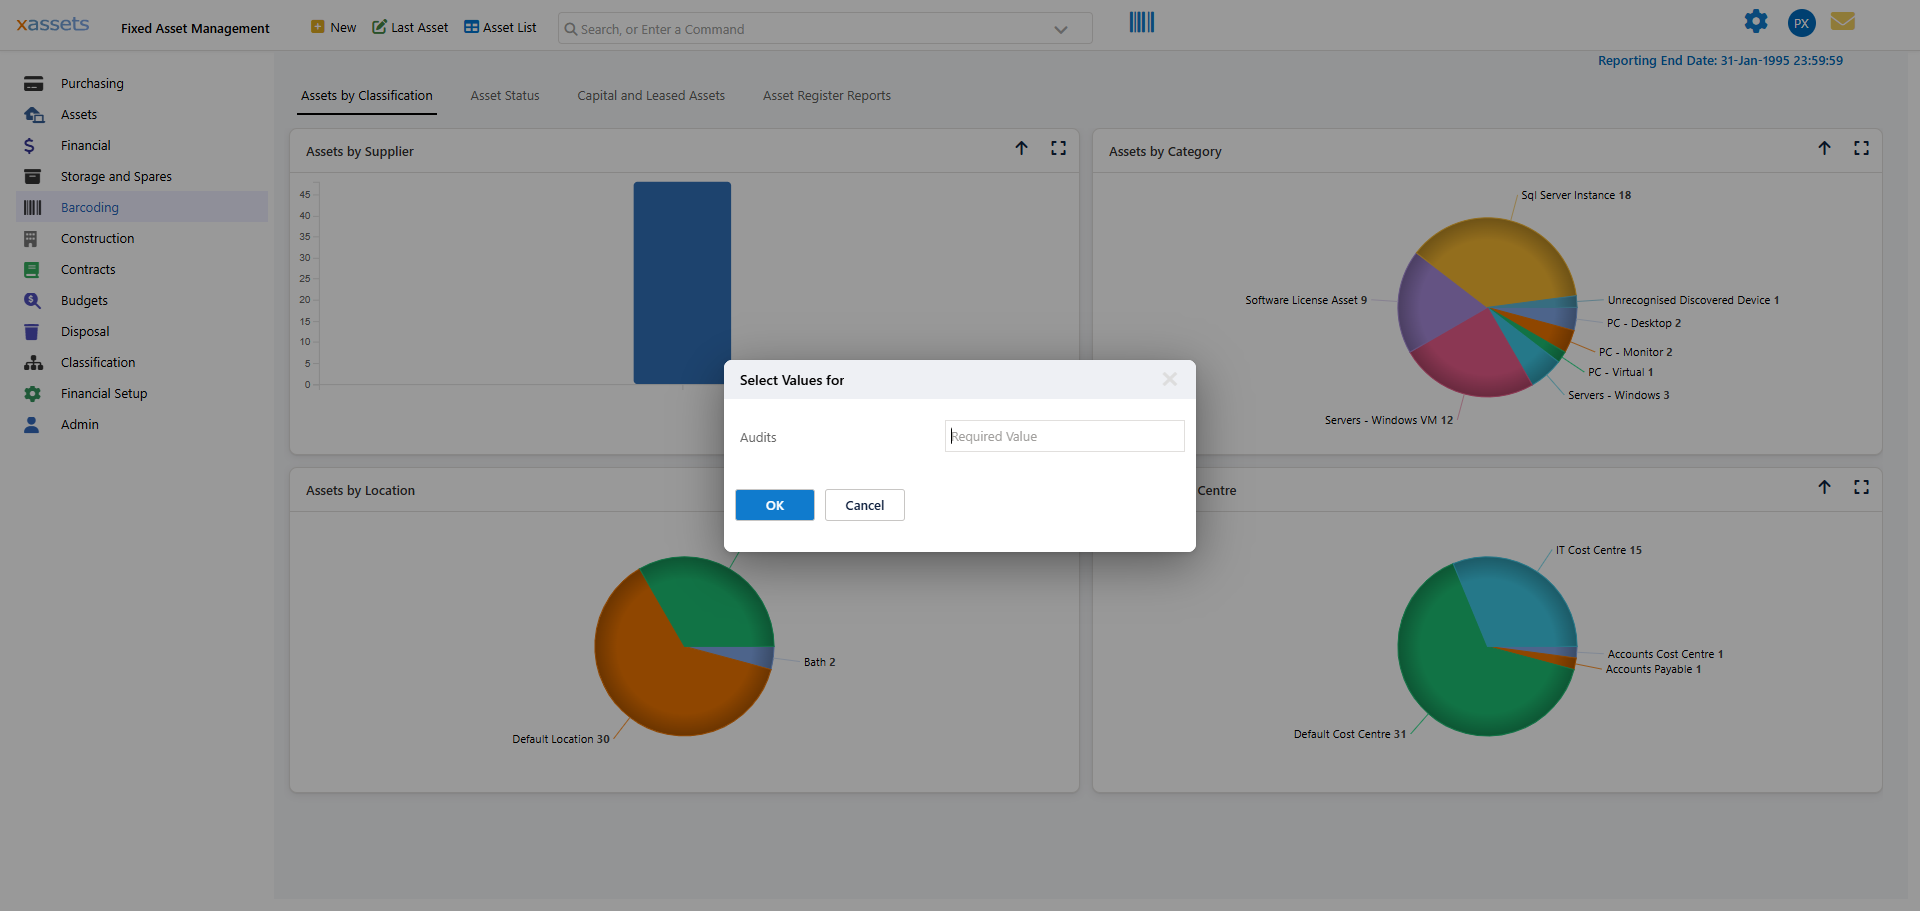
- Click the Barcode or Exception to open the audit results dialog, where you can review changes, add comments, and accept or reject:
In this dialog:
- Right panel -- shows the asset details with any proposed changes highlighted.
- Top-left menu -- lets you switch between forms to view other fields affected by the audit.
- Exceptions list (left) -- shows the exceptions for this asset. You can add or remove exceptions. Most exceptions are cumulative (use Ctrl+click to select multiple), but "Present and Correct" and "Asset Missing or Not Scanned" cannot be combined with other exceptions.
- Audit Comments -- enter a comment about the asset. If the changes are accepted, this comment is recorded in the asset's history.
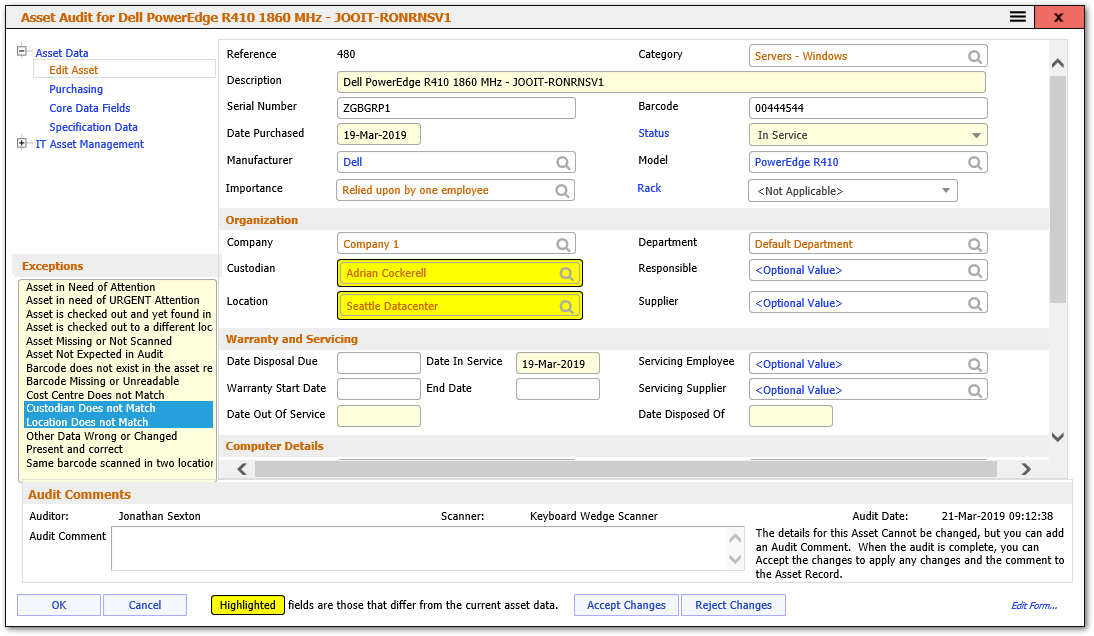
Scanned Barcode does not exist
When a scanned barcode does not match any asset's barcode or serial number in the database, the record appears as "Unknown Scanned Asset" with the exception "Barcode does not exist in the asset register".
You have two options:
- Create a new asset -- edit the field values in the dialog and accept. A new asset record will be created with those values.
- Match to an existing asset -- click
Accepting and Rejecting Changes
Once an asset’s changes have been accepted or rejected, that decision is final -- no further changes can be made to that asset in the audit.
You can accept or reject changes in three ways:
- From the asset dialog -- click
- From the Holding Area toolbar -- select one or more records and use the Accept/Reject buttons above the list.
- From the Audit Review Menu -- includes options to accept or reject all records at once.
What Happens After Acceptance
| Action | Effect |
|---|---|
| Accept | The proposed changes are applied to the asset record. |
| Accept (missing asset) | If an expected asset was not scanned and accepted as missing, its Status is set to Lost. |
| Reject | No changes are made to the asset record. |
Once every asset in the Holding Area has been accepted or rejected, the audit status is set to COMPLETE. No further changes can be made.
Related Articles
- Creating a New Audit — How to create and configure a new asset audit
- Performing an Audit — Step-by-step guide to performing a barcode audit
- Asset Audits Overview — Introduction to the asset audit process
- Asset Audit Forms — Forms used during the audit process