Adding and Removing Dashboard Items
In design mode you can add a query or a button to a dashboard, add a new container to hold them, and remove anything you do not want.
Adding an Item
Each container carries a + at the foot. Click it and the Add here panel opens.
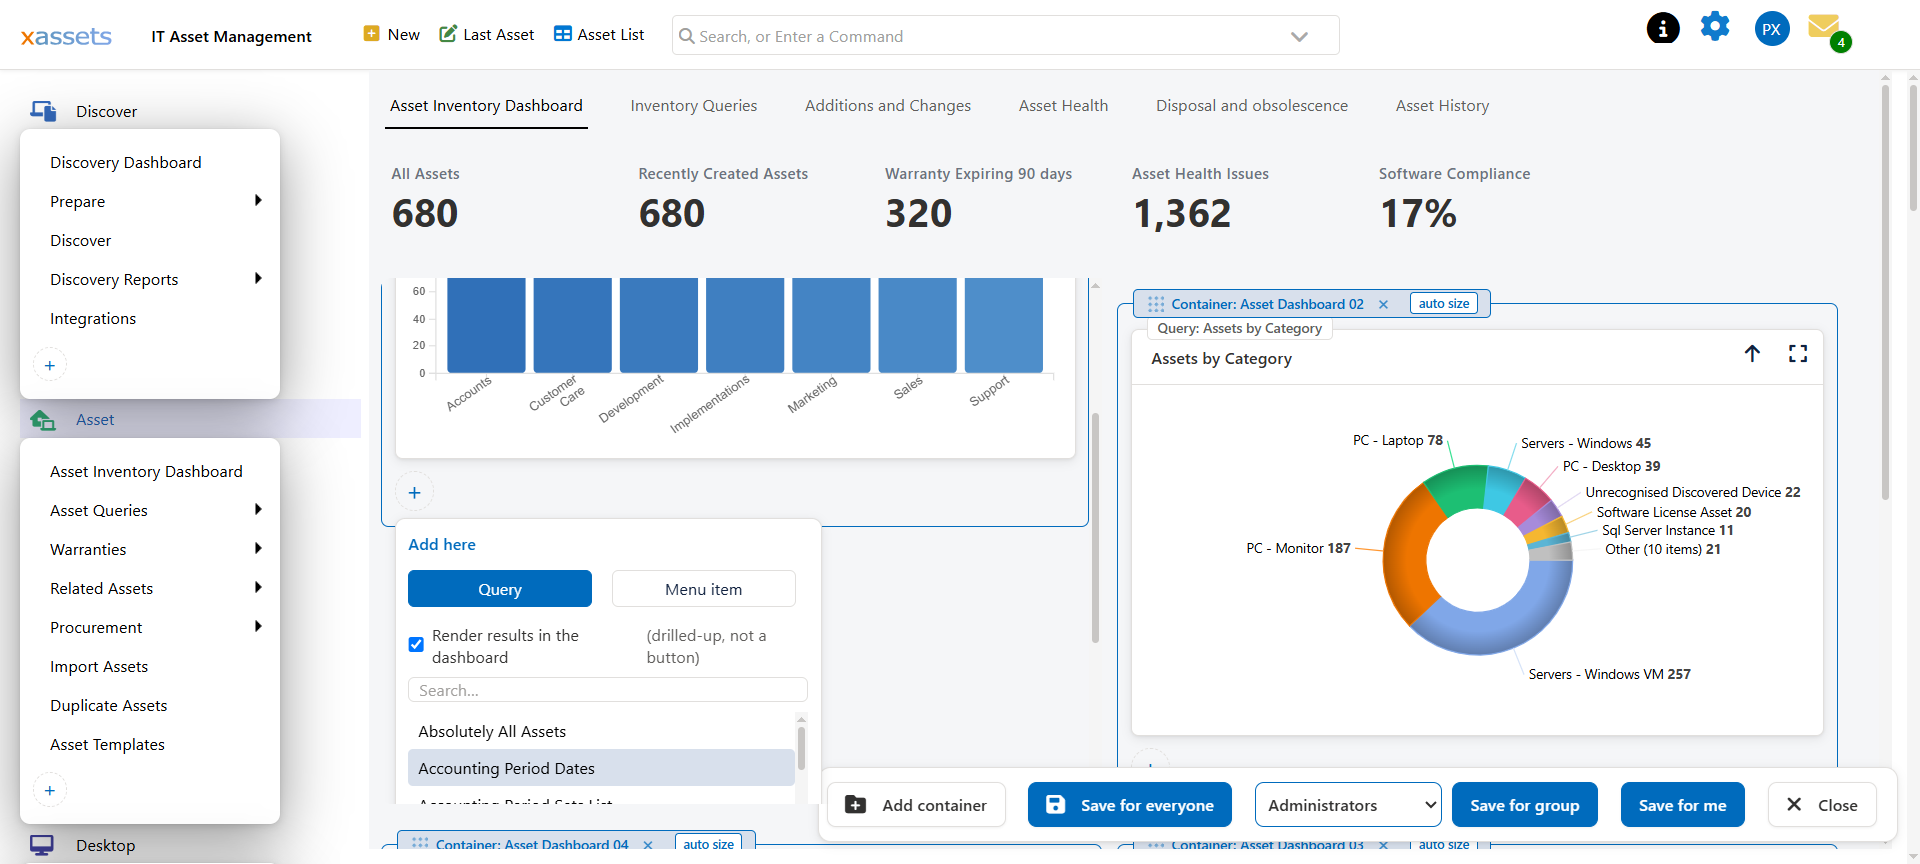
Choose what you are adding:
| Choice | Adds |
|---|---|
| Query | A saved query or chart |
| Menu item | A button that runs something |
Then find what you want. The list holds everything available, so use the search box rather than scrolling — start typing and the list narrows.
Render Results in the Dashboard
When adding a query, the Render results in the dashboard tick decides how it appears:
- Ticked — the query runs and its results are drawn on the dashboard, as a chart or table.
- Unticked — a button appears instead, and the query runs when somebody clicks it.
Ticked is what you want for the things people should see at a glance. Unticked suits queries that are occasionally useful, slow to run, or too big to read in a panel. A dashboard of twenty rendered queries is slow to load and hard to read; a few charts and a column of buttons usually works better.
Only menu items that make sense on a dashboard are offered. Buttons that depend on a selected record are excluded, because there is no record to act on.
Adding a Container
Add container on the save bar creates a new empty panel at the end of the dashboard. Drag it where you want it, then use its + to fill it.
Use a new container when you want a group of things to move and size as a unit. Everything inside a container stays together.
Removing an Item
Each label carries a red ×. Click it to take that item off the dashboard. Removing a container removes what it holds.
What removal means depends on how you save:
| Save with | Effect |
|---|---|
| Save for me | Hidden from your view only. Everyone else still sees it |
| Save for group | Hidden for that user group |
| Save for everyone | Removed from the dashboard for all users |
In every case the query or menu item itself is untouched — you are changing what this dashboard shows, not deleting anything. Anything removed can be added back with +.
Practical Notes
- Add before you tidy. Adding puts items at the end of a container; get everything on the page first, then arrange it.
- Nothing is saved until you save. Add, remove and rearrange freely, then choose a save scope, or Close to discard.
- Check the result as a normal user. A dashboard saved for everyone should be looked at outside design mode before you leave it.
Related Reading
- Design Mode — entering design mode, moving items and the save scopes
- Sizing Dashboard Elements
- Creating a Dashboard — building one from scratch
- Queries and Reports — creating the queries you add here