The Menu Editor
The Menu Editor is the central screen for creating, editing, copying, and deleting menu items of all types. Use it whenever you need to add new navigation, modify what an existing menu item does, or reorganise the menu structure.
Accessing the Menu Editor
Navigate to Admin > Menus > Menus to open the Menu Editor list screen.
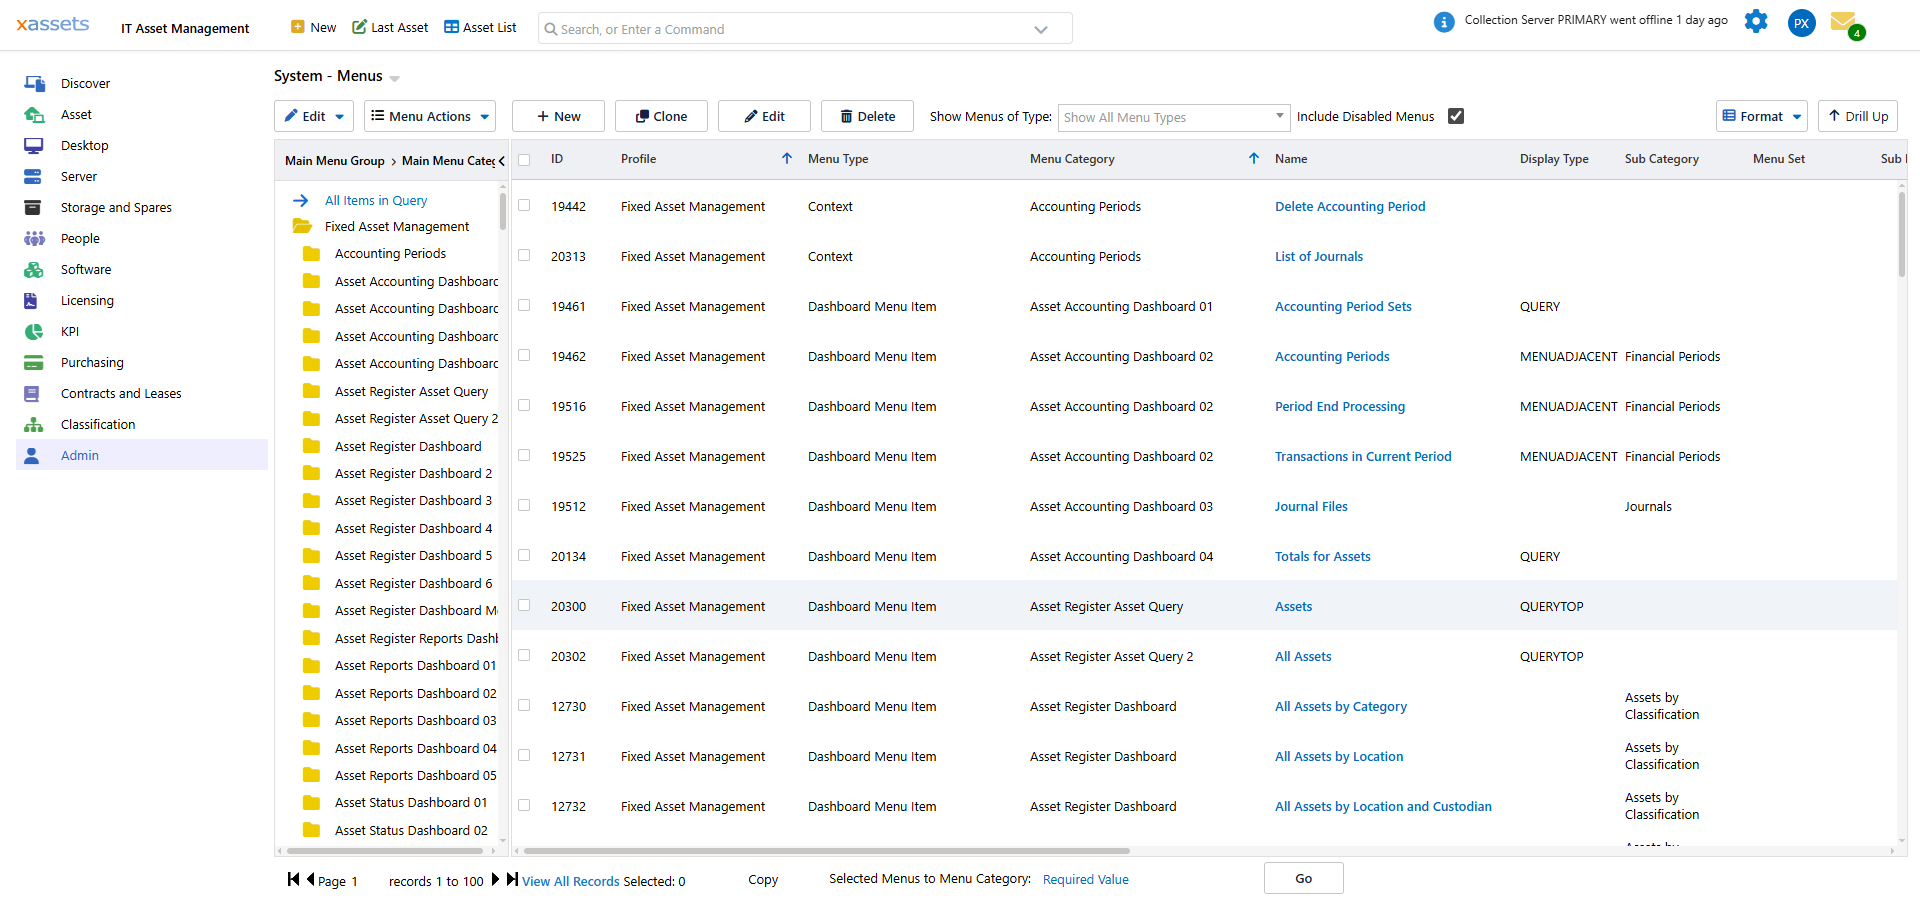
There are many ways to select the menu to edit:
- Click on a menu name in the list of menus
- select it in the query and click

- select it in the query and choose "Edit Menu Option" from the Menu Actions Menu
- click

You can also find a menu by searching for the menu by name in the search box and selecting the Configuration Items search, then clicking on its name in the search results.
Note: once a menu has been deleted it cannot be recovered but disabling a menu will prevent it from being displayed. You can disable a menu from the Menu Editor, or by selecting the menu in the query and then choose Disable Menu Options from the Menu Actions menu.
The Menu Editor is displayed when you edit a menu item.
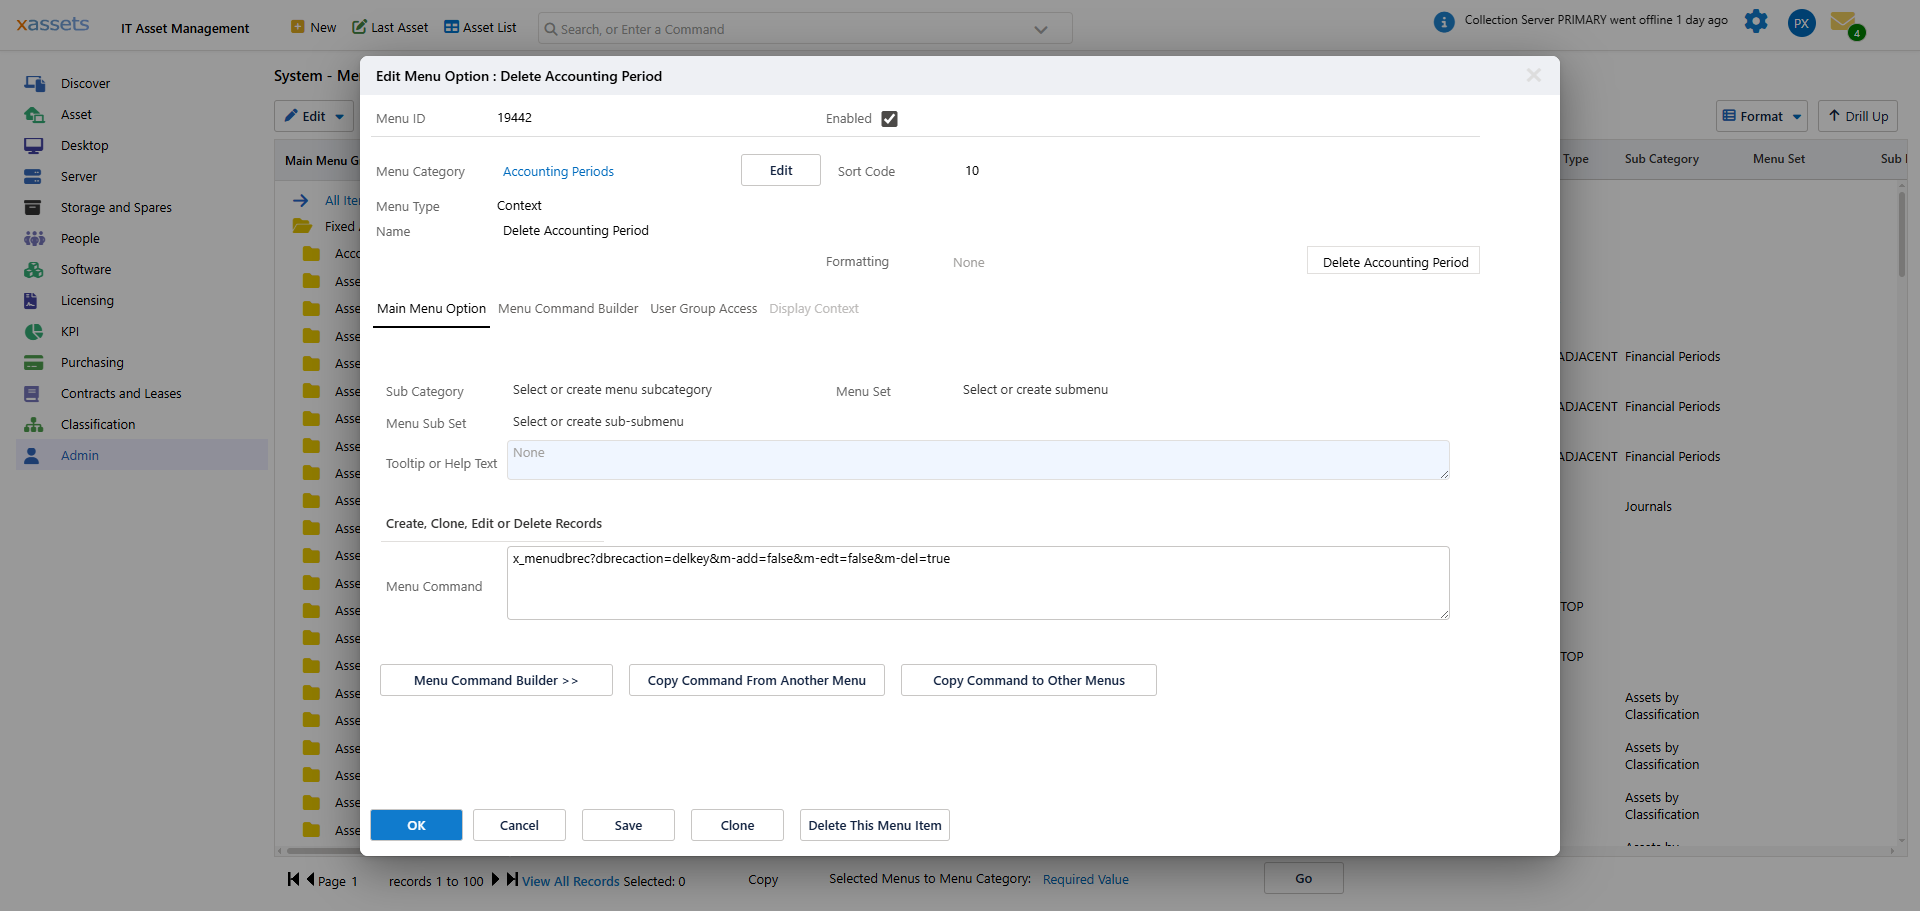
The Menu Editor fields are:
- Menu ID: A Unique number given to each menu. This is generated by the system and cannot be changed.
- Hidden: Hidden menus are available to links such as menu link columns in queries, but do not show in the menu
- Enabled: When unchecked, the menu is disabled and will not appear or be available to use from a link
- Menu Category: This is the Menu Category that the menu is contained in. This determines how and where the menu will be displayed.
- Sort Code: this is a numeric value that determines where the menu item appears in the menu with relation to other menus in the Category.
- Menu Type: This is the Type of menu as determined by the Menu Category.
- Display Type: This is only available for Dashboard Menus and determines whether the menu shows as a menu link, or a query/chart on the dashboard.
- Name: This is the name of the menu option as it will appear in the menu.
- Display Context: This is only available to menus associated with queries. The Display Context is set by a query or a menu that runs the query. With this Display context set, only menus with a matching Context will be displayed. For example, when the Contract Management Query is displayed, the Display Context is set to CONTRACT, as defined in the Query itself. The menus in the Contract Management Query Header Menu Category only display when this display context is set, and so will only display above this query:
- Category Context: This is only available to Asset Entry Left Menu, Task Entry Left Menu, Service Desk Action Menu and Asset Entry Action Menu options. Selecting one or more Category Contexts will make the menu only display when the Category of the Asset being edited matches these contexts, or in the case of Tasks, the Task Service Type Code matches these contexts.
- Sub Category: Entering a Sub Category (or selecting from the existing ones) will group this menu and others with the same Sub Category, that are next to each other in the sort order, under this Sub Category as a heading.
- Menu Set: This optional entry will group menus into a sub menu within the main menu.
- Menu Sub Set: Like Menu Set, this provides another layer of sub menus.
- Tooltip or Help Text: This will appear as a Tool tip over the menu if the user hovers their mouse over the option. For menus on dashboards that are displayed as Queries or Charts with Help Text, this text will be displayed above the Query or Chart
- Menu Command: This is the querystring that forms the menu command. It can be edited here by an Expert User, but the Command Builder offers a more user-friendly means of editing the command.
Tip: The most commonly edited fields are Name (to rename the menu item), Menu Category (to move it), Sort Code (to reorder it), and the Menu Command (to change what it does). For most changes, use the Menu Command Builder rather than editing the raw command string.
Warning: Once a menu item has been deleted, it cannot be recovered. If you want to temporarily remove a menu item, disable it instead (uncheck the Enabled checkbox). Disabled menus can be re-enabled later.
Related Articles
- Menus Overview — where menu items appear and how they work
- Menu Command Builder — guided command construction
- Menu Security — controlling access by User Group
- Parameters for Queries and Transformations — passing parameters from menus