Menu Security
Menu security controls which users can see and use each menu item. Access is managed through User Groups -- if a user's group is denied access to a menu item, that item is hidden from them entirely.
How Menu Security Works
Every menu item can be allowed or denied per User Group. The behaviour is:
- Allowed (default) -- the menu item is visible and usable for users in that group.
- Denied -- the menu item is completely hidden from users in that group. It does not appear in the menu, and users cannot access it even by typing its command directly.
- If all menu items in a category are denied for a User Group, the entire menu category (e.g., the dropdown heading in the menu bar) disappears for those users.
This means you can progressively restrict the interface by denying access to menu items that specific user groups should not see.
Setting Menu Access from the Menu Editor
- Open the menu item in the Menu Editor.
- Click the User Group Access tab.
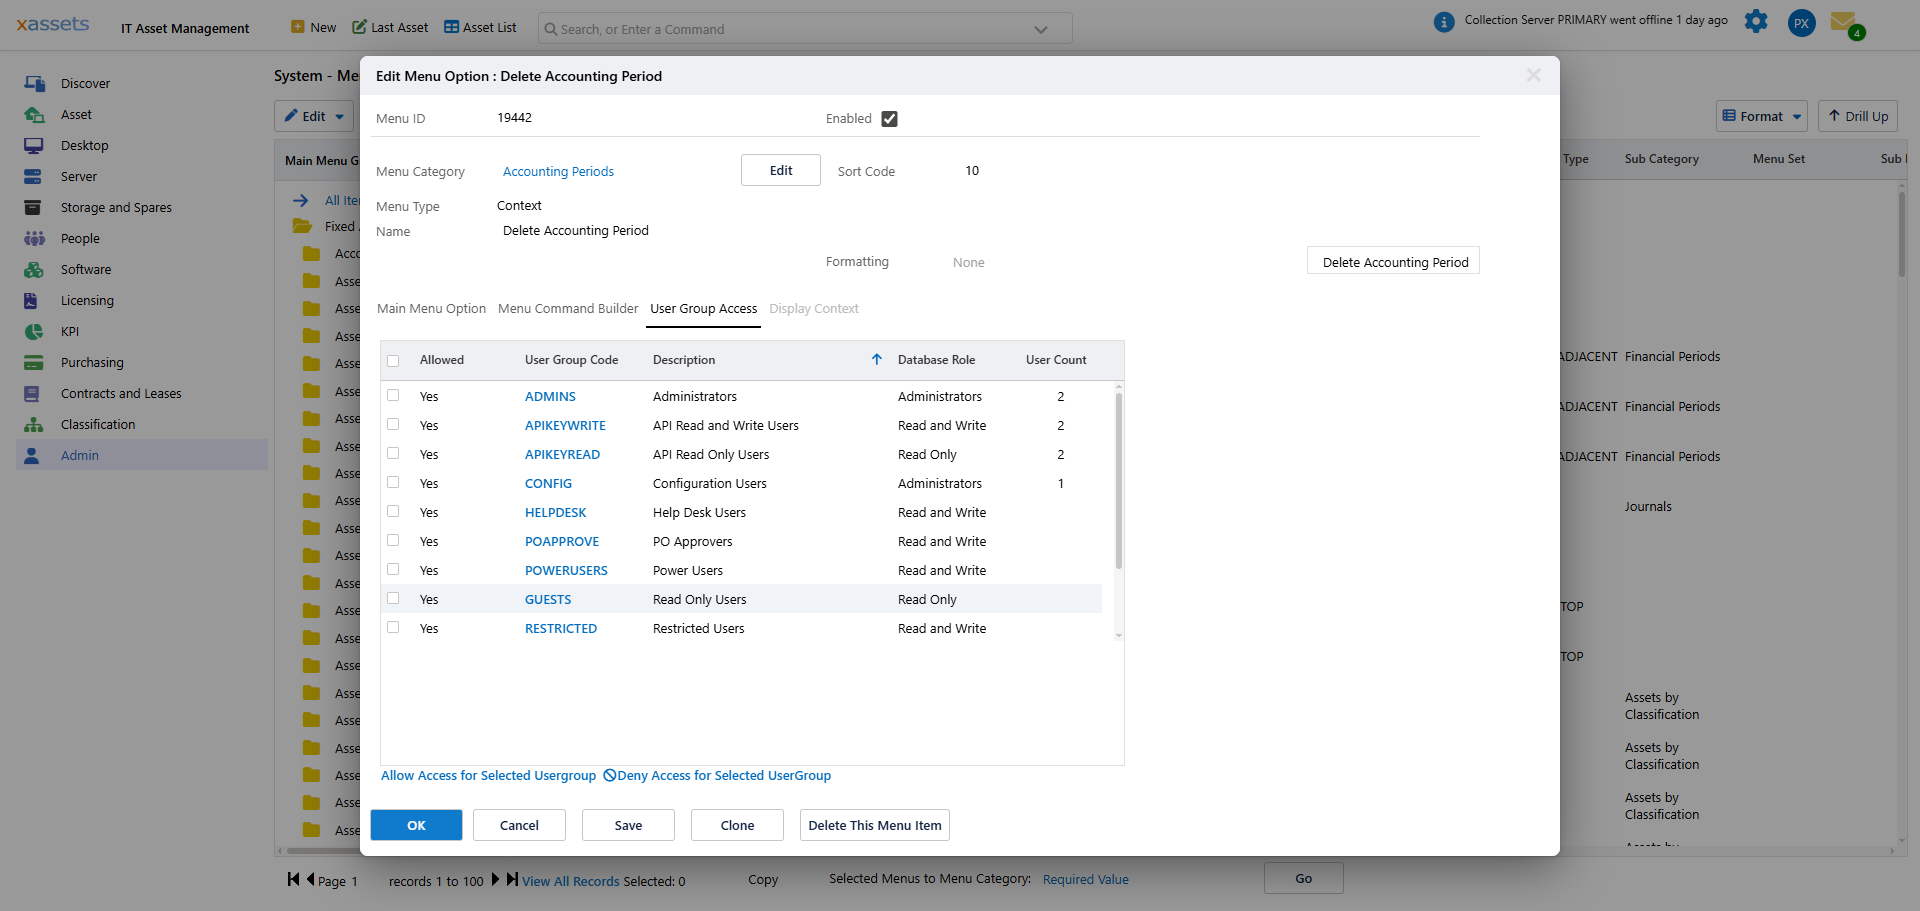
- Select a User Group from the list.
- Click the Allow or Deny link to set the access level for that group.
- Repeat for each User Group that needs a different access level.
- Click Save.
Setting Menu Access from the User Group Editor
You can also manage menu access from the other direction -- starting from the User Group:
- Navigate to Admin > User Groups and open the User Group you want to configure.
- Click the Menu Access tab.
- Browse or search for the menu items you want to allow or deny.
- Set the access level for each menu item.
This approach is useful when you want to review or configure all menu access for a single User Group at once.
Tips and Warnings
Tip: When setting up a new User Group, start by allowing all menus (the default) and then selectively deny the ones that group should not access. This is faster and less error-prone than building up from zero.
Tip: Use menu security in combination with Table Permissions for comprehensive access control. Menu security hides the navigation; table permissions control the underlying data access.
Warning: Denying a menu item only hides it from the user interface. For complete security, ensure the User Group's table permissions also restrict access to the underlying data. Menu security and table permissions work best when used together.
Warning: If you deny all menu items in a category for all non-admin User Groups, check that at least one admin group still has access. Otherwise, the menu category becomes inaccessible and can only be restored through direct database access or by another Configuration User.
Related Articles
- The Menu Editor — editing menu items and their properties
- User Groups — creating and managing User Groups
- Table Permissions — controlling data-level access by User Group
- Menu Access — the User Group side of menu security