Running Discovery
This page explains how to launch a discovery scan, monitor its progress, and review the results. Discovery can target a specific location, a single computer, or an entire IP range.
Prerequisites
- Locations and IP ranges must be configured (see Preparing for Discovery)
- The xAssets Discovery Service must be running on the Collection Server
- You need an account with administrative access to the target machines, either through the service account or a Credential Pack
Discovering by Location
- From the Standard Menu, select Discover > Discover a Location
- In the location tree, select one or more locations and click OK
Tip: You can also discover and schedule locations directly from the Data Mapping -- IP Range to Location Mapping screen.

- A confirmation dialog appears before scanning begins. Click OK to proceed
- The screen refreshes to show recently running jobs

Discovering a Computer or IP Range
- From the Standard Menu, select Discover > Discover This Computer or Another Computer
- Enter the IP address of a single computer, or use wildcards and ranges:
10.55.238.*-- scans the entire subnet10.55.238.33-10.55.238.63-- scans a portion of a subnet

- Select the applicable Credential Pack from the Credentials drop-down, or leave at default to use the Discovery Service account
- Click OK to start the scan
Warning: Discovery requires that the xAssets Discovery Service is running and that the service account (or the credentials you select) has administrative access to the target machines. If discovery returns no results, check the service status and credential permissions first.
Monitoring Discovery Progress
From the Web Interface
To view progress while discovery is running, navigate to Settings > Recent and Running Batch Jobs:

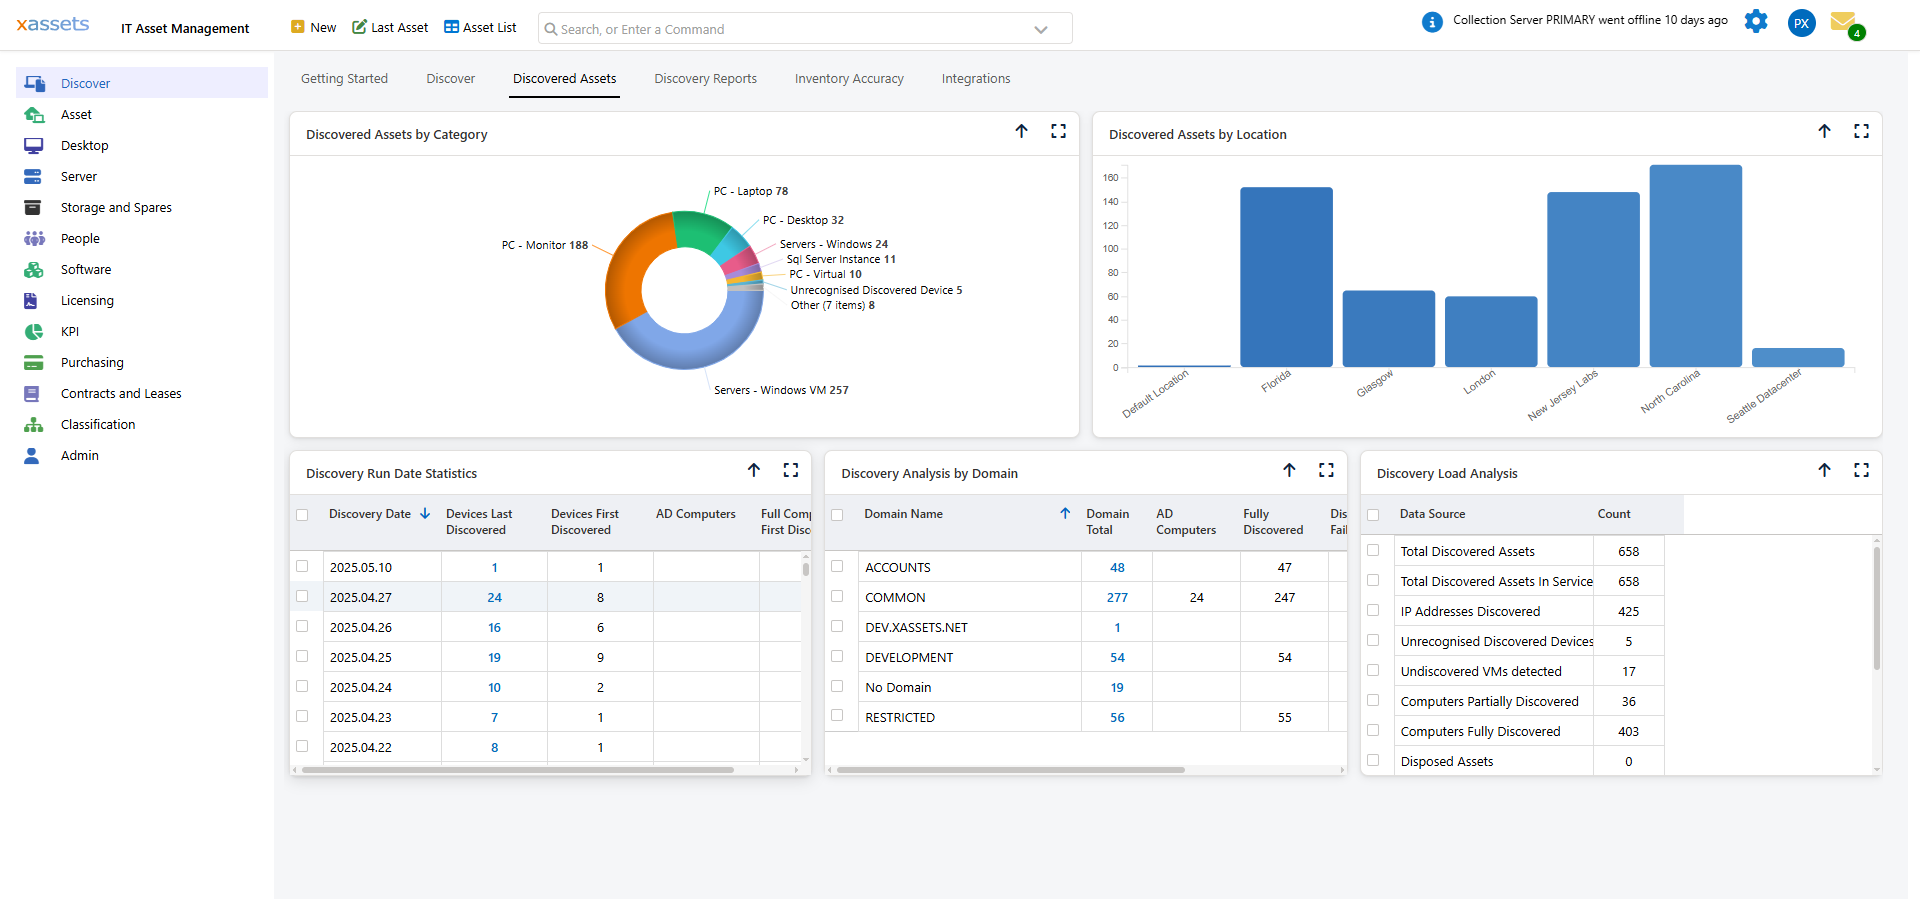
From the Discovery Dashboard
For summary information with drill-down capability, navigate to Discover > Discovery Dashboard > Discovered Assets and review the Discovery Run Date Statistics query:


Discovery Reports
Navigate to Discover > Discovery Dashboard > Discovery Reports to see a dashboard displaying recently discovered assets, discovery trends, and any errors encountered during the scan.
What Happens After Discovery
Once a discovery script finishes scanning, the collected data is written to files on the Collection Server (PCA, PCZ, PCV, and PCS files). This data is then loaded into the xAssets database either:
- Automatically -- the data loader runs after each discovery by default
- Manually -- using Discover > Load Now (see Loading Discovery Data)
Tips
- Start with a small scope (a single subnet) to verify that discovery is working before expanding
- If you have many subnets, schedule them to run at staggered times to reduce network load
- Check the Discovery Dashboard after each run to confirm assets were discovered and loaded
Related Articles
- Preparing for Discovery — setting up locations and IP ranges
- Loading Discovery Data — importing results into the database
- Analysing Discovery Problems — troubleshooting failed scans
- Scheduling Discovery Scripts — automating regular scans
- Credential Packs — managing authentication for discovery