Editing a User Group
This page describes the User Group Editor dialog and explains each field. Use this dialog to create new user groups or modify existing ones.
Opening the User Group Editor
To edit a user group:
- Navigate to Admin > Users > User Groups.
- Click the user group name in the list to open the editor.
User Group Editor Fields
| Field | Description |
|---|---|
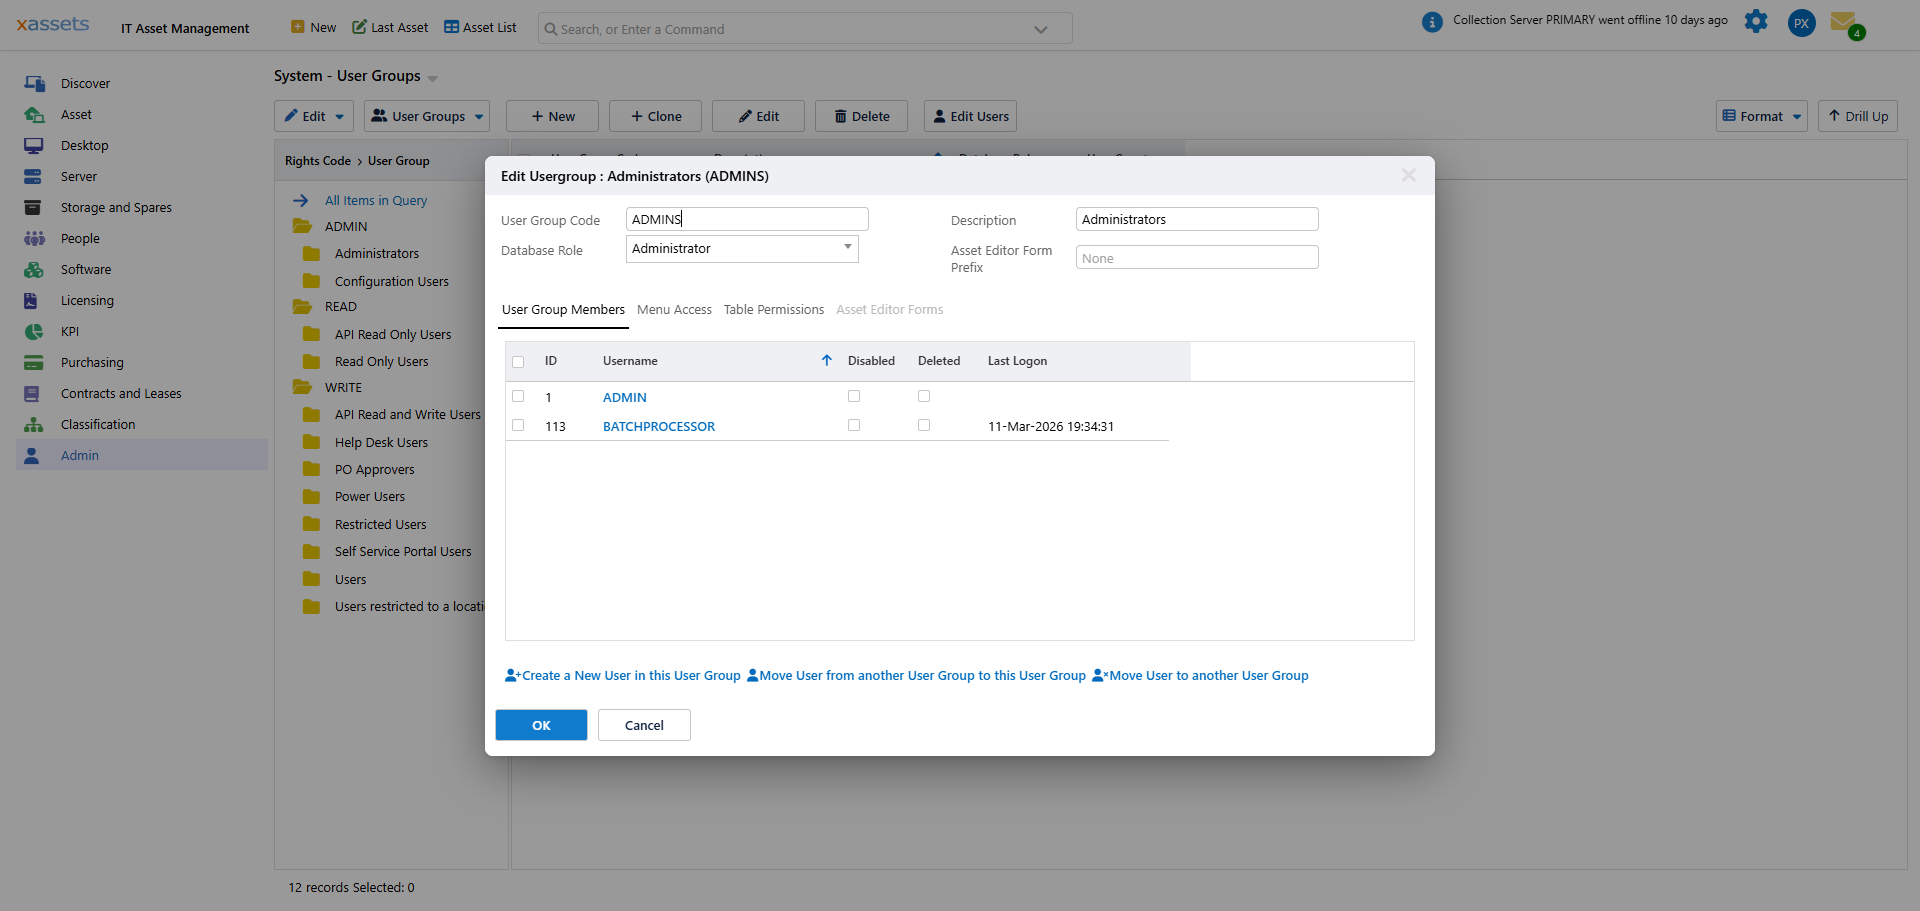
| User Group Code | A short unique code that identifies the user group (e.g., "ADMIN", "READONLY", "ITUSER"). This code is used internally and cannot be changed after creation. |
| Description | The display name for the user group (e.g., "IT Asset Managers"). This is what users and administrators see in lists and dropdowns. |
| Database Role | The baseline database access level. Choose from Administrator (unrestricted), Read and Write (can view and modify records within group restrictions), or Read Only (can only view data). See User Groups for details on each role. |
| Asset Editor Form Prefix | An optional prefix that enables this user group to use customised asset editor forms. When set, the system looks for forms named with this prefix (e.g., prefix "RO" would match a form named "RO Asset IT") and uses those forms instead of the standard ones. See Asset Editor Forms for details. |
Warning: Do not change the Asset Editor Form Prefix if forms already exist with the current prefix. Changing the prefix will break the link between the user group and its customised forms, and those forms will stop displaying for users in this group.
User Group Members Tab
The User Group Members tab shows all users currently assigned to this group. From this tab you can:
- Move users into this group from another group by selecting them from a list of available users.
- Move users out of this group to another group.
- Create a new user directly within this group.
Warning: When moving users into or out of the Configuration or Administrator user groups, the system displays a warning because these groups have elevated permissions. Confirm that you intend to grant or revoke administrative access before proceeding.
Editing Steps
To modify an existing user group:
- Navigate to Admin > Users > User Groups.
- Click the group name to open the editor.
- Modify the Description or Database Role as needed.
- Switch to the User Group Members tab to add or remove users.
- Switch to the Menu Access tab to configure which menus this group can see.
- Switch to the Table Permissions tab to configure table-level access and record filters.
- Save the user group.
Tip: After changing a user group's database role or permissions, existing users in that group may need to log out and log back in for the changes to take full effect. You can use the Log off selected users option from the Users Menu to force this.
Related Articles
- User Groups — overview of the user group system
- Menu Access — controlling which menus the group can see
- Table Permissions — controlling record-level access
- Asset Editor Forms — customising forms per group
- Users — assigning individual users to groups